
Cold Cheese Cake
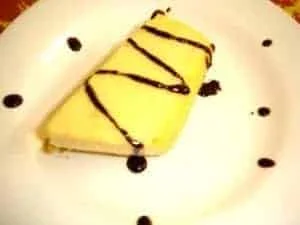
This is a chilled cheesecake with a buttery Digestive biscuit base and a smooth, lightly lemony cream cheese filling. It is a no-bake option when you want a set-ahead dessert rather than one that needs baking.
Ingredients
- 250 gDigestive biscuits, crumbled
- 100 gButter, melted
- 1 cup (200 g)Cream cheese
- 1 tinCondensed milk
- 1 tin (170 g)Cream
- 1 tspVanilla powder
- 1 tbspLemon juice
- 10 g (1 tbsp), dissolved in 120 ml hot waterGelatine powder
- To tasteChocolate sauce, for serving
Instructions
- 1
Make the base
Combine the crumbled biscuits with the melted butter. Press the mixture into the bottom of a loose-bottomed cake tin, then chill for 10 minutes.
- 2
Blend the filling
Using a food processor, beat the cream cheese, condensed milk, cream, vanilla powder and lemon juice until smooth.
- 3
Add the gelatine
Stir the dissolved, melted gelatine into the cream cheese mixture, then spoon the filling over the biscuit base.
- 4
Chill and serve
Refrigerate for 2–3 hours, until completely set. Serve with chocolate sauce.
What is cold cheesecake?
Cold cheesecake is a chilled dessert made with a crumb base and a soft cream cheese filling that sets in the refrigerator instead of baking. Cheesecake has a long history across different food traditions, so this style is best understood by its method rather than a single origin.
This version uses condensed milk for sweetness and gelatine to help the filling set. Lemon juice cuts through the richness, while the biscuit-and-butter base gives each slice a firm, crumbly contrast.
Nutrition and macros by portion
The nutrition label shows one serving as written: 890 calories, 12g protein, 81g carbs, 59g fat.
| Portion | Adjustment | kcal | Protein | Carbs | Fat |
|---|---|---|---|---|---|
| Lighter | Smaller slice, less sauce | 623 kcal | 8g | 57g | 41g |
| This serving | As written | 890 kcal | 12g | 81g | 59g |
| Hungry | Larger slice | 1335 kcal | 18g | 122g | 89g |
The biscuits and condensed milk provide most of the carbohydrates, while the butter, cream cheese and cream contribute much of the fat. Cream cheese, dairy and gelatine provide some protein, though the exact amounts depend on the brands and the size of the condensed milk tin. Balance a slice with fresh fruit, or serve a smaller slice after a lighter main meal.
The biscuit base
Crumbs and butter: mix them thoroughly so the biscuit is evenly coated and can hold together when pressed into the tin.
Firm packing: press the mixture into an even layer across the bottom. Chilling it for the stated 10 minutes helps it stay in place when you add the filling.
Getting a smooth filling
Cream cheese: blending it with the condensed milk, cream, vanilla and lemon juice makes a uniform filling. Scrape down the sides of the food processor if any mixture is left clinging there.
Gelatine: stir the dissolved gelatine into the filling so it is distributed throughout. Add it while melted, as directed, rather than leaving it to cool and thicken first.
How to tell it is set
Chilling time: allow 2–3 hours in the fridge, as the recipe specifies. The centre should be completely set before you try to serve it.
Clean slices: cut with a clean knife and wipe the blade between portions if you want neater edges. Keep the cake chilled between servings.
Choosing the tin
Loose bottom: the method calls for a loose-bottomed cake tin, which makes the chilled cake easier to release. Press the base evenly into the bottom rather than pushing it high up the sides.
Serving: chocolate sauce is suggested for serving, but it is added at the table rather than mixed into the filling. A small drizzle lets the lemon and vanilla flavours remain noticeable.
What to serve alongside
Fresh fruit: berries or sliced fruit add a fresh contrast to the sweet, creamy filling. Serve them alongside rather than adding extra moisture to the cake.
A small portion: this is a rich dessert, so a modest slice with tea or coffee can be enough to finish a meal.
Recipe notes & tips
- Chill the biscuit base for the full 10 minutes before adding the filling.
- Blend the filling until no streaks of cream cheese remain.
- Dissolve the gelatine fully in the hot water before stirring it into the filling.
- Chill the cake until the centre is set before releasing it from the tin.
- Add chocolate sauce just before serving so it does not run across the chilled surface.
Variations
- Berry topping: serve with fresh berries for a fruity contrast.
- Citrus note: add a little finely grated lemon zest to the filling.
- Chocolate finish: dust each slice with cocoa powder instead of using sauce.
- Biscuit swap: use another plain sweet biscuit in place of the Digestives.
- Fruit sauce: serve with a smooth fruit sauce instead of chocolate sauce.
Common mistakes to avoid
- Loose base: press the crumbs firmly and evenly so the base holds together when served.
- Lumpy filling: blend the cream cheese mixture until smooth before adding the gelatine.
- Uneven gelatine: stir it into the filling thoroughly so it is spread throughout.
- Rushing the chill: wait until the centre is completely set before slicing.
- Removing it too soon: release the cake carefully from the loose-bottomed tin once chilled.
How to store
Cover and keep the cheesecake refrigerated, and aim to eat it within 3 days. Serve it cold; reheating is not suitable for this chilled dessert.
Frequently asked questions
Can I make this cheesecake ahead?
Yes. It needs 2–3 hours in the fridge to set, so you can prepare it ahead and keep it chilled until serving.
How do I know when it is set?
The recipe calls for it to be completely set after 2–3 hours. Check that the centre is no longer loose before slicing.
Can I leave out the gelatine?
Gelatine is the setting ingredient in this recipe. Leaving it out would change the texture, and the method does not give an alternative setting agent.
What does a loose-bottomed tin do?
It lets you release the chilled cake more easily without turning it out. Press the biscuit mixture into the bottom as directed.
Can I use a different topping?
Yes. The recipe suggests chocolate sauce, but fresh berries or fruit sauce also work as serving options.
Cook it from the original
This recipe comes from mariasmenu.com. Their page has the author’s own photos, notes and tips — the best place to cook it from.
Open the recipe on mariasmenu.com