
Chilli Beef
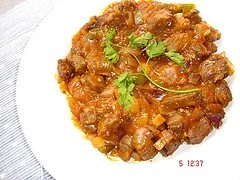
This Indo-Chinese chilli beef pairs tender beef with a savoury, spicy gravy made from soya, chilli and tomato sauces. It is a satisfying option for a rice-based meal, with the heat easy to adjust to your taste.
Ingredients
- 500 g (1/2 kg)beef
- 45 ml (3 tbsp)soya sauce
- 15 ml (1 tbsp)chilli sauce
- 15 ml (1 tbsp)tomato sauce
- 5 ml (1 tsp)ground black pepper
- 7.5 ml (1/2 tbsp)finely chopped ginger and garlic
- 2green chillies, chopped
- 2 mediumonions, cut into cubes
- 240 ml (1 cup)beef stock
- 2.5 ml (1/2 tsp)cornflour
- to tastesalt
- as neededoil
- to tastespring onion or parsley leaves, for garnish
Instructions
- 1
Cook the beef
Cook the beef with salt until tender, then set it aside and keep the cooking stock.
- 2
Sauté the aromatics
Heat oil in a pan. Add the ginger, garlic, onion and green chilli, and sauté for 5 minutes.
- 3
Add the beef
Add the cooked beef to the pan and stir well.
- 4
Stir in sauces
Add the soya, chilli and tomato sauces, mix well and sauté for 5 minutes.
- 5
Thicken the stock
Mix the cornflour into the beef stock, then pour it into the pan with the beef.
- 6
Cook the gravy
Stir for 2 minutes.
- 7
Check the thickness
Once the gravy has thickened, take the pan off the heat.
- 8
Garnish and serve
Finish with spring onion or parsley leaves.
What is chilli beef?
Chilli beef is a popular Indo-Chinese style dish, combining Chinese-inspired stir-frying and sauces with flavours that are familiar in South Asian cooking. This version serves the beef in a thick, savoury gravy rather than as a dry stir-fry.
The mix of soya, chilli and tomato sauces gives the gravy its salty, spicy and slightly sweet character. Beef stock carries those flavours around the meat.
Nutrition and macros by portion
The nutrition label shows one serving as written: 520 calories, 44g protein, 15g carbs, 32g fat.
| Portion | Adjustment | kcal | Protein | Carbs | Fat |
|---|---|---|---|---|---|
| Lighter | More vegetables, less beef | 364 kcal | 31g | 11g | 22g |
| This serving | As written | 520 kcal | 44g | 15g | 32g |
| Hungry | Serve with extra rice | 780 kcal | 66g | 23g | 48g |
Beef supplies most of the protein and fat, while the onions and sauces contribute much of the carbohydrates and sugars. Serve it with a moderate portion of rice and add vegetables to round out the plate.
The beef and its stock
Beef: Cook it until tender before adding it to the pan, as the later sauté is brief and mainly brings the flavours together.
Stock: Keep the liquid from cooking the beef for the gravy. The recipe calls for a cup; if you have less, make up the difference with additional beef stock.
Building the flavour
Aromatics: Sauté the ginger, garlic, onion and green chilli for the full 5 minutes so their flavours soften and spread through the oil.
Sauces: Stir all three sauces through the beef and cook for another 5 minutes. Taste before adding extra salt, since soya sauce and stock can already be salty.
Getting a smooth gravy
Cornflour: Mix it thoroughly into the cold or cooled stock before adding it to the pan; this helps prevent lumps.
Thickness: Stir for 2 minutes, then check the gravy. It should cling to the beef; take the pan off the heat once it has thickened.
Adjusting the heat
Green chillies: The recipe uses two, but their heat can vary. Remove the seeds for a gentler result, or use fewer chillies if you prefer mild food.
Chilli sauce: Its heat and sweetness also vary by brand, so taste the finished gravy before adding any extra.
Serving the dish
Rice: Serve the beef and gravy with steamed rice to soak up the sauce.
Fresh finish: Add spring onion or parsley just before serving for a fresh contrast. A simple vegetable side works well alongside the rich gravy.
Recipe notes & tips
- Cut the onions into similarly sized pieces so they cook evenly.
- Keep the cooked beef covered while preparing the aromatics to help it stay moist.
- Stir the cornflour into the stock until no dry clumps remain.
- Taste the gravy before seasoning further, as the sauces may be salty.
- Garnish just before serving so the herbs stay fresh.
Variations
- Milder chilli: Use one green chilli and a less fiery chilli sauce.
- Extra vegetables: Add sliced peppers with the onions and sauté them until just tender.
- More ginger: Increase the chopped ginger for a brighter, warmer flavour.
- Parsley finish: Use parsley instead of spring onion for a fresh herbal garnish.
- Thicker gravy: Mix a little more cornflour with stock before adding it, then cook until the sauce thickens.
Common mistakes to avoid
- Adding raw beef at the end: The recipe expects cooked beef; cook it until tender first and reserve its stock.
- Lumpy cornflour: Stir it into the stock before it reaches the pan.
- Overcooking the aromatics: Sauté them for 5 minutes, keeping the heat moderate so they do not burn.
- Adding salt too early: Check the finished gravy first because soya sauce and stock can add plenty.
- Leaving the gravy unattended: Stir as it thickens so it does not catch on the bottom of the pan.
How to store
Cool leftovers promptly and keep them in a covered container in the fridge for up to 3 days. Reheat in a pan until steaming hot throughout, adding a splash of water or stock if the gravy has thickened too much.
Frequently asked questions
Can I make this with beef that is already cooked?
Yes. Add cooked, tender beef at the stage specified, then follow the sauce and gravy steps. Use beef stock for the liquid if you do not have reserved cooking stock.
How can I make the gravy less spicy?
Use fewer green chillies and choose a milder chilli sauce. You can also remove the chilli seeds before chopping.
What can I serve with chilli beef?
Steamed rice is a straightforward match for the gravy. You can also serve it with noodles or vegetables.
How do I stop the cornflour forming lumps?
Mix it fully into the stock before pouring the mixture into the pan. Stir the gravy as it heats and thickens.
Can I prepare it ahead?
You can cook the beef in advance and keep it chilled with its stock. Finish the dish with the aromatics and sauces shortly before serving.
Cook it from the original
This recipe comes from mariasmenu.com. Their page has the author’s own photos, notes and tips — the best place to cook it from.
Open the recipe on mariasmenu.com