
Crispy Sesame Chicken (without Deep Frying)
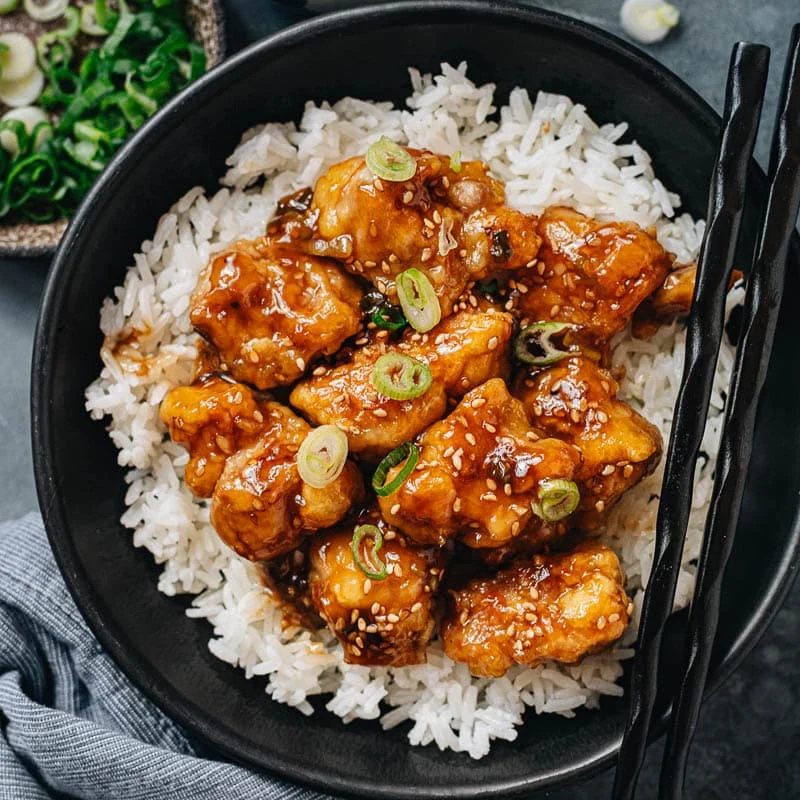
This Chinese-inspired sesame chicken gets a crisp, chewy coating from a pan rather than a deep fryer, then is tossed in a savoury, tangy sauce. It is a quick way to make a takeaway-style main at home and serve it hot over steamed rice.
Ingredients
- 450 g (1 lb), cut into 1.5 cm (1-inch) pieceschicken thighs or breast
- ½ teaspoonsalt
- 1 tablespoonpeanut oil or vegetable oil
- 1egg, beaten
- about 64 g (½ cup)cornflour
- 120 ml (½ cup)chicken stock
- 2 tablespoonsShaoxing wine
- 2 tablespoonssoy sauce
- 2 tablespoonsChinkiang vinegar
- about 50 g (4 tablespoons)sugar
- 2 teaspoonssesame oil
- 1 tablespooncornflour
- 1 tablespoontoasted sesame seeds
- 60 ml (¼ cup)peanut oil or vegetable oil
- 2 cloves, mincedgarlic
- 2, sliced; reserve some for garnishspring onions
Instructions
- 1
Salt the chicken
Put the chicken pieces in a large bowl with the salt and mix well. Leave to marinate for 10–15 minutes while you prepare the other ingredients.
- 2
Mix the sauce
Combine the chicken stock, Shaoxing wine, soy sauce, Chinkiang vinegar, sugar, sesame oil, 1 tablespoon of cornflour and sesame seeds in a medium bowl.
- 3
Coat the chicken
When ready to cook, add the oil and beaten egg to the chicken and stir to combine. Add the ½ cup of cornflour and mix until the pieces are coated, with an uneven layer and only a little loose dry cornflour remaining.
- 4
Sear the pieces
Heat the ¼ cup of oil in a large non-stick frying pan over a medium-high heat until hot. Add the chicken with as little overlap as possible, separating the pieces with tongs or chopsticks so they sear evenly.
- 5
Brown both sides
Cook without moving the chicken for 2–3 minutes, until the underside is golden. Turn and brown the other side for 2–3 minutes, then transfer the chicken to a large plate and take the pan off the heat. Leave the chicken to cool for 2–3 minutes to help it become crispier.
- 6
Fry the aromatics
If needed, use several layers of kitchen paper held with tongs to wipe excess oil from the pan, leaving about 1 tablespoon behind. Add the garlic and spring onion and stir-fry for a few seconds, until fragrant.
- 7
Thicken and serve
Stir the sauce again to dissolve the cornflour, then pour it into the pan and stir straight away. Once bubbling and thickened, return the chicken to the pan, turn off the heat and toss quickly to coat. Transfer to a plate and serve hot over steamed rice.
What is sesame chicken?
Sesame chicken is a Chinese-inspired dish often found on takeaway menus, pairing bite-sized chicken with a glossy, sweet-savoury sauce. This version uses a hot pan instead of deep-frying, while the egg and cornflour coating gives the chicken a crisp-edged, chewy texture.
The sauce brings together soy sauce, vinegar, wine, garlic and sesame. The method works by browning the coated chicken first, then adding it back only once the sauce has thickened.
Nutrition and macros by portion
The nutrition label shows one serving as written: 316 calories, 8g protein, 26g carbs, 20g fat.
| Portion | Adjustment | kcal | Protein | Carbs | Fat |
|---|---|---|---|---|---|
| Lighter | Use less rice | 221 kcal | 6g | 18g | 14g |
| This serving | As written | 316 kcal | 8g | 26g | 20g |
| Hungry | Add extra steamed rice | 474 kcal | 13g | 39g | 29g |
The chicken supplies most of the protein, while the cornflour and sugar contribute carbohydrates. The cooking oils and sesame oil are the main sources of fat; serve with steamed rice and vegetables to make a more balanced plate.
Choosing the chicken
Chicken thighs: these stay juicy during the short, high-heat sear and suit the chewy coating well.
Chicken breast: this also works; cut it into evenly sized pieces and take care not to overcook it.
Getting the coating right
Egg and oil: stir these into the salted chicken before adding the cornflour, so the coating clings to the pieces.
Cornflour: aim for an uneven layer with only a little loose dry powder left in the bowl. A perfectly smooth batter is not the goal here.
Searing without deep-frying
Give the chicken room: arrange the pieces with minimal overlap so they brown rather than steam. Cook them undisturbed for the first 2–3 minutes on each side.
Let it rest: the 2–3 minute pause after searing is part of the method and helps the coating crisp up before it meets the sauce.
Thickening the sauce
Stir first: cornflour can settle in the sauce mixture, so stir it again immediately before pouring it into the pan.
Keep stirring: the sauce thickens as it bubbles. Return the chicken only then, and toss quickly with the heat off to coat without leaving it to simmer.
Serving suggestions
Steamed rice is the suggested base and soaks up the savoury, tangy sauce. Scatter the reserved spring onion over the chicken just before serving.
For a fuller plate, serve alongside a simple green vegetable, such as steamed broccoli or greens. Keep the chicken hot and bring it straight to the table while the coating is at its best.
Making it gluten-free
Use dry sherry in place of Shaoxing wine, tamari instead of soy sauce and rice vinegar instead of Chinkiang vinegar, as suggested for this recipe.
Check the labels on the other packaged ingredients, including the stock, to make sure they meet your requirements.
Recipe notes & tips
- Cut the chicken into evenly sized pieces so they cook at a similar pace.
- Have the sauce ingredients ready before you start searing the chicken.
- Separate the chicken pieces as they go into the pan to prevent them sticking together.
- Keep the chicken undisturbed for the first 2–3 minutes on each side so it can brown.
- Wipe away excess oil carefully, leaving about 1 tablespoon in the pan for the garlic and spring onion.
- Stir the sauce immediately after adding it to the pan to help it thicken evenly.
Variations
- Use chicken breast: swap it for the thighs and watch it closely so it stays juicy.
- Choose vegetable oil: use it in place of peanut oil for both stages of cooking.
- Make it gluten-free: use dry sherry, tamari and rice vinegar instead of the listed wine and sauces.
- Add a vegetable side: serve with steamed broccoli or greens alongside the chicken.
- Finish with sesame: reserve the sesame seeds to scatter over the plated chicken.
Common mistakes to avoid
- Crowding the pan: the chicken can steam instead of sear, so leave as little overlap as possible.
- Moving it too soon: the coating needs 2–3 minutes undisturbed to brown before turning.
- Skipping the rest: leave the cooked chicken for 2–3 minutes to help the coating crisp.
- Pouring in settled sauce: stir it thoroughly first so the cornflour is distributed.
- Simmering the chicken in the sauce: turn off the heat before returning it and toss quickly.
How to store
Refrigerate leftovers in a covered container and use within 2 days. Reheat thoroughly in a frying pan or microwave; the coating may soften once stored with the sauce.
Frequently asked questions
Can I use chicken breast instead of thighs?
Yes. Cut it into the same 1.5 cm pieces and keep an eye on the searing time so it does not dry out.
How do I make this recipe gluten-free?
Use dry sherry instead of Shaoxing wine, tamari in place of soy sauce and rice vinegar instead of Chinkiang vinegar. Check the stock and other packaged ingredients as well.
Why is the cornflour coating uneven?
That is intentional: the recipe calls for a patchy coating with a little dry cornflour left unattached. Stir the chicken until the pieces are coated, without trying to make a smooth batter.
How can I tell when the sauce is thick enough?
It should be bubbling and visibly thickened before you add the chicken back to the pan.
Can I prepare the sauce in advance?
You can mix it ahead, but stir it again just before adding it to the pan because the cornflour can settle.
What should I serve with sesame chicken?
Serve it hot over steamed rice, as described in the method. Steamed greens or broccoli also make a suitable side.
Cook it from the original
This recipe comes from omnivorescookbook.com. Their page has the author’s own photos, notes and tips — the best place to cook it from.
Open the recipe on omnivorescookbook.com