
Yaki Onigiri (Grilled Rice Balls)
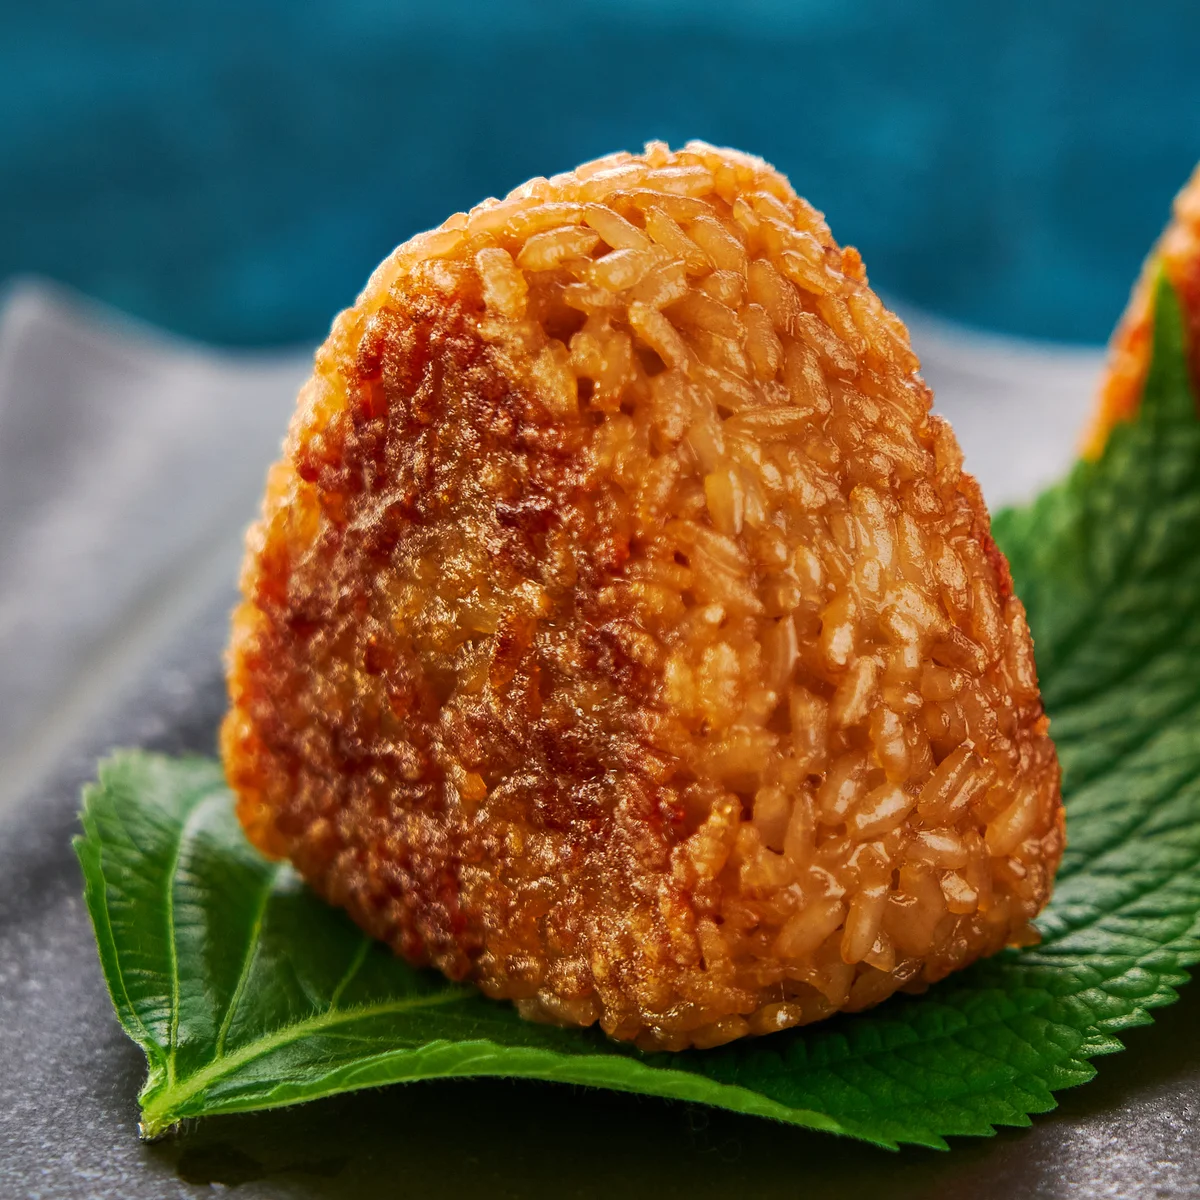
Yaki onigiri are Japanese rice balls browned in a pan until crisp outside and soft inside. Soy sauce seasons the rice, while a little butter adds richness; wrap them in shiso or nori to serve.
Ingredients
- 160 g (1 rice-cooker cup or ¾ US cup)Japanese short-grain rice
- 240 ml (1 cup)water
- 30 ml (2 tablespoons)soy sauce
- 5 ml (1 teaspoon)potato starch
- 15 ml (1 tablespoon)vegetable oil
- 15 ml (1 tablespoon)cultured unsalted butter
- For wrappingshiso leaves
- For wrappingnori sheets
Instructions
- 1
Cook the rice
Using a rice cooker, measure the rice with its cup and follow the water lines in the cooker bowl to cook 1 rice-cooker cup.
- 2
Cook on the hob
For the hob method, rinse the 160 g rice in several changes of water until it runs mostly clear, then drain in a sieve. Put it in a tall pot with 240 ml water and cover with a lid. Bring to the boil over high heat, then immediately reduce the heat to its lowest setting and cook for 13 minutes. Turn off the heat and leave the rice to steam for another 10–15 minutes. Keep the lid closed throughout cooking and steaming.
- 3
Season the rice
Once the steaming is complete, pour the 30 ml soy sauce evenly over the rice. Fold and cut through it with a spatula or rice paddle until the colour is even.
- 4
Divide the rice
Level the top of the rice mixture, then divide it into three equal portions, as if cutting a pizza.
- 5
Shape the onigiri
To shape by hand, follow the publisher’s specific shaping instructions. If using a mould, wet it, fill it with one portion of rice and press it more firmly than usual so the rice ball holds its shape.
- 6
Dust with starch
Set the onigiri on a tray lined with baking parchment or cling film. Pass the 5 ml potato starch through a fine-mesh sieve to dust a thin layer over each one. Turn them over and dust the other side, keeping starch off the edges if possible.
- 7
Heat the frying pan
Set a non-stick frying pan over medium-low heat. When it is moderately hot, add about half of the 15 ml vegetable oil and arrange the onigiri over the small pools of oil.
- 8
Brown the first side
Fry without moving the rice balls for about 7–10 minutes, until the underside is golden brown and crisp.
- 9
Brown the second side
Turn the onigiri over and add a little more of the remaining oil. Fry the other side until crisp and browned.
- 10
Butter and brown edges
Melt some of the 15 ml butter directly onto each browned surface. Roll the onigiri onto their three sides to cook any loose starch.
- 11
Wrap and serve
Serve the rice balls wrapped in shiso leaves or nori sheets.
What are yaki onigiri?
Onigiri are Japanese rice balls, often shaped by hand or pressed in a mould. Yaki means grilled or cooked over heat, and this version gets its browned crust in a frying pan.
Soy sauce is mixed through the rice before shaping, so each bite is seasoned throughout. A dusting of potato starch helps form a crisp exterior, and butter finishes the browned surfaces.
Nutrition and macros by portion
The nutrition label shows one serving as written: 274 calories, 5g protein, 43g carbs, 9g fat.
| Portion | Adjustment | kcal | Protein | Carbs | Fat |
|---|---|---|---|---|---|
| Lighter | Use less butter | 192 kcal | 4g | 30g | 6g |
| This serving | As written | 274 kcal | 5g | 43g | 9g |
| Hungry | Make larger rice balls | 411 kcal | 8g | 65g | 14g |
The rice supplies most of the carbohydrates, while the vegetable oil and butter provide most of the fat. Rice contributes a little protein, with soy sauce adding seasoning and some additional protein. Pair one rice ball with vegetables or a protein-rich side to make the plate more balanced.
Rice and seasoning
Short-grain rice: Its sticky texture helps the portions hold together when shaped and turned in the pan. Cook it fully before adding the soy sauce.
Soy sauce: Fold it through the cooked rice rather than stirring vigorously, which can break up the grains. Aim for an even colour before dividing the mixture.
Shape them firmly
Firm press: The rice balls need to stay intact when turned, so press them more firmly in a mould than you might for ordinary onigiri. If shaping by hand, use the publisher’s shaping instructions.
Even portions: Divide the mixture into three before shaping so the rice balls cook at a similar pace.
Getting a crisp crust
Starch coating: Sift a thin layer over the two broad faces, avoiding the sides where possible. Too much starch can remain powdery rather than browning neatly.
Steady heat: Medium-low heat gives the rice time to brown while the centre warms through. Leave each face undisturbed until it has developed a golden crust.
Butter and finishing
Butter: Add it to the browned faces near the end, as directed, rather than using it for the initial frying. Roll each rice ball onto its three sides to cook off loose starch.
Texture cues: Look for a golden, crisp surface before turning. Handle the onigiri gently so the crust forms without breaking the rice ball.
Serving ideas
Wraps: Shiso leaves bring a fresh, aromatic note, while nori gives the rice a savoury seaweed wrap. Add the wrapping just before eating.
On the plate: Serve them with a simple vegetable side or a bowl of soup for a more rounded meal. Keep accompaniments light so the crisp rice remains the focus.
Recipe notes & tips
- Keep the pot lid closed during both cooking and steaming so the rice cooks as directed.
- Fold the soy sauce through the rice with a cutting motion to keep the grains from becoming too broken.
- Wet an onigiri mould before filling it to help release the shaped rice.
- Sift the potato starch in a thin layer so it coats the broad faces without collecting around the edges.
- Wait for the first side to turn golden before flipping the onigiri.
- Use a gentle touch when turning the rice balls to keep them intact.
Variations
- Add sesame: Sprinkle toasted sesame seeds into the rice after mixing in the soy sauce.
- Use miso: Replace some of the soy sauce with miso for a different savoury seasoning.
- Try spring onion: Fold finely sliced spring onion through the seasoned rice before dividing it.
- Change the wrap: Use shiso or nori according to the flavour and texture you prefer.
- Add chilli: Mix a small amount of chilli seasoning into the rice for a spicier version.
Common mistakes to avoid
- Opening the pot: The rice needs to steam undisturbed, so keep the lid closed through cooking and resting.
- Loose shaping: Rice balls may break when turned; press them firmly enough to hold their shape.
- Too much starch: A thick coating can stay dusty; sift on just a thin layer.
- Turning too soon: The rice may stick or break before a crust forms; leave it undisturbed until golden.
- High heat: The outside may brown before the centre warms; keep the pan at medium-low.
- Rough handling: The rice balls can fall apart; turn them carefully with a suitable spatula.
How to store
For best texture, eat the onigiri soon after frying. If storing leftovers, refrigerate promptly in an airtight container and use within 1–2 days; reheat in a frying pan until hot throughout to help restore the crisp surface.
Frequently asked questions
Can I cook the rice without a rice cooker?
Yes. Rinse and drain the rice, then simmer it covered with 240 ml water for 13 minutes after it comes to the boil. Turn off the heat and steam it, still covered, for another 10–15 minutes.
Why is my onigiri falling apart?
It may not have been pressed firmly enough. Shape each portion tightly, especially when using a mould, and turn it carefully once the first side has browned.
Can I make the rice balls ahead?
You can cook and shape them ahead, but the crisp crust is best made shortly before serving. Refrigerated rice can firm up, so handle the shaped balls gently when frying.
What can I use instead of shiso?
Nori is already included as an alternative wrap. You can also serve the rice balls without a wrap.
How do I know when to flip them?
The first side should be golden brown and crisp, which takes about 7–10 minutes in the stated method. If it is still pale, give it more time before turning.
Can I use a different rice?
Japanese short-grain rice is specified because its sticky texture helps the onigiri hold together. A less sticky rice may be harder to shape and turn.
Cook it from the original
This recipe comes from norecipes.com. Their page has the author’s own photos, notes and tips — the best place to cook it from.
Open the recipe on norecipes.com