
Homemade Greek Yogurt
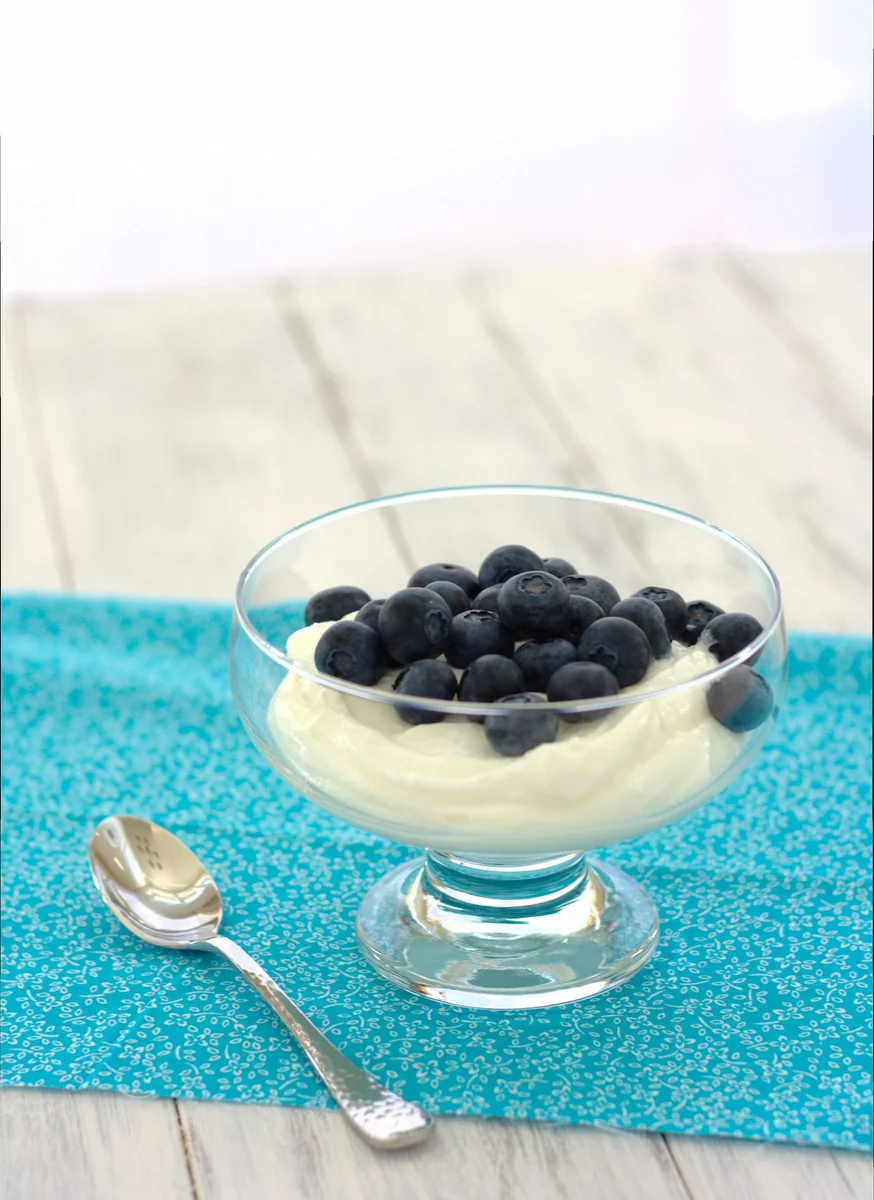
This homemade Greek-style yoghurt is made by warming milk, adding live-culture yoghurt and letting it ferment before draining it until thick. It takes little hands-on work and gives you a simple batch to keep in the fridge for breakfasts, snacks or cooking.
Ingredients
- 1.9 litres (8 cups; half a gallon or 2 quarts)milk (2% recommended; whole, 1% or fat-free also work)
- 15 ml (1 tablespoon)plain yoghurt with live active cultures, or homemade yoghurt from a previous batch
Instructions
- 1
Heat the milk
Pour the milk into a medium saucepan and warm it over medium-high heat, stirring occasionally, until it reaches 82°C (180°F). It should be steaming and beginning to froth, but not boiling.
- 2
Cool and inoculate
Pour the milk into a bowl and let it cool to 43–46°C (110–115°F), the range needed to activate the yoghurt cultures. Whisk in the plain yoghurt, cover the bowl with a lid or plastic wrap, then wrap it in a few heavy tea towels.
- 3
Incubate the yoghurt
Switch the oven on at any temperature and let it warm for 1 minute, then switch it off, turn on the oven light and place the wrapped bowl inside. Close the door and leave the yoghurt for 8–12 hours. Aim to keep the oven warm, at about 43°C (110°F); check every few hours and repeat the 1-minute warming cycle if needed. If incubating overnight, the oven may stay warm enough without further warming.
- 4
Drain the whey
The yoghurt is ready when it has set and has some liquid on top; this liquid is whey. Set a fine-mesh sieve over a large bowl and line it with cheesecloth or a double layer of paper towels. Spoon the yoghurt into the lined sieve, cover with plastic wrap and refrigerate for about 8 hours, until the whey has drained away. Discard the whey or use it instead of water when baking bread; it keeps in a sealed jar in the fridge for up to 10 days.
- 5
Chill and store
Spoon the thick yoghurt into a storage container, cover it and keep it in the fridge. It will keep for about a week.
What is Greek yoghurt?
Greek yoghurt is yoghurt that has been strained to remove some of its whey, giving it a thicker texture than unstrained yoghurt. The style is associated with Greece, though strained yoghurt is enjoyed across many cuisines.
This version uses milk and a spoonful of live-culture yoghurt as its starter. Heating the milk first, then incubating it warm before straining, builds the set and thickness.
Nutrition and macros by portion
The nutrition label shows one serving as written: 319 calories, 21g protein, 31g carbs, 13g fat.
| Portion | Adjustment | kcal | Protein | Carbs | Fat |
|---|---|---|---|---|---|
| Lighter | Use fat-free milk | 223 kcal | 15g | 22g | 9g |
| This serving | As written | 319 kcal | 21g | 31g | 13g |
| Hungry | Serve a larger portion | 479 kcal | 32g | 47g | 20g |
Milk supplies the carbohydrates and most of the protein, while its fat content contributes to the fat in each serving. Pair a portion with fruit or vegetables for a more balanced plate, or add oats for extra substance.
Choose milk and starter carefully
Milk: The recipe recommends 2% milk, but whole, 1% and fat-free milk can also be used. The milk is the base of the batch and its fat level affects how rich the yoghurt tastes.
Starter: Use plain yoghurt that clearly contains live active cultures, or yoghurt saved from a previous batch. Flavoured yoghurt is not the specified starter here.
Watch the temperatures
Heating: Bring the milk to 82°C (180°F), stirring occasionally. Look for steam and the first signs of froth, rather than waiting for a rolling boil.
Cooling: Let the milk fall to 43–46°C (110–115°F) before whisking in the starter. This temperature window is important for activating the cultures.
Keep the bowl warm
Insulation: A lid or plastic wrap and several heavy tea towels help the covered bowl hold warmth during incubation. The recipe uses a briefly warmed oven with its light on as a warm place.
Timing: Leave the yoghurt for 8–12 hours. The oven should stay around 43°C (110°F); check every few hours and warm it for another minute if needed.
Strain for a thicker texture
Lining: Set a fine-mesh sieve over a large bowl and line it with cheesecloth or a double layer of paper towels. This catches the yoghurt while letting the whey drain away.
Doneness: After about 8 hours in the fridge, the yoghurt should be noticeably thicker. For a softer result, check it sooner; for a firmer Greek-style texture, let it drain for the full time.
Ways to use the whey
Save it: The drained whey can be used in place of water when baking bread, as described in the recipe. Keep it in a sealed jar in the fridge for up to 10 days.
Serve the yoghurt: Enjoy it on its own or with fruit, oats or a savoury meal. Add toppings when serving rather than mixing them into the stored batch.
Recipe notes & tips
- Use a saucepan large enough to stir the milk without splashing.
- Stir occasionally as the milk heats so it warms evenly.
- Use a thermometer to check that the milk has cooled to 43–46°C (110–115°F) before adding the starter.
- Keep the bowl covered throughout incubation.
- Set the sieve over a bowl deep enough to catch the draining whey without letting it touch the sieve.
- Use clean containers and utensils when transferring the finished yoghurt.
Variations
- Richer batch: Use whole milk instead of 2% milk.
- Lighter batch: Use fat-free milk, as allowed in the recipe.
- Softer yoghurt: Shorten the draining time and check the texture before the full 8 hours.
- Firmer yoghurt: Leave it to drain in the fridge for the full 8 hours.
- Bread baking: Use the saved whey instead of water in a bread recipe.
Common mistakes to avoid
- Boiling the milk: Stop heating when it reaches 82°C (180°F) and is steaming and beginning to froth.
- Adding starter too soon: Let the milk cool to 43–46°C (110–115°F) first.
- Using yoghurt without live cultures: Check the label or use starter from a previous homemade batch.
- Letting the oven cool too much: Check it every few hours and repeat the 1-minute warming cycle if needed.
- Skipping the lining: Line the sieve with cheesecloth or a double layer of paper towels so the yoghurt can be strained.
- Draining without refrigeration: Cover the sieve and chill the yoghurt while the whey drains.
How to store
Keep the finished yoghurt covered in a container in the fridge for about a week. Refrigerate saved whey in a sealed jar and use it within 10 days.
Frequently asked questions
Can I use a different type of milk?
Yes. The recipe recommends 2% milk, but whole, 1% and fat-free milk will also work.
Can I use shop-bought yoghurt as the starter?
Yes, provided it is plain yoghurt with live active cultures. You can also use homemade yoghurt from a previous batch.
How do I know when the yoghurt has incubated long enough?
It should look set like yoghurt, with some liquid on top. Incubation takes 8–12 hours in the warm oven.
Why is my yoghurt not thick yet?
The whey needs to drain through the lined sieve in the fridge. Leave it for about 8 hours for the Greek-style texture described here.
Do I have to keep the oven warm during incubation?
The oven should stay around 43°C (110°F). Check every few hours and repeat the 1-minute warming cycle if needed; the recipe notes that an overnight incubation may work without further warming.
What can I do with the whey?
You can discard it or use it instead of water when baking bread. Store it in a sealed jar in the fridge for up to 10 days.
Cook it from the original
This recipe comes from kristineskitchenblog.com. Their page has the author’s own photos, notes and tips — the best place to cook it from.
Open the recipe on kristineskitchenblog.com