
Whole Wheat Pita Bread
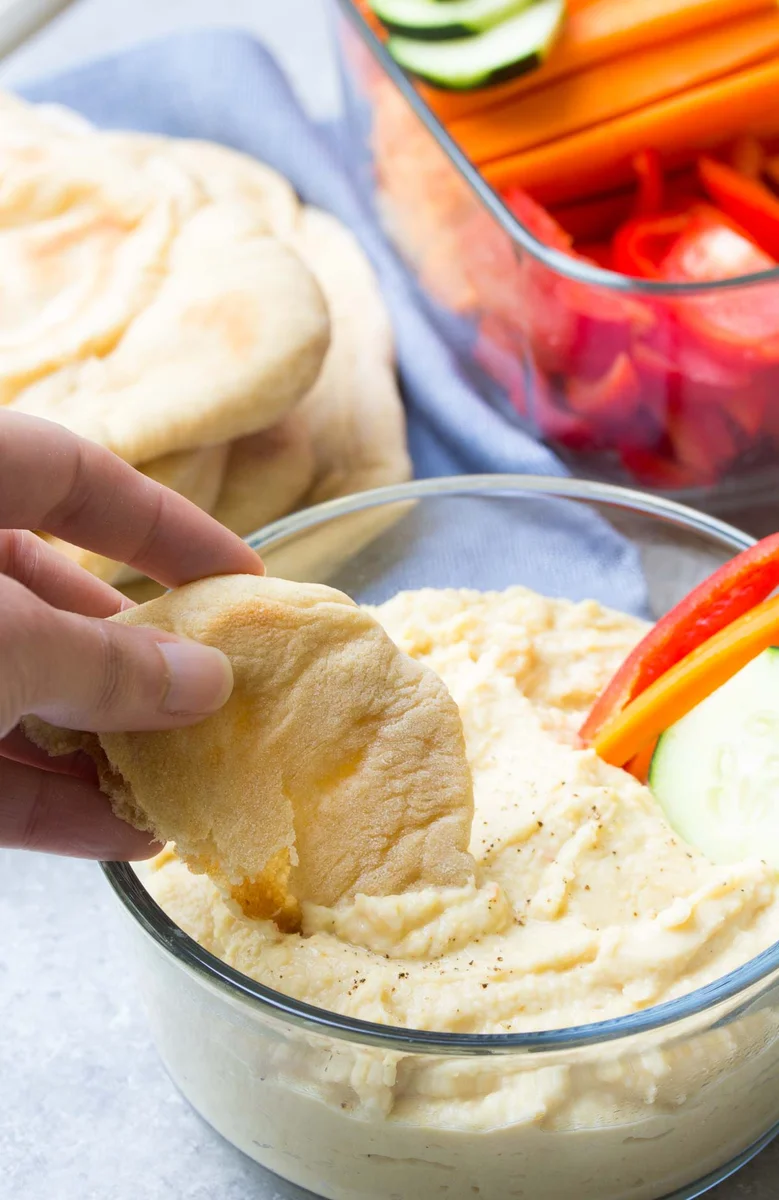
These soft whole wheat pitas are made with a short list of pantry ingredients and cooked in the oven or on a griddle. Make a batch for sandwiches, dipping or serving alongside a Mediterranean-inspired meal.
Ingredients
- 355 mlwarm water (40–46°C)
- 2½ teaspoons (about 8 g)instant yeast
- 1 tablespoon (15 ml)honey
- 60 mlolive oil
- 1 teaspoon (about 5 g)salt
- 390–420 gwhite whole wheat flour
Instructions
- 1
Activate the yeast
Add the warm water, yeast and honey to a stand mixer bowl, or a mixing bowl if kneading by hand. Stir gently and leave for 5 minutes, until foamy.
- 2
Mix and knead
Add the olive oil, salt and 390 g of the flour. Mix with the paddle attachment until combined, then switch to the dough hook and knead on low for 8 minutes. Add up to 30 g more flour if the dough is too sticky; it should feel only slightly sticky to the touch.
- 3
Let dough rise
Cover the bowl with a clean tea towel or cling film and leave the dough to rise for 45 minutes to 1 hour, until doubled in size.
- 4
Prepare the oven
If using a baking stone, put it in the oven now and preheat the oven to 260°C. You can also bake the pitas directly on the oven racks; if using a griddle, heat it shortly before baking instead.
- 5
Shape the pitas
Tip the dough onto a lightly floured surface and press it down to release the air. Shape it into a ball and divide it into 10 equal pieces. Shape each piece into a ball, then roll it on a lightly floured surface into a 15 cm round. Place the rounds on baking parchment and cover with a clean tea towel.
- 6
Rest the rounds
Leave the dough rounds to rest for 30 minutes, during which time they will puff up slightly.
- 7
Heat the griddle
If you are using a griddle rather than the oven, preheat it while the rounds rest to 175–190°C.
- 8
Cook the pitas
Bake or griddle the rounds in batches of 2 or 3. Cook the first side for about 2 minutes, then turn and cook the second side for 1–2 minutes, until lightly golden.
- 9
Cool the bread
Let the pitas cool briefly, then wrap them loosely in a clean tea towel while they finish cooling to help keep them soft.
- 10
Store the pitas
Keep them in a zip-top bag at room temperature for up to 2 days, or freeze them for up to 3 months.
What is whole wheat pita bread?
Pita is a round, leavened flatbread associated with Mediterranean and Middle Eastern cooking. It is often split to make a pocket for fillings, or served whole alongside dips and meals.
This version uses white whole wheat flour for a wholegrain flavour, with yeast helping the dough rise. Cooking the rounds on a very hot surface gives them a chance to puff while keeping the method straightforward.
Nutrition and macros by portion
The nutrition label shows one serving as written: 184 calories, 5g protein, 25g carbs, 6g fat.
| Portion | Adjustment | kcal | Protein | Carbs | Fat |
|---|---|---|---|---|---|
| Lighter | Smaller pita portion | 129 kcal | 4g | 18g | 4g |
| This serving | As written | 184 kcal | 5g | 25g | 6g |
| Hungry | Serve an extra pita | 276 kcal | 8g | 38g | 9g |
The flour supplies most of the carbohydrates, while olive oil contributes much of the fat; the flour also provides the protein. Serve a pita with vegetables and a protein-rich filling or dip for a more balanced plate.
Choosing the flour
White whole wheat flour: use the specified variety for the flavour and dough texture intended here. Start with the smaller amount, then add more only if the dough is too sticky to handle comfortably.
Extra flour: the dough should remain slightly tacky rather than dry. Adding the full extra amount automatically can make the finished pitas firmer.
Getting the dough right
Yeast mixture: give the water, yeast and honey 5 minutes to turn foamy before continuing. This is the visual cue in the method that the mixture is ready for the remaining ingredients.
Kneading: knead on low speed for 8 minutes with the dough hook. If mixing by hand, knead until the dough is cohesive and has a similar slightly sticky feel.
Shaping and resting
Even rounds: divide the dough into 10 equal pieces so they cook at a similar rate. Roll each into a 15 cm round, keeping the work surface only lightly floured.
Resting time: cover the shaped rounds and leave them for 30 minutes. A slight puff is expected before they go onto the hot cooking surface.
Baking or griddling
Oven: preheat the baking stone to 260°C before the dough rounds are ready. The method also allows the pitas to be baked directly on the oven racks if you do not have a stone.
Griddle: heat it to 175–190°C shortly before cooking. Work in batches of 2 or 3, turning each pita after about 2 minutes and cooking the second side for 1–2 minutes until lightly golden.
Keeping the pitas soft
After cooking: allow the pitas to cool briefly, then wrap them loosely in a clean tea towel as they finish cooling. This helps retain a soft texture.
To serve: use them for sandwiches or tear them into pieces for scooping up dips, soups or stews.
Recipe notes & tips
- Use a thermometer to bring the water into the 40–46°C range before mixing.
- Add the extra flour gradually so the dough does not become dry.
- Keep the shaped rounds covered while they rest to prevent them drying out.
- Cook in batches of 2 or 3 so each pita has room on the hot surface.
- Wrap the pitas in a clean tea towel after cooking to help them stay soft.
Variations
- Herb dough: mix finely chopped herbs into the dough with the oil and salt.
- Garlic finish: brush the cooked pitas lightly with garlic-infused olive oil.
- Seeded tops: sprinkle seeds over the rounds and gently press them in before cooking.
- Mini pitas: divide the dough into smaller equal pieces and keep a close eye on their cooking time.
- Oven method: bake the rounds on a preheated stone or directly on the oven racks as described.
Common mistakes to avoid
- Water too hot: it can hinder the yeast; keep it between 40–46°C.
- Too much flour: the dough can turn firm; add the extra flour only if it is too sticky.
- Drying rounds: uncovered dough can form a dry surface; keep the rounds under a clean tea towel.
- Cool cooking surface: the pitas may not cook as intended; preheat the stone or griddle before baking.
- Overcooking: pitas can lose their softness; use the stated cooking times and look for light golden colour.
How to store
Store the pitas in a zip-top bag at room temperature for up to 2 days. Freeze for up to 3 months, then thaw and warm briefly before serving.
Frequently asked questions
Can I knead the dough by hand?
Yes. The method allows the dough to be mixed and kneaded by hand instead of using a stand mixer.
Do I need a baking stone?
No. The pitas can be baked directly on the oven racks or cooked on a griddle.
How do I know when the dough has risen enough?
After the first rise, it should have doubled in size. The shaped rounds should puff up slightly during their 30-minute rest.
Why is my dough sticky?
It should feel slightly sticky, but if it is too sticky to handle, add some of the reserved flour gradually, up to 30 g.
Can I freeze the cooked pitas?
Yes. Store them in a freezer-safe bag for up to 3 months, then thaw before serving.
Cook it from the original
This recipe comes from kristineskitchenblog.com. Their page has the author’s own photos, notes and tips — the best place to cook it from.
Open the recipe on kristineskitchenblog.com