
Gluten-Free Apple Pie (Homemade Crust!)
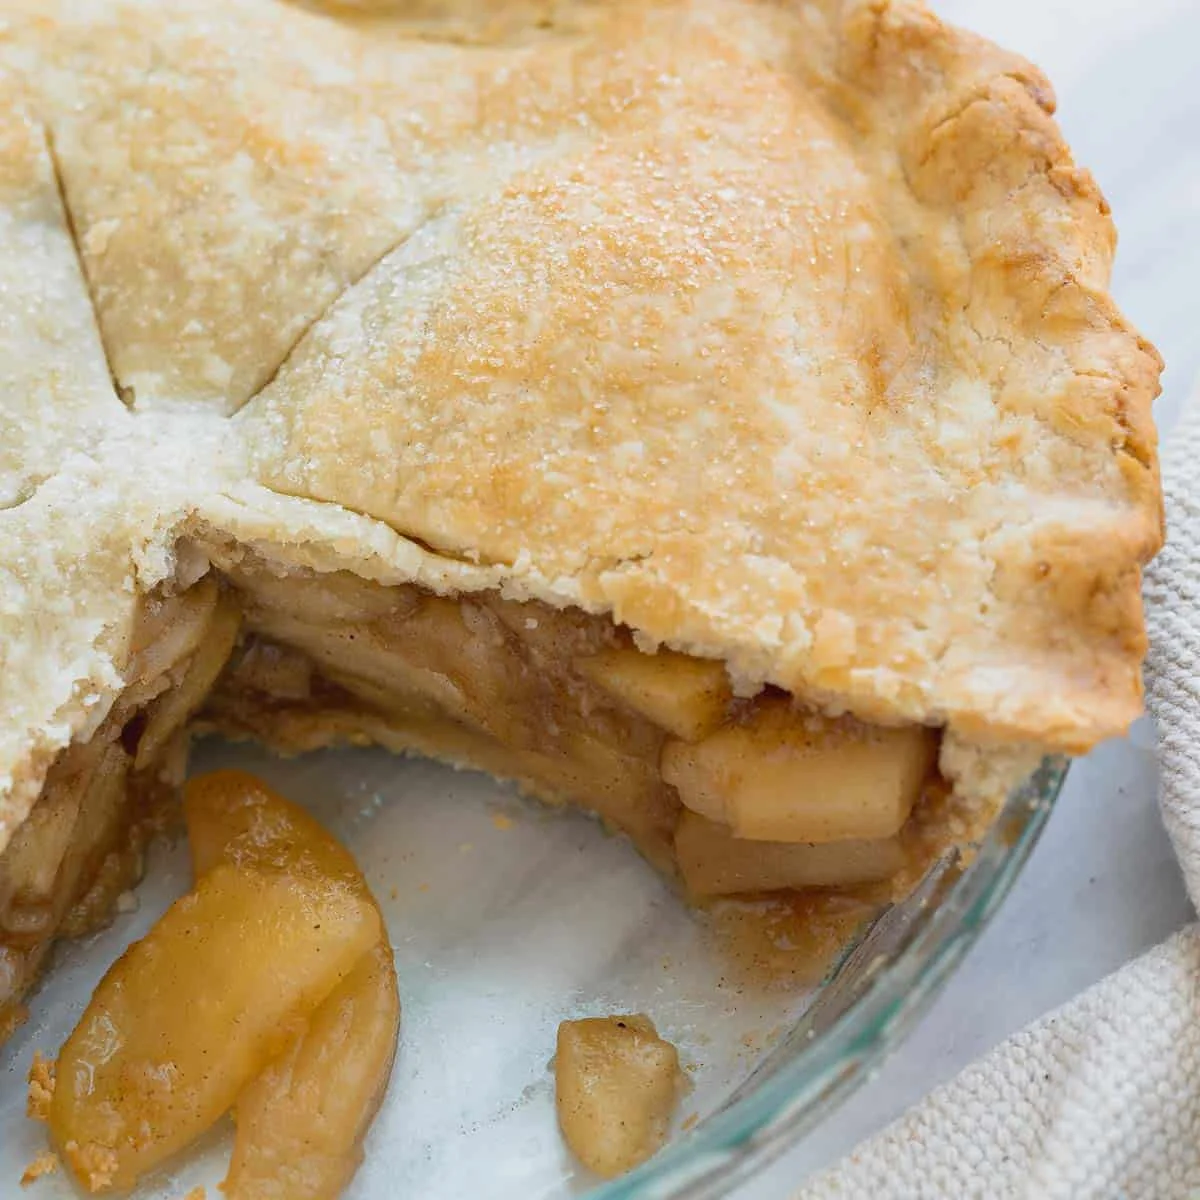
This American-style gluten-free apple pie pairs a flaky homemade crust with cinnamon-spiced apples and a thick, saucy filling. Pre-cooking the apples helps keep the bottom crust crisp and the filling from being watery.
Ingredients
- 227 g (16 tablespoons; 2 sticks)salted butter
- 90 ml (6 tablespoons)ice water
- 45 ml (3 tablespoons)sour cream
- 15 ml (1 tablespoon)white vinegar
- 340 g (2 cups)gluten-free 1:1 baking flour
- 2 teaspoonssugar
- 1 teaspoonsalt
- 1.81 kg (4 pounds; about 6–7 large apples)apples
- 2 tablespoonsbutter
- 100 g (½ cup)brown sugar
- 50 g (¼ cup)granulated sugar
- 1½ teaspoonsground cinnamon
- ¼ teaspoonground nutmeg
- ¼ teaspoonground allspice
- ¼ teaspoonsalt
- Zest of 1lemon
- 30 ml (2 tablespoons)fresh lemon juice
- 30 ml (2 tablespoons) cornstarch + 30 ml (2 tablespoons) watercornstarch and water
- 1egg
- 15 ml (1 tablespoon)milk of choice
Instructions
- 1
Chill the butter
Cut the butter into small pieces about 6 mm (¼ inch) across and freeze for 10–15 minutes.
- 2
Mix the liquids
Whisk the ice water, sour cream and vinegar together in a small bowl until smooth, then set aside.
- 3
Make the dough
Pulse the flour, sugar and salt in a food processor to combine. Scatter the butter over the flour mixture and pulse until the pieces are about the size of large peas, roughly 10 pulses.
- 4
Bring it together
Add the sour cream mixture and pulse about 10 times, until the dough starts clumping around the blade. If it does not clump, tip it into a bowl and finish mixing with your hands or a spatula.
- 5
Chill the discs
Divide the dough into 2 balls, press each into a flat disc and wrap tightly in cling film. Refrigerate for 1 hour or up to 2 days.
- 6
Slice the apples
Peel and core the apples, then cut them into slices about 6 mm (¼ inch) thick. Keep the slices a similar size so they cook evenly.
- 7
Cook the filling
Put the apples, butter, brown sugar, granulated sugar, cinnamon, nutmeg, allspice, salt, lemon juice and lemon zest in a large deep frying pan or Dutch oven. Cook over medium heat for about 10 minutes, stirring occasionally, until the apples have softened slightly but still hold their shape.
- 8
Thicken the filling
Stir together the cornstarch and water, then add the mixture to the apples. Cook for another 2–3 minutes, until thickened.
- 9
Cool the apples
Transfer the filling to a bowl and leave it to cool to room temperature. Taste and adjust the sugar or lemon juice to your liking; to cool it faster, spread it on a baking sheet and refrigerate.
- 10
Roll the pastry
If the dough has been chilled for longer than 1 hour, leave it at room temperature for 15 minutes before rolling. Roll one disc between two large pieces of cling film to about 6 mm (¼ inch) thick, pressing any cracks at the edges together as you go.
- 11
Line the tin
Remove the top sheet of cling film and flip the pastry into a 23 cm (9-inch) pie plate. Gently ease it into the edges before removing the second sheet, then refrigerate the bottom crust while rolling out the other disc in the same way.
- 12
Assemble the pie
Spoon the cooled filling into the crust and place the second crust on top. Trim excess pastry, seal the edges with your fingers or a fork, and cut a few slits in the centre for steam to escape. Freeze the pie for 10 minutes to chill the pastry before baking.
- 13
Heat the oven
Put a baking sheet on the centre rack and preheat the oven to 200°C (400°F), leaving the sheet in the oven as it heats.
- 14
Brush with egg
Whisk the egg and milk together until combined. Brush the pastry with the egg wash and, if desired, sprinkle with sugar.
- 15
Bake the pie
Set the pie on the preheated baking sheet and bake for 35 minutes. Loosely cover the top with foil or a pie shield to prevent excess browning, reduce the oven to 190°C (375°F), and bake for another 35–40 minutes, until golden and bubbling.
- 16
Cool before slicing
Leave the pie on a wire rack for 3 hours before slicing.
What is gluten-free apple pie?
Apple pie is a classic American dessert of spiced apples baked inside pastry. This version uses a gluten-free flour blend for its homemade crust.
Pre-cooking the apple filling is the key to this recipe: it thickens before baking and helps the base crust bake up crisp rather than sitting under a pool of juice.
Nutrition and macros by portion
The nutrition label shows one serving as written: 452 calories, 5g protein, 58g carbs, 24g fat.
| Portion | Adjustment | kcal | Protein | Carbs | Fat |
|---|---|---|---|---|---|
| Lighter | Smaller slice, less crust | 316 kcal | 4g | 41g | 17g |
| This serving | As written | 452 kcal | 5g | 58g | 24g |
| Hungry | Larger slice | 678 kcal | 8g | 87g | 36g |
The apples and sugars provide most of the carbohydrates, while the butter in the crust and filling contributes much of the fat. The flour, egg and dairy ingredients contribute some protein, though the pie is not a substantial protein source. Serve a slice with plain yoghurt or alongside a meal with a protein-rich main to balance the plate.
A crust that holds together
Cold butter: cutting it into small pieces and freezing it helps keep the pastry flaky. Pulse just until the pieces resemble large peas; overworking the dough can make it dense.
Sour cream mixture: the water, sour cream and vinegar add moisture to bring the dough together. Stop once it clumps, then chill the discs so they are easier to roll.
Choose and cut the apples
Apple choice: use apples that keep some shape as they cook, so the filling has texture rather than becoming purée. The recipe does not specify a particular variety.
Even slices: cut the apples to about 6 mm (¼ inch) thick and keep them similar in size. This helps them soften evenly during the brief pre-cooking stage.
Cook the filling until thick
Initial cooking: the apples should soften slightly in the pan but retain their shape. Stir occasionally so the fruit and sugars cook evenly.
Cornstarch slurry: mix the starch with water before adding it to the pan to help it disperse. Cook for a further 2–3 minutes, until the juices thicken, then cool the filling fully before assembling.
Roll and assemble carefully
Rolling: work between sheets of cling film, which makes the gluten-free dough easier to handle. Smooth small edge cracks together with the rolling pin as you go.
Pie plate: ease the pastry into the plate rather than stretching it, which can make it shrink. A metal plate is recommended in the recipe for a crisp bottom crust.
Bake for a crisp base
Hot baking sheet: preheating it in the oven gives the bottom of the pie direct heat when the pie goes in. The recipe calls for 200°C (400°F) at first, then 190°C (375°F) after 35 minutes.
Colour and bubbles: loosely cover the top if it is browning too quickly. The pie is ready when it is golden and the filling is bubbling through the vents.
Allow time to set
Cooling: leave the baked pie on a wire rack for 3 hours before cutting. This gives the thickened filling time to settle, making it easier to serve neat slices.
Serving: enjoy it on its own or with a scoop of ice cream or a spoonful of cream. The pie is best eaten on the day it is baked.
Recipe notes & tips
- Keep the butter cold when making the pastry for a flakier crust.
- Measure the apple slices evenly so they soften at a similar rate.
- Let the filling cool completely before putting it in the pastry case.
- Use cling film above and below the dough to make rolling and transferring easier.
- Preheat the baking sheet in the oven for a crisper bottom crust.
- Give the baked pie the full 3 hours to cool before slicing.
Variations
- Dairy-free crust: use dairy-free sour cream and suitable dairy-free butter and milk.
- Adjust the tang: add lemon juice to the cooled filling to suit your taste.
- Adjust the sweetness: taste the cooled filling and add sugar to your liking.
- Change the spice balance: vary the cinnamon, nutmeg or allspice to suit your preference.
- Top with ice cream: serve each slice with a scoop alongside.
Common mistakes to avoid
- Warm butter: the pastry can lose its flaky texture; freeze the cut pieces for 10–15 minutes first.
- Uneven apple slices: they may cook at different rates; cut them to a consistent 6 mm (¼ inch).
- Watery filling: it can soften the base; cook in the cornstarch mixture until thickened and cool before assembly.
- Stretched pastry: it may pull back in the tin; ease it gently into the edges instead.
- Over-browned top: loosely cover it with foil or a pie shield before reducing the oven temperature.
- Cutting too soon: the filling may not hold its shape; cool the pie for 3 hours on a wire rack.
How to store
The recipe says the pie is best eaten on the day it is baked. Store leftovers covered in the refrigerator and reheat slices in the oven until warmed through.
Frequently asked questions
Why pre-cook the apple filling?
It softens the apples slightly and thickens their juices before baking. This helps avoid a watery centre and supports a crisp bottom crust.
Can I make the pastry ahead?
Yes. The wrapped dough discs can be refrigerated for up to 2 days. If chilled for longer than 1 hour, leave them at room temperature for 15 minutes before rolling.
Can I make the filling ahead?
Yes. Cool it to room temperature before assembling the pie. The recipe also suggests spreading it on a baking sheet and refrigerating it to speed up cooling.
Why roll the dough between cling film?
The sheets make the gluten-free pastry easier to roll and transfer. Smooth cracks at the edges as you roll, then ease the pastry gently into the pie plate.
How do I know when the pie is baked?
The pastry should be golden and the filling bubbling. Bake for 35 minutes at 200°C (400°F), then for another 35–40 minutes at 190°C (375°F).
Why must the pie cool for 3 hours?
The filling needs time to settle before slicing. Cutting sooner can make it harder to serve tidy slices.
Cook it from the original
This recipe comes from meaningfuleats.com. Their page has the author’s own photos, notes and tips — the best place to cook it from.
Open the recipe on meaningfuleats.com