
Gluten-Free Yeast-Free Bread
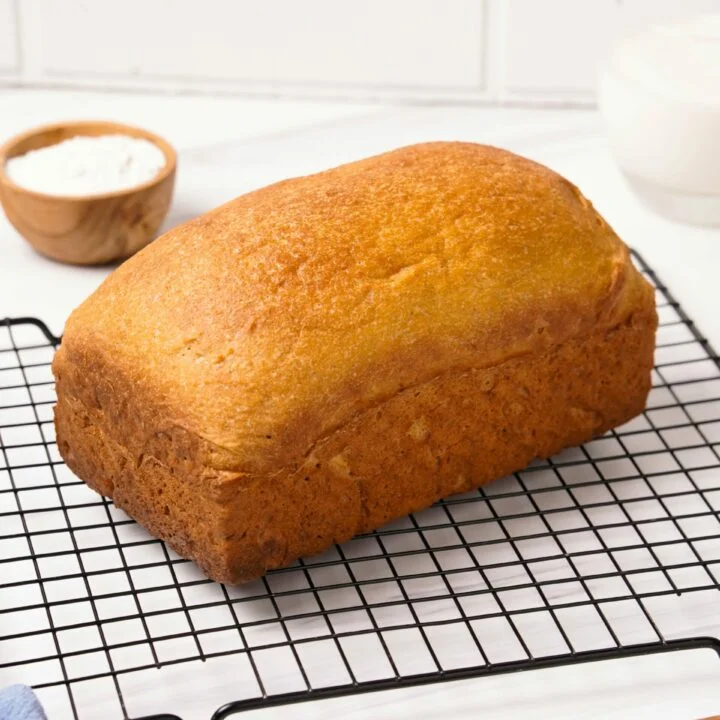
This American-style gluten-free loaf uses baking powder and bicarbonate of soda for lift instead of yeast. It is a straightforward option when you want homemade bread without a proving stage.
Ingredients
- 300 g (2 1/2 cups)all-purpose gluten-free flour
- 6 g (2 teaspoons)xanthan gum
- 16 g (2 tablespoons)dry milk
- 50 g (1/4 cup)sugar
- 12 g (3 teaspoons)baking powder
- 5 g (1 teaspoon)bicarbonate of soda
- 1.25 g (1/4 teaspoon)salt
- 240 ml (1 cup)buttermilk
- 2eggs
- 1egg yolk
- 15 ml (1 tablespoon)apple cider vinegar
- 45 ml (3 tablespoons)extra virgin olive oil
Instructions
- 1
Preheat the oven
Heat the oven to 180°C (350°F) for at least 10 minutes.
- 2
Grease the tin
Coat a loaf tin with oil or butter.
- 3
Combine dry ingredients
In a large bowl, mix the gluten-free flour, xanthan gum, dry milk, sugar, baking powder, bicarbonate of soda and salt. Stir well, then set the bowl aside.
- 4
Whisk wet ingredients
In a separate bowl, whisk together the buttermilk, eggs, egg yolk, apple cider vinegar and oil.
- 5
Mix the batter
Tip the wet mixture into the dry ingredients and stir with a spatula until combined.
- 6
Fill the tin
Scrape the mixture into the prepared loaf tin and smooth the top with a wet spatula.
- 7
Bake covered
Cover the loaf with aluminium foil and bake for about 40 to 50 minutes.
- 8
Brown the top
Remove the foil and continue baking until the loaf is golden brown.
- 9
Cool before slicing
Leave the loaf in the tin for a few minutes, then turn it out onto a wire rack. Let it cool completely before slicing and serving.
What is gluten-free yeast-free bread?
This is a quick-style loaf made without gluten-containing flour or yeast. Instead of waiting for dough to rise, it relies on baking powder and bicarbonate of soda for lift.
The American-style recipe combines buttermilk, eggs and olive oil with a gluten-free flour blend. Xanthan gum helps give the loaf structure in the absence of gluten.
Nutrition and macros by portion
The nutrition label shows one serving as written: 73 calories, 2g protein, 6g carbs, 5g fat.
| Portion | Adjustment | kcal | Protein | Carbs | Fat |
|---|---|---|---|---|---|
| Lighter | Use a smaller slice | 51 kcal | 1g | 4g | 4g |
| This serving | As written | 73 kcal | 2g | 6g | 5g |
| Hungry | Serve a larger slice | 110 kcal | 3g | 9g | 8g |
The flour and sugar provide most of the carbohydrate, while the olive oil, eggs and yolk contribute fat; the eggs, buttermilk and flour also provide some protein. Serve a slice with a protein-rich topping or alongside vegetables and a main dish to make a more balanced plate.
Choosing the flour and raising agents
Gluten-free flour: Use an all-purpose blend intended for baking. If the blend already contains xanthan gum, check its packaging before adding the full amount called for here.
Raising agents: Baking powder and bicarbonate of soda do the work that yeast would do in a conventional loaf. Measure them carefully so their flavour does not overwhelm the bread.
Mixing the batter
Dry mixture: Stir the flour, xanthan gum, dry milk, sugar, baking powder, bicarbonate of soda and salt thoroughly before adding liquid. Even mixing helps distribute the raising agents through the loaf.
Wet mixture: Whisk the buttermilk, eggs, yolk, vinegar and oil in a separate bowl. Fold the two mixtures together with a spatula until combined, without continuing to stir once the dry patches are gone.
Why the buttermilk and vinegar matter
Buttermilk: Its acidity pairs with bicarbonate of soda, while the liquid helps bring the flour blend together. Keep the stated amount so the batter is not made unnecessarily loose.
Vinegar: Apple cider vinegar adds further acidity to the mixture. It is whisked with the other wet ingredients before they meet the dry ingredients.
Baking and checking the loaf
Covered baking: The recipe starts with the loaf covered in foil for about 40 to 50 minutes. The stated total time is 40 minutes, so allow for the method's longer baking range when planning.
Colour: Remove the foil and bake until the surface is golden brown. The recipe does not give a separate time for this final uncovered stage, so use the colour cue rather than guessing an exact duration.
Cooling and serving
Cooling: Let the loaf rest in its tin for a few minutes, then move it to a wire rack to cool completely. Slicing while it is still hot can make the crumb more liable to crumble.
Serving: Cut slices once cool and serve with your preferred spread, or alongside soup or a meal. A sharp serrated knife can help make cleaner slices.
Recipe notes & tips
- Measure the gluten-free flour carefully rather than packing it into the measuring cup.
- Whisk the wet ingredients until the eggs and oil are evenly combined.
- Use a wet spatula to smooth the batter without dragging it out of the tin.
- Keep the loaf covered for the initial bake, then remove the foil for browning.
- Wait until the loaf has cooled completely before slicing for a neater crumb.
Variations
- Herb loaf: Fold finely chopped herbs into the dry ingredients before adding the wet mixture.
- Seeded top: Scatter seeds over the smoothed batter before covering the tin with foil.
- Dairy-free option: Use suitable dairy-free alternatives for the buttermilk and dry milk, bearing in mind that the texture may differ.
- Savoury loaf: Reduce or omit the sugar and add a little dried herb to the flour mixture.
- Olive variation: Replace some of the olive oil with another mild cooking oil if you prefer a more neutral flavour.
Common mistakes to avoid
- Skipping the xanthan gum: It helps provide structure in gluten-free baking; use the specified amount unless your flour blend already includes it.
- Uneven dry mixture: Thoroughly stir the flour and raising agents before adding the wet ingredients.
- Overmixing: Stir only until the batter is combined to avoid working it more than necessary.
- Dry top: Keep the loaf covered with foil during the first baking stage, then uncover it as directed.
- Slicing while hot: Let the loaf cool completely on a rack before cutting so it is less likely to crumble.
How to store
Once completely cool, store the loaf in an airtight container at room temperature and use within 2 days, or freeze slices for longer storage. Reheat a slice briefly in a toaster or oven until warmed through.
Frequently asked questions
Does this bread need to rise?
No. It contains no yeast and has no proving stage; the baking powder and bicarbonate of soda provide the lift.
Can I use a gluten-free flour blend that contains xanthan gum?
Check the blend's ingredients first. If it already contains xanthan gum, adding the full extra amount may affect the texture.
Why is the loaf covered with foil at first?
The method covers it during the initial bake, then removes the foil so the surface can turn golden brown. Follow both stages as written.
How do I know when it is done?
After the covered bake, remove the foil and continue until the loaf is golden brown. The recipe does not specify a separate time for this final stage.
Can I slice it while it is warm?
It is best to let it cool completely on a wire rack first. The crumb will be easier to cut neatly once set.
Why does the recipe take longer than 40 minutes?
The listed total time is 40 minutes, but the method calls for about 40 to 50 minutes covered, followed by additional uncovered baking until golden. Allow extra time for the method as written.
Cook it from the original
This recipe comes from glutenfreepalate.com. Their page has the author’s own photos, notes and tips — the best place to cook it from.
Open the recipe on glutenfreepalate.com