
Oven Baked Chicken Parmesan Recipe
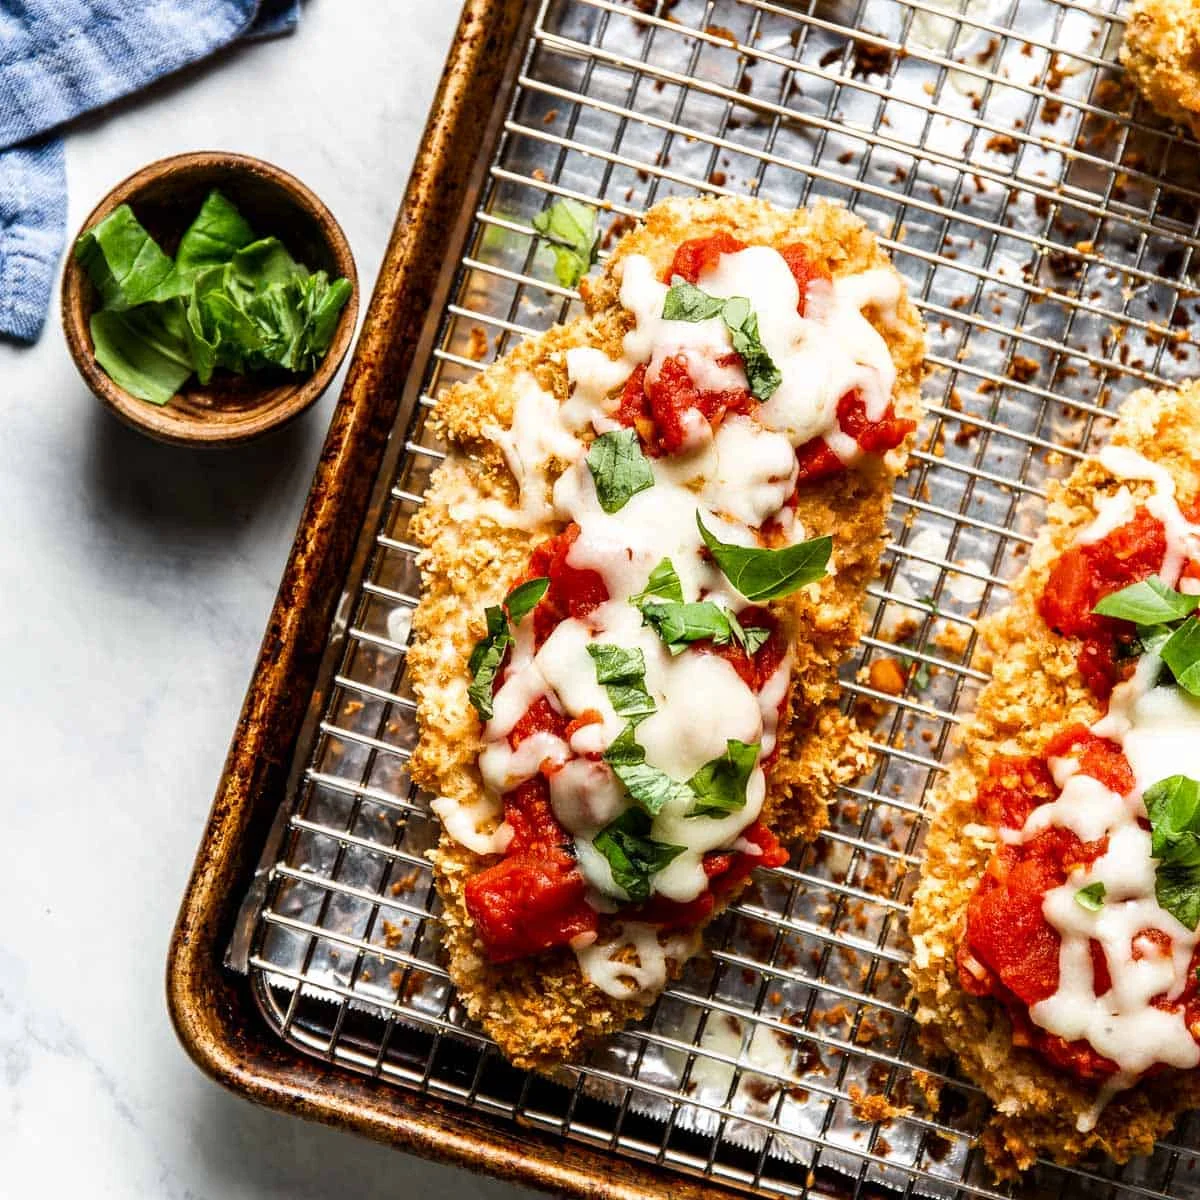
Oven-baked chicken Parmesan pairs crisp panko-coated chicken with tomato sauce, melted mozzarella and fresh basil. It brings the familiar American-Italian combination to the table without frying the chicken.
Ingredients
- 135 g (1½ cups)panko breadcrumbs
- 15 ml (1 tablespoon)olive oil
- 28 g (1 oz; approximately 120 ml/½ cup)grated Parmesan cheese
- 60 g (½ cup)plain flour
- 1 teaspoonkosher salt
- ½ teaspoonblack pepper
- 1½ teaspoonsgarlic powder
- 3egg whites
- 15 ml (1 tablespoon)water
- as neededvegetable oil cooking spray
- 3 (boneless and skinless, sliced into cutlets; 170–227 g/6–8 oz each)chicken breasts
- 75 g (¾ cup)shredded mozzarella cheese
- 15 ml (1 tablespoon)minced fresh basil
- 2 cans (397 g/14 oz each)crushed tomatoes
- 4 clovesgarlic, minced
- 15 ml (1 tablespoon)tomato purée
- 5 ml (1 teaspoon)olive oil
- ⅛ teaspoon (optional)red pepper flakes
- 15 ml (1 tablespoon)minced fresh basil leaves
Instructions
- 1
Toast the panko
Put the panko and 15 ml (1 tablespoon) olive oil in a large non-stick frying pan. Cook, stirring often, for 9–10 minutes until golden, then set aside to cool.
- 2
Prepare the oven
Heat the oven to 230°C (450°F). Line a rimmed baking tray with foil, set a wire rack on top and coat the rack with vegetable oil cooking spray.
- 3
Set up coating dishes
Arrange three shallow dishes side by side. In the first, combine the flour, garlic powder, salt and black pepper. Whisk the egg whites and water together in the second. In the third, mix the cooled panko with the Parmesan.
- 4
Dry the chicken
Pat each chicken cutlet dry with kitchen paper.
- 5
Coat the cutlets
Dredge each cutlet in flour and shake off the excess. Dip it in the egg whites, then coat it in the panko and Parmesan, pressing the crumbs on. Place the coated chicken on the wire rack.
- 6
Bake the chicken
Lightly spray the tops of the cutlets with vegetable oil spray. Bake for 15–20 minutes, until a thermometer inserted into a chicken breast reads 74°C (165°F).
- 7
Make the sauce
While the chicken bakes, heat 5 ml (1 teaspoon) olive oil with the garlic, tomato purée and red pepper flakes in a large frying pan over medium heat, until the mixture coats the bottom of the pan. Stir in the crushed tomatoes and season with salt and pepper. Cook, stirring occasionally, for about 15–20 minutes until thickened. Take the pan off the heat and stir in the basil.
- 8
Add sauce and cheese
When the chicken is cooked, take it out of the oven. Spoon 2 tablespoons of tomato sauce over each cutlet, then add 2 tablespoons or more mozzarella. Return the chicken to the oven and grill for 5 minutes, until the cheese has melted.
- 9
Finish and serve
Sprinkle each cutlet with ribbons of basil and Parmesan cheese before serving.
What is chicken Parmesan?
Chicken Parmesan is an Italian-American dish built around breaded chicken, tomato sauce and cheese. This oven-baked take keeps that familiar combination but uses a rack and toasted panko rather than frying the cutlets.
Panko gives the coating a light, crisp texture, while the tomato sauce and fresh basil bring a savoury, bright finish.
Nutrition and macros by portion
The nutrition label shows one serving as written: 310 calories, 24g protein, 32g carbs, 10g fat.
| Portion | Adjustment | kcal | Protein | Carbs | Fat |
|---|---|---|---|---|---|
| Lighter | Use less mozzarella | 217 kcal | 17g | 22g | 7g |
| This serving | As written | 310 kcal | 24g | 32g | 10g |
| Hungry | Add pasta on the side | 465 kcal | 36g | 48g | 15g |
The panko, flour and tomatoes provide most of the carbohydrates; olive oil, mozzarella and Parmesan contribute fat, while the chicken and cheeses provide protein. Serve with a generous side of vegetables or salad for a balanced plate.
Why toast the panko first?
Even browning: Toasting the panko in a little olive oil before coating the chicken gives the crumbs a head start in the oven. Stir frequently and take the pan off the heat when the crumbs are golden.
Cool crumbs: Let the panko cool before mixing it with Parmesan, so the cheese is easy to distribute through the coating.
How to coat the chicken
Dry cutlets: Patting the chicken dry helps the flour adhere instead of clumping on a damp surface.
Three stages: Shake off excess flour, dip in the whisked egg whites and press the panko mixture onto the cutlet. Keeping the dishes in order makes the coating process neater.
Getting crisp coating and tender chicken
Airflow: The wire rack lets hot air circulate around the chicken, while the light spray on top helps the crumb coating brown.
Doneness: The recipe gives a 15–20 minute baking window; check the thickest part of a cutlet with a thermometer and look for 74°C (165°F). Cutlets of different thicknesses may finish at different times.
A thick, fresh tomato sauce
Cook down: The sauce simmers for about 15–20 minutes, until it thickens. Stir occasionally as it cooks so the ingredients combine evenly.
Fresh basil: Stir the basil in after taking the pan off the heat. This keeps its flavour distinct from the cooked garlic and tomato.
Melting the cheese
Sauce first: Add 2 tablespoons of tomato sauce to each cooked cutlet, then top with 2 tablespoons or more mozzarella. This gives the cheese a saucy base without covering the entire crumb coating.
Brief finish: Return the tray to the oven for about 5 minutes to melt the mozzarella, then finish with basil ribbons and Parmesan.
What to serve alongside
Pasta or bread: Serve with pasta, crusty bread or another favourite side to make a fuller meal and catch any extra sauce.
Fresh contrast: A green salad or simply cooked vegetables work well alongside the rich cheese and tomato sauce.
Recipe notes & tips
- Keep the toasted panko moving in the pan so it colours evenly.
- Use shallow dishes wide enough to coat each cutlet without folding it.
- Press the breadcrumb mixture onto the chicken so it adheres well.
- Place the cutlets in a single layer on the rack.
- Check the thickest cutlet with a thermometer rather than relying only on the cooking time.
Variations
- Herb crumb: Mix dried Italian herbs into the panko and Parmesan before coating.
- Spicier sauce: Increase the red pepper flakes for a hotter tomato sauce.
- Extra basil: Add more fresh basil at the table for a stronger herbal finish.
- Cheese blend: Replace some of the mozzarella with provolone for a different melt.
- Pasta supper: Serve the cutlets with pasta and the remaining tomato sauce.
Common mistakes to avoid
- Wet chicken: Pat the cutlets dry before dredging so the flour coating can adhere.
- Uneven crumbs: Stir the panko frequently as it toasts to prevent some crumbs browning faster than others.
- Loose coating: Press the panko mixture onto the chicken rather than merely dipping it.
- Soggy underside: Use the wire rack on the foil-lined tray so air can circulate beneath the cutlets.
- Guessing doneness: Check the thickest part of the chicken reaches 74°C (165°F).
- Overcooking the sauce: Stir it occasionally and take it off the heat once thickened, after about 15–20 minutes.
How to store
Refrigerate leftovers in an airtight container for up to 3 days. Reheat in an oven until hot throughout; the coating may soften after storage.
Frequently asked questions
Can I use chicken cutlets instead of slicing chicken breasts?
Yes. Use boneless, skinless cutlets and follow the same coating and baking method. Check each piece for doneness, as thickness can vary.
How do I know when the chicken is cooked?
Insert a thermometer into the thickest part of a cutlet; it should read 74°C (165°F).
Can I make the tomato sauce ahead?
Yes. Make it ahead and refrigerate it, then reheat it before spooning it over the cooked chicken.
Can I skip the red pepper flakes?
Yes. They are optional, so leave them out for a milder sauce.
Why is the panko toasted before baking?
Toasting gives the crumbs colour before they go into the oven and helps them form a golden coating.
Can I prepare the coated chicken in advance?
For the crispest coating, bake it soon after breading. Keep raw coated chicken refrigerated if it must wait, and cook it thoroughly before serving.
Cook it from the original
This recipe comes from foolproofliving.com. Their page has the author’s own photos, notes and tips — the best place to cook it from.
Open the recipe on foolproofliving.com