
The Best Carnitas Recipe
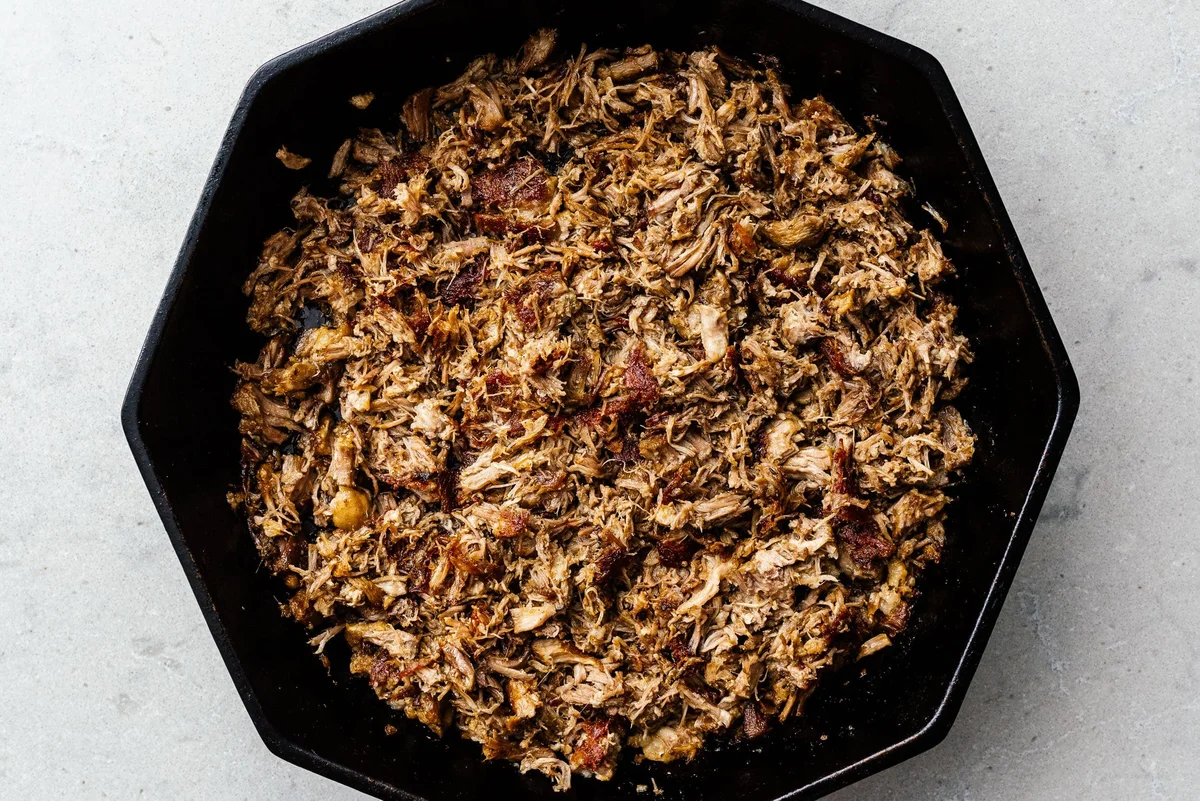
These Mexican-style carnitas are pork shoulder cooked under pressure with orange, cola and spices, then crisped in a pan. They make tender, flavourful meat for tacos, burritos and other easy meals.
Ingredients
- 30 ml (2 tbsp)high-heat oil
- 1.36 kg (3 lb)pork shoulder or butt, cubed and well marbled
- to tastesalt
- to tasteblack pepper
- 1 mediumonion, chopped
- 60 ml (¼ cup)juice of ½ orange
- 120 ml (½ cup)Coke (Coke Zero preferred)
- 2 stickscinnamon
- 30 ml (2 tbsp)oregano, preferably Mexican
- 10 ml (2 tsp)ground cayenne pepper
- 10 ml (2 tsp)ground cumin
- 2bay leaves
Instructions
- 1
Heat and season
Coat the bottom of the Instant Pot with about 30 ml (2 tbsp) of high-heat oil and preheat it on high sauté. Cube the pork, season it with salt and pepper, and keep an eye on the pot so the oil does not start smoking.
- 2
Brown the pork
Brown two sides of the pork cubes, working in batches if needed.
- 3
Pressure cook
Add the remaining ingredients. Set the Instant Pot to high pressure for 45 minutes, then release the pressure quickly.
- 4
Shred and crisp
Use two forks to shred the pork cubes completely, then transfer the meat to a cast-iron skillet or another pan. Working in batches, spread the meat in a thin layer about 1.3 cm (½ inch) thick and crisp it over medium heat for 4–5 minutes. When all the meat is crisped, add about 120 ml (½ cup) of the braising liquid.
- 5
Mix and serve
Mix the meat with the braising liquid, then serve in tacos, burritos or however you like.
What are carnitas?
Carnitas are a Mexican preparation of pork cooked until tender, then often crisped before serving. The name means “little meats”, a fitting description for the shredded pieces that go into tacos and other dishes.
This version uses a pressure cooker to make the pork tender, then finishes it in a skillet for browned, crisp edges. Orange juice, cola and warm spices season the meat as it cooks.
Nutrition and macros by portion
The nutrition label shows one serving as written: 342 calories, 27g protein, 2g carbs, 25g fat.
| Portion | Adjustment | kcal | Protein | Carbs | Fat |
|---|---|---|---|---|---|
| Lighter | Smaller portion, more vegetables | 239 kcal | 19g | 2g | 17g |
| This serving | As written | 342 kcal | 27g | 2g | 25g |
| Hungry | Larger portion of carnitas | 513 kcal | 40g | 3g | 37g |
Most of the carbohydrates come from the orange juice and cola, while the pork shoulder provides much of the protein and fat. Serve a portion with vegetables or salad for a more balanced plate.
Choose well-marbled pork
Pork shoulder: Its marbling helps keep the meat juicy through pressure cooking and gives the shredded pork a rich texture. Cut it into cubes so it is easier to brown and shred.
Brown before pressure cooking
The initial browning adds colour to the pork before it cooks in the pot. Brown two sides of each piece, in batches if necessary, and watch the oil so it does not smoke.
Let the pressure cooker do the work
Braising liquid: Orange juice and cola join the onion, cinnamon, oregano, cayenne, cumin and bay leaves in the pot. The recipe calls for 45 minutes at high pressure, followed by a quick release.
Shredding: Once cooked, the pork should come apart readily under two forks. Shred it completely before transferring it to the skillet.
Crisp in a thin layer
Batch size: Keep the meat in a thin layer about 1.3 cm (½ inch) thick so it can crisp in the pan. Work in batches rather than piling all the shredded pork in at once.
Finish: Crisp each batch for 4–5 minutes over medium heat, then mix in about 120 ml (½ cup) of the braising liquid. This brings moisture and flavour back to the meat.
Serve it your way
Tacos and burritos are suggested ways to serve the carnitas, and the shredded pork also suits other meals where you want a savoury filling. Add it to your chosen serving just before eating so the crisped edges are at their best.
Recipe notes & tips
- Use a heavy-based skillet for the crisping step if you do not have cast iron.
- Brown the pork in batches if the pieces do not fit in a single layer.
- Keep the skillet at medium heat while crisping the shredded pork.
- Measure out about 120 ml (½ cup) of braising liquid for the final mix.
- Serve the carnitas soon after crisping for the best contrast in texture.
Variations
- Milder spice: Use less cayenne for a gentler heat.
- More citrus: Add extra orange juice to the braising liquid.
- Taco filling: Spoon the finished pork into tacos just before serving.
- Burrito filling: Use the carnitas in burritos as suggested in the recipe.
Common mistakes to avoid
- Smoking oil: Keep an eye on the Instant Pot as it preheats and avoid letting the oil smoke.
- Crowded browning: Brown the pork in batches so the cubes have room in the pot.
- Large skillet batches: Spread the shredded pork in a thin layer and crisp it in batches.
- Skipping the braising liquid: Mix in about 120 ml (½ cup) after crisping to finish the meat.
- Stopping before shredding: Pull the pork apart completely with two forks before crisping.
How to store
Refrigerate leftover carnitas in a covered container and use within 3–4 days. Reheat in a pan until hot, crisping the meat again if desired.
Frequently asked questions
Can I make these carnitas without an Instant Pot?
This method is written for an Instant Pot and does not give an alternative cooking method.
How long do the carnitas cook under pressure?
Cook them at high pressure for 45 minutes, then use a quick release.
Why crisp the pork after pressure cooking?
The skillet step gives the shredded meat crisp edges after it has become tender in the pressure cooker.
Do I need to crisp the pork in batches?
Yes, if needed. Keep each batch in a thin layer about 1.3 cm (½ inch) thick so it can crisp in the pan.
How much braising liquid should I add at the end?
Add about 120 ml (½ cup) after crisping, then mix it through the meat.
What can I serve carnitas with?
The recipe suggests tacos and burritos, or serving the meat in another way you like.
Cook it from the original
This recipe comes from iamafoodblog.com. Their page has the author’s own photos, notes and tips — the best place to cook it from.
Open the recipe on iamafoodblog.com