
Crispy Prosciutto
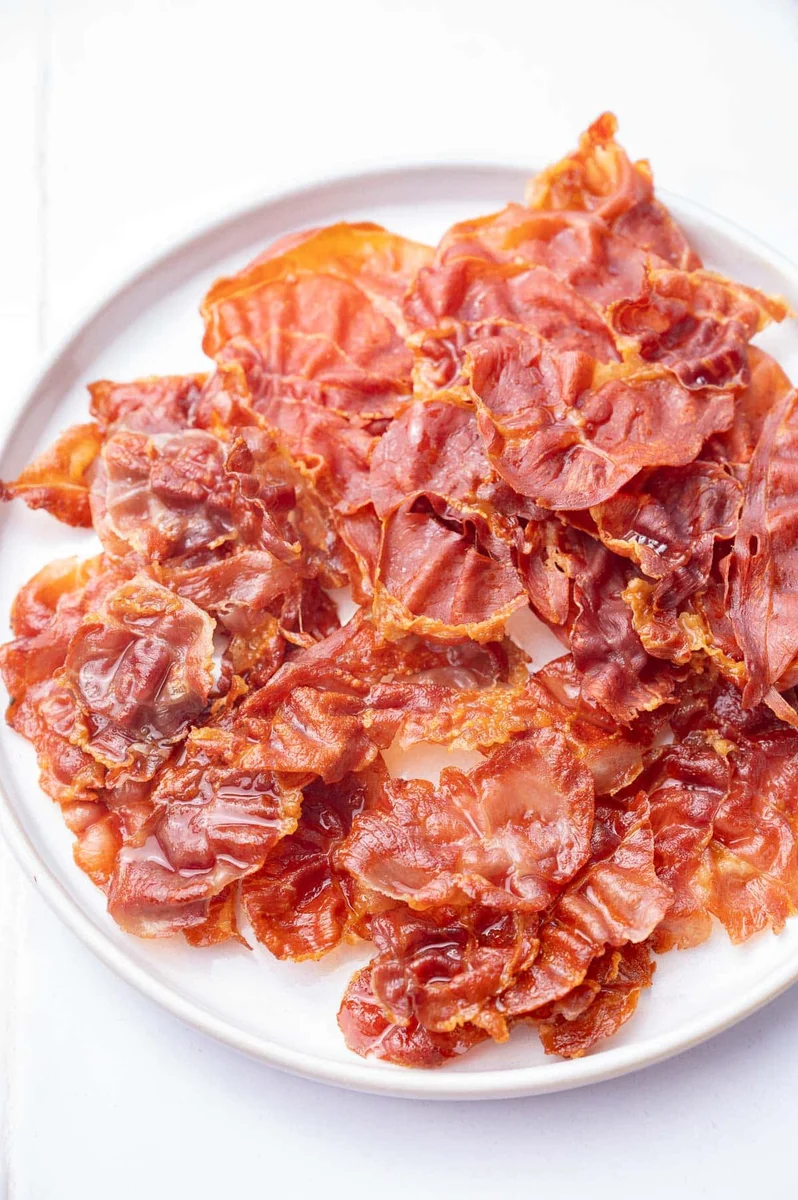
Crispy prosciutto turns thin slices of salty, cured ham into a crisp topping for salads, pasta, eggs and more. Bake it in the oven or cook it in a pan, then let it cool so it firms up further.
Ingredients
- 8 slicesprosciutto crudo (not prosciutto cotto)
- 7.5 ml (½ tablespoon)oil (only for the stovetop method)
Instructions
- 1
Arrange the prosciutto
For the oven method, line a baking sheet with baking parchment and lay the prosciutto slices on it in a single layer, without overlapping.
- 2
Bake until crisp
Bake at 200°C for about 10–12 minutes, until browned and crisp. Watch closely towards the end to prevent burning. Transfer the slices to a plate; they will crisp up further as they cool.
- 3
Heat the oil
For the stovetop method, heat the oil in a non-stick pan over medium heat. Arrange the prosciutto in the pan without overlapping.
- 4
Cook both sides
Cook until browned, then turn the slices and cook until browned throughout, taking care not to burn them. Transfer to a plate and let them cool; they will crisp up more as they do.
What is crispy prosciutto?
Prosciutto is Italian dry-cured ham, usually served in thin slices. This recipe gives it a crisp texture by baking or pan-cooking it, making it easy to crumble or lay over other foods.
The method is straightforward: use prosciutto crudo rather than cooked prosciutto, keep the slices in a single layer, and let them cool before judging their final crispness.
Nutrition and macros by portion
The nutrition label shows one serving as written: 150 calories, 0g protein, 0g carbs, 0g fat.
| Portion | Adjustment | kcal | Protein | Carbs | Fat |
|---|---|---|---|---|---|
| Lighter | Use less prosciutto | 105 kcal | 0g | 0g | 0g |
| This serving | As written | 150 kcal | 0g | 0g | 0g |
| Hungry | Add another serving | 225 kcal | 0g | 0g | 0g |
The prosciutto provides most of this serving's energy and fat, while the recipe contains no meaningful carbohydrate source; the nutrition figures supplied report 0 g protein, so they do not describe the ingredient's expected protein contribution. Pair a few crisps with vegetables or a salad for a more balanced plate.
Choosing the prosciutto
Type: Use prosciutto crudo, as specified, rather than prosciutto cotto. The recipe relies on thin cured slices that can brown and crisp during cooking.
Thickness: Evenly sliced pieces cook more consistently. If some slices are much thinner than others, check them individually near the end.
Baking or pan-cooking
Oven: Arrange the slices on baking parchment with a little space between them. This method cooks the batch on a flat tray without needing to turn each slice.
Stovetop: Use a non-stick pan over medium heat and add the measured oil. Cook the slices in a single layer, turning them once they have browned.
Getting the crisp texture
Single layer: Overlapping slices can cook unevenly, so leave them separate on the tray or in the pan. Cook in batches if they do not fit without touching.
Cooling: The prosciutto firms up as it cools, so transfer it to a plate before deciding whether it is crisp enough. Handle it gently once browned, as crisp slices can break.
Timing and doneness
Oven cue: Bake at 200°C for about 10–12 minutes, checking towards the end. Look for browned, crisp slices, and remove them before they burn.
Pan cue: The stovetop method gives no fixed cooking time, so use the colour as your guide. Turn the slices after browning and cook the second side until browned too.
Ways to serve it
Toppings: Crumble the cooled crisps over salads, pasta or eggs, or serve them whole alongside a meal. Their salty flavour works well as a finishing touch.
Balance: Since the prosciutto is salty, pair it with ingredients that are mild or fresh, such as leafy greens or plain eggs. Add it at the end to keep its crisp texture.
Recipe notes & tips
- Keep the prosciutto slices separate so they brown evenly.
- Check the oven closely during the final minutes because the slices can burn quickly.
- Use medium heat for the stovetop method rather than turning the pan up to speed cooking.
- Let the slices cool on a plate before checking their final crispness.
- Cook the prosciutto in batches if you cannot fit it in a single layer.
Variations
- Salad topping: Break the cooled slices into small pieces and scatter them over a salad.
- Pasta finish: Crumble the crisps over pasta just before serving to retain their texture.
- Egg garnish: Add a crisp slice alongside or over cooked eggs.
- Oven batch: Make several slices at once on a baking sheet, keeping them in a single layer.
- Pan batch: Cook the slices in batches if your pan is too small to hold them without overlapping.
Common mistakes to avoid
- Overlapping slices: They can cook unevenly, so arrange them in a single layer or work in batches.
- Leaving them unattended: Prosciutto can burn near the end of cooking, so keep an eye on it.
- Judging them while hot: They crisp further as they cool, so wait before assessing the texture.
- Using high heat in the pan: The outside may burn before the slices brown evenly; keep the heat at medium.
- Using prosciutto cotto: Choose prosciutto crudo, as specified in the recipe.
How to store
Cool the crisps completely, then store them in an airtight container in the fridge and use within 3 days. Reheat briefly in a hot oven or a dry pan to restore some crispness, and let them cool again before serving.
Frequently asked questions
Can I make crispy prosciutto in the oven?
Yes. Arrange the slices on baking parchment without overlapping and bake at 200°C for about 10–12 minutes, watching closely towards the end.
Can I cook it without oil?
The recipe only specifies oil for the stovetop method. For a no-oil option, use the oven method on baking parchment.
How do I know when the prosciutto is done?
Look for browned, crisp slices, and remove them before they burn. They will firm up more as they cool.
Why is my prosciutto still soft?
It may need more time, or it may not have cooled yet. Check that the slices were not overlapping, then let them cool before judging the texture.
Can I prepare it ahead?
Yes. Cool the slices fully and store them in an airtight container in the fridge for up to 3 days. Reheat briefly before serving if you want to bring back some crispness.
Cook it from the original
This recipe comes from everyday-delicious.com. Their page has the author’s own photos, notes and tips — the best place to cook it from.
Open the recipe on everyday-delicious.com