
Gluten Free Rice Roti Recipe
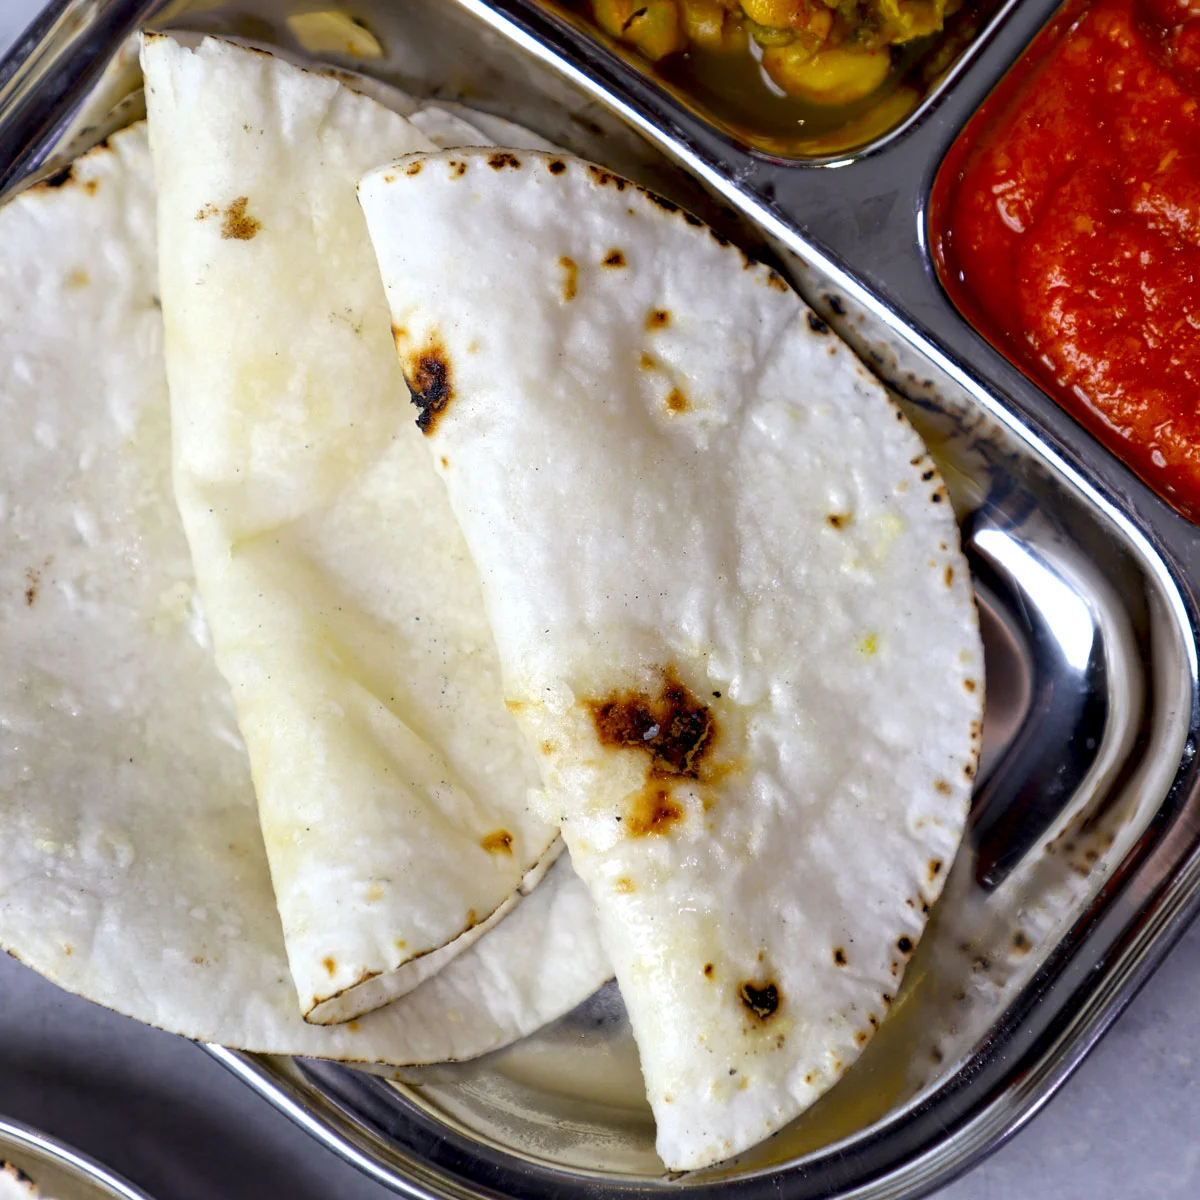
Chawal ki roti is an Indian flatbread made with rice flour rather than wheat flour. This simple, gluten-free version uses a brief rest to make the dough easier to shape before it is cooked on a hot griddle.
Ingredients
- 160 g (1 cup)rice flour (chawal ka atta), plus extra for dusting
- 240 ml (1 cup)water
- 5 ml (1 teaspoon)refined oil
- 1.25 ml (¼ teaspoon), or to tastecooking salt
Instructions
- 1
Boil the water
Put the oil, salt and water in a kadhai or small saucepan. Bring the water to the boil, then turn off the heat.
- 2
Mix the flour
Add the rice flour and stir with chopsticks or a wooden rolling pin. Cover and leave the mixture to rest for 10 minutes.
- 3
Transfer the dough
When the dough is a little easier to handle, move it to a wide mixing bowl or a clean, flat work surface.
- 4
Knead and rest
Bring the dough together and work it until smooth, pliable and not sticky. Cover with a clean muslin cloth and leave it to rest for 10 minutes.
- 5
Heat the griddle
Set a non-stick frying pan or tawa over a medium heat. Sprinkle a pinch of rice flour over the surface to help prevent sticking.
- 6
Shape the rotis
Divide the dough into small balls. Take one ball at a time and roll it into a chapati shape, dusting with rice flour as needed.
- 7
Cook until marked
Carefully place a roti on the preheated tawa. Cook for a few minutes on each side, until brown, charred marks appear. If you wish, finish it by placing it directly over a flame to puff.
- 8
Serve the rotis
Transfer each cooked roti to a plate. Brush with ghee to keep it soft, if you like. The rice rotis are ready to serve.
What is chawal ki roti?
Chawal ki roti is an Indian flatbread whose name refers to rice flour. Unlike wheat chapati dough, rice flour dough has no gluten, so it needs a different handling approach.
This version starts by mixing the flour with hot water, which helps bring the dough together. Resting it before shaping makes it more manageable for rolling and cooking.
Nutrition and macros by portion
The nutrition label shows one serving as written: 103 calories, 2g protein, 21g carbs, 1g fat.
| Portion | Adjustment | kcal | Protein | Carbs | Fat |
|---|---|---|---|---|---|
| Lighter | Skip the optional ghee | 72 kcal | 1g | 15g | 1g |
| This serving | As written | 103 kcal | 2g | 21g | 1g |
| Hungry | Serve an extra roti | 155 kcal | 3g | 32g | 2g |
Rice flour provides most of the carbohydrate, while the small amount of oil contributes fat; the roti itself contains little protein. To make a more balanced plate, serve it with a protein-rich dal or another protein dish and vegetables.
Why hot water matters
Hot water: the recipe pours rice flour into water that has just boiled, with the heat switched off. Stir carefully at this stage, as the mixture will be hot.
Rest: cover the mixture for 10 minutes before handling it. This gives it time to cool somewhat and become easier to work with.
Getting the dough ready
Kneading: bring the mixture together and work it until it is smooth, pliable and not sticky. If it is still too hot to handle, give it a little more time to cool before transferring it.
Second rest: cover the kneaded dough with a clean muslin cloth for 10 minutes. Keep it covered while shaping the rotis so the dough does not dry out.
Rolling without cracking
Small portions: divide the dough into small balls and roll them one at a time. Rice-flour dough is less stretchy than wheat dough, so handle each round gently.
Dusting: use rice flour on the work surface and rolling pin as needed to limit sticking. Use a light touch so the roti stays in one piece.
Cooking and checking doneness
Griddle heat: preheat the non-stick pan or tawa over medium heat and dust it with a pinch of flour. A hot surface helps the roti cook and develop its characteristic marks.
Doneness: cook for a few minutes on each side, looking for brown, charred spots before turning or removing the roti. The method also gives the option of finishing it over a flame to puff.
Serving the roti
Serve the rotis warm alongside an Indian curry, dal or vegetable dish. Their mild rice flavour makes them a useful accompaniment for scooping up sauces.
Optional ghee: brush it over the cooked rotis if you want to help keep them soft. Ghee is a serving option in the method, not one of the listed dough ingredients.
Recipe notes & tips
- Have the rice flour measured and ready before you bring the water to the boil.
- Use a wide bowl or a clean, flat worktop when kneading the warm dough.
- Keep the dough covered with a clean cloth between shaping the rotis.
- Dust with rice flour sparingly so the rounds do not become coated in excess flour.
- Use a medium heat and wait for brown marks before taking each roti off the griddle.
- Brush with ghee only after cooking, if you want the rotis to stay soft.
Variations
- Ghee finish: brush the cooked rotis with ghee while they are warm.
- Flame finish: place a griddled roti directly over a flame to encourage it to puff.
- Salt to taste: adjust the cooking salt to suit the dishes you plan to serve alongside.
- Serve with dal: pair the rotis with dal for a traditional-style meal.
- Serve with vegetables: add a vegetable curry or cooked vegetables alongside.
Common mistakes to avoid
- Handling the mixture too soon: it will be very hot after the boiling water is added, so leave it covered for the full 10 minutes first.
- Skipping the second rest: the dough may be harder to shape, so cover it and let it rest for 10 minutes after kneading.
- Letting the dough dry out: keep it under a clean muslin cloth while you shape the rotis.
- Using too much dusting flour: add only what is needed to keep the dough from sticking.
- Cooking over excessive heat: the surface may brown before the roti cooks through, so use a medium heat.
- Turning too early: wait for brown charred marks to appear before moving on to the next side.
How to store
Keep leftover rotis in an airtight container in the fridge and use within 2 days. Reheat in a dry pan over a medium heat until warmed through; brush with a little ghee after reheating if desired.
Frequently asked questions
Is rice roti gluten-free?
The dough in this recipe is made with rice flour, water, oil and salt, with no wheat flour listed. Check the rice flour packaging if you need to avoid cross-contamination.
Can I make the dough ahead?
The recipe includes two 10-minute rests and is designed to be shaped and cooked afterwards. For the best texture, prepare and cook the rotis close to serving time.
Why is my rice roti cracking?
Rice-flour dough is less elastic than wheat dough, so it can be fragile. Make sure it is smooth and pliable after kneading, keep it covered, and roll each portion gently.
How do I know when the roti is cooked?
Look for brown, charred marks on both sides after cooking for a few minutes per side. The recipe also suggests an optional finish directly over a flame to puff the roti.
Do I have to use ghee?
No. The recipe describes brushing the cooked rotis with ghee as optional, so you can serve them without it.
What can I serve with rice roti?
Serve it warm with dal, curry or a vegetable dish. Its mild flavour works well with saucy accompaniments.
Cook it from the original
This recipe comes from funfoodfrolic.com. Their page has the author’s own photos, notes and tips — the best place to cook it from.
Open the recipe on funfoodfrolic.com