
Chicken Fried Pork Fingers
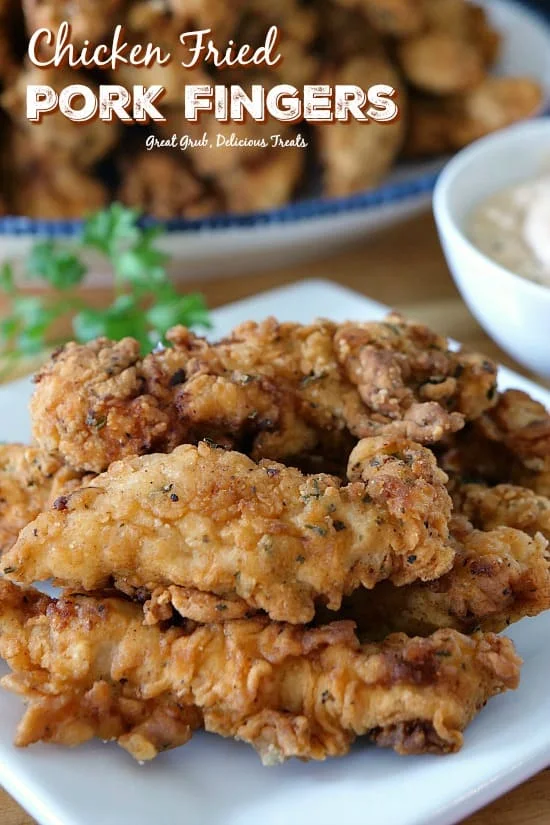
Chicken-fried pork fingers are strips of pork coated in seasoned flour and fried until crisp and golden. They make a hearty, crunchy main that’s easy to serve with your favourite dipping sauce and sides.
Ingredients
- 907 g (2 lb)boneless pork, sliced into 1.3 cm strips
- 240 ml (1 cup)buttermilk
- 2eggs
- 375 g (3 cups), dividedplain flour
- 1 tbspdried parsley
- 1 tbspgarlic salt
- 1 tspSlap Ya Mama® seasoning
- 1 tspblack pepper
- 1/2 tspcrushed red pepper
- 1 tsponion powder
- 240–480 ml (1–2 cups)vegetable oil
Instructions
- 1
Heat the oil
In an electric skillet or large cast-iron pan, heat the oil to 190°C (375°F).
- 2
Cut the pork
Slice the pork into 1.3 cm strips and set them on a plate.
- 3
Prepare the flour
As the oil heats, put 125 g (1 cup) of flour in a large resealable bag. Put the remaining flour and all the seasonings in a second bag, then shake to combine.
- 4
Mix egg and buttermilk
Whisk the eggs and buttermilk together in a bowl large enough to hold the pork strips.
- 5
Coat with plain flour
When the oil is ready, put about 6–8 pork strips in the bag of plain flour. Seal it and shake to coat.
- 6
Dip and season
Dip the strips in the egg mixture, then coat them in the seasoned flour before placing them in the skillet.
- 7
Fry until golden
Fry the pork until golden brown on both sides, about 3–4 minutes per side.
- 8
Keep the first batch warm
When the first batch is cooked, transfer it to a paper-towel-lined plate and place it in an oven preheated to 80°C (175°F) to keep warm while you cook the rest.
- 9
Cook the remaining pork
Repeat the coating process with the remaining pork.
- 10
Coat just before frying
For best results, coat each batch of pork shortly before it goes into the skillet.
What are chicken-fried pork fingers?
This dish takes the crisp, flour-coated style of chicken-fried cooking and applies it to strips of pork. The name describes the preparation rather than the meat: the pork is dipped, dredged and fried.
Here, a plain-flour coating comes first, followed by an egg-and-buttermilk dip and a seasoned flour layer. That sequence helps build a crisp, well-flavoured crust around each strip.
Nutrition and macros by portion
The nutrition label shows one serving as written: 850 calories, 56g protein, 73g carbs, 34g fat.
| Portion | Adjustment | kcal | Protein | Carbs | Fat |
|---|---|---|---|---|---|
| Lighter | Use less oil | 595 kcal | 39g | 51g | 24g |
| This serving | As written | 850 kcal | 56g | 73g | 34g |
| Hungry | Add a larger portion | 1275 kcal | 84g | 110g | 51g |
Pork provides most of the protein, while the flour coating supplies much of the carbohydrate. The frying oil and eggs contribute much of the fat, and the garlic salt and seasoning blends are the main sodium sources. Serve a portion with vegetables or salad to round out the plate.
The two-flour coating
Plain flour: the first dusting gives the wet dip a dry surface to cling to. Shake off loose excess so the coating does not become thick or patchy.
Seasoned flour: parsley, garlic salt, pepper, onion powder, crushed red pepper and the Cajun-style seasoning bring savoury flavour and a little heat. Mix them thoroughly through the flour before coating.
Keep the coating crisp
Coat to order: the recipe recommends breading the pork just before frying. Leaving coated strips waiting can make the flour damp and less likely to turn crisp.
Work in batches: coat about 6–8 strips at a time, then fry them without crowding the pan. If the pan is packed, the oil temperature can drop and the coating may brown less evenly.
Watch the oil and doneness
Oil temperature: heat the oil to 190°C (375°F) before adding the pork. Keep an eye on the heat between batches, since adding cold strips can lower the temperature.
Colour and timing: fry each side for about 3–4 minutes, until the coating is golden brown. Check that the pork is cooked through before serving; thickness can affect how long it takes.
Keep batches warm
Set cooked strips on a plate lined with paper towels, then hold them in the oven at 80°C (175°F) while frying the remaining pork. Avoid stacking them, which can soften the crisp coating.
Serve the batches as soon as practical after frying. A dipping sauce and a fresh or lightly dressed side make a good contrast to the crunchy coating.
What to serve alongside
A simple green salad, coleslaw or steamed vegetables can balance the meal with a fresh, crisp side. For a more filling plate, add chips, mashed potatoes or another starchy side.
Choose a dip that suits the seasoning, such as a creamy dressing or a tangy sauce. Keep the dip separate until serving so the coating stays crunchy.
Recipe notes & tips
- Use a pan with enough space to fry the strips in batches without crowding.
- Shake each bag well so the flour and seasonings are evenly mixed.
- Let excess egg mixture drip off before transferring the pork to the seasoned flour.
- Use a thermometer to check that the oil reaches 190°C (375°F).
- Line the holding plate with fresh paper towels to absorb excess oil.
- Keep the cooked strips in a single layer while they wait in the warm oven.
Variations
- Milder coating: reduce or leave out the crushed red pepper.
- Extra heat: add a little more crushed red pepper to the seasoned flour.
- Saucy finish: serve with a tangy or creamy dipping sauce on the side.
- Herb variation: add a little more dried parsley to the flour mixture.
- Pork choice: use evenly cut boneless pork so the strips cook at a similar rate.
Common mistakes to avoid
- Crowded pan: too many strips can lower the oil temperature; fry in batches.
- Coating too early: the flour can turn damp while waiting; bread each batch just before frying.
- Uneven strips: pieces of different thickness cook at different speeds; cut them as evenly as possible.
- Oil not hot enough: the coating may absorb more oil; wait until the oil reaches 190°C (375°F).
- Over-browning: the crust can darken before the pork is done; keep the heat steady and check the thickest pieces.
- Stacking cooked strips: trapped steam softens the coating; hold them in a single layer.
How to store
Refrigerate cooled leftovers in an airtight container for up to 3 days. Reheat in an oven or air fryer until hot to help restore some crispness; microwaving can leave the coating soft.
Frequently asked questions
Can I prepare the coating ahead?
You can mix the seasoned flour ahead and keep it covered. For the best coating, bread the pork shortly before frying.
How do I know when the oil is ready?
The recipe specifies 190°C (375°F), so a cooking thermometer is the most reliable check. Allow the oil to return to temperature between batches.
Can I use a different pan?
Yes. The recipe suggests an electric skillet or a large cast-iron pan; use another sturdy pan that can hold the oil safely and maintain an even heat.
Can I make these less spicy?
Reduce or omit the crushed red pepper. The seasoning blend may also contribute heat, so adjust it to suit your preference.
Why is the coating coming off?
Excess liquid or a coating left to sit can make it less secure. Let extra egg mixture drip off and fry the strips soon after breading.
What goes well with pork fingers?
Try them with a fresh salad, coleslaw or vegetables, and serve a dipping sauce on the side. Add a potato side for a more substantial meal.
Cook it from the original
This recipe comes from greatgrubdelicioustreats.com. Their page has the author’s own photos, notes and tips — the best place to cook it from.
Open the recipe on greatgrubdelicioustreats.com