
How to cook beans in a pressure cooker
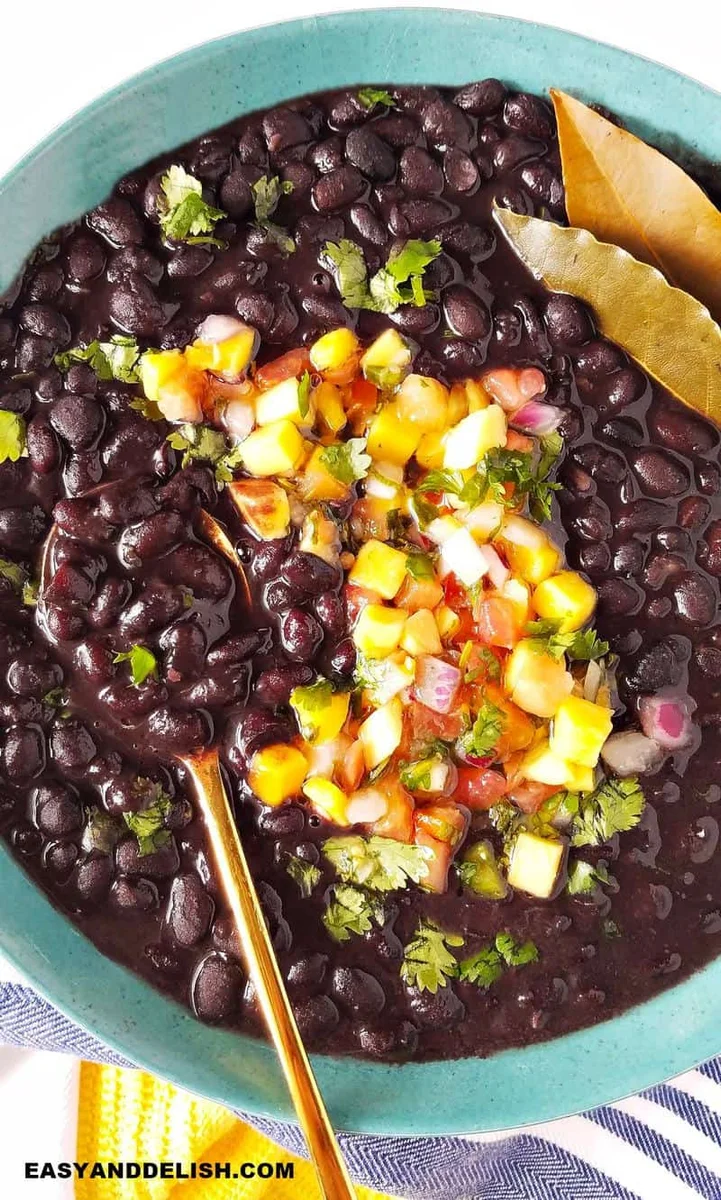
Tender black beans with a thick, savoury broth, cooked in a stovetop or electric pressure cooker without soaking. The onion, garlic and spices are added after pressure-cooking, so the beans cook without salt and take on their flavour as the broth simmers.
Ingredients
- 454 gdried black beans
- 1.44 litres (6 cups)water
- 30 ml (2 tablespoons), dividedolive oil
- ¼ mediumyellow onion, chopped
- 4 cloves, choppedgarlic
- 2bay leaves
- 1 tablespoon plus 1 teaspoon, or moresalt
- ½ teaspoonblack pepper
- ½ teaspoonground cumin
- 15 ml (1 tablespoon)red wine vinegar
- 2 tablespoonschopped fresh coriander or parsley (optional)
Instructions
- 1
Sort the beans
Pick through the beans, removing any stones or damaged beans.
- 2
Rinse and drain
Rinse the beans in a sieve. Do not soak them for this pressure-cooker method; drain and set aside.
- 3
Pressure-cook the beans
Put the beans in a stovetop or electric pressure cooker with 1.44 litres (6 cups) of water and 15 ml (1 tablespoon) of the oil. The oil helps limit foaming during cooking.
- 4
Set the cooker
Lock the lid and set the valve to seal. For an electric cooker, select the bean setting and set the time to 30 minutes. For a stovetop cooker, cook over high heat.
- 5
Release the pressure
When the cooking time is complete, turn the valve to release the pressure quickly, then remove the lid.
- 6
Cook the aromatics
Heat the remaining 15 ml (1 tablespoon) of oil in a non-stick frying pan over medium heat. Cook the chopped onion, stirring occasionally, until translucent. Add the garlic and cook for about 60 seconds, stirring occasionally.
- 7
Season the beans
Stir the cooked onion and garlic into the beans. Add the bay leaves, salt, pepper, cumin and vinegar. The recipe adds salt after pressure-cooking to avoid toughening the beans.
- 8
Simmer and thicken
For an electric cooker, use the sauté function and simmer uncovered for 10 to 15 minutes. For a stovetop cooker, simmer over medium heat for 10 to 15 minutes. Stir and remove the bay leaves. If you like, blend about 1 cup of cooked beans and broth until smooth.
- 9
Finish and serve
Stir the blended beans back into the pot, if using, to thicken the broth. Just before serving, scatter over the chopped coriander or parsley, if desired. Serve with white rice and meat of your choice, or use the beans as a base for other dishes.
What are pressure-cooked black beans?
Black beans cooked until tender in a seasoned broth are a familiar staple across the Americas. This version uses a pressure cooker to skip soaking and keeps the beans’ initial cooking simple, adding aromatics and seasoning afterwards.
A short uncovered simmer helps the broth take on the flavour of the onion, garlic, spices and vinegar. Blending some of the beans is an optional way to give it a creamier texture.
Nutrition and macros by portion
The nutrition label shows one serving as written: 228 calories, 12g protein, 36g carbs, 4g fat.
| Portion | Adjustment | kcal | Protein | Carbs | Fat |
|---|---|---|---|---|---|
| Lighter | Less oil, more vegetables | 160 kcal | 8g | 25g | 3g |
| This serving | As written | 228 kcal | 12g | 36g | 4g |
| Hungry | Larger bean portion | 342 kcal | 18g | 54g | 6g |
The beans provide most of the carbohydrates and much of the protein, while the olive oil contributes most of the fat. Serve a portion with vegetables alongside, or pair it with rice and a source of protein for a more complete plate.
Start with sorted, rinsed beans
Dry beans: pick out any stones and damaged beans before cooking, then rinse them well in a sieve.
No soaking: the method is designed to cook the beans directly in the pressure cooker. Drain them after rinsing, but do not leave them to soak.
Keep the first cooking stage simple
Water and oil: cook the beans with the measured water and 15 ml of oil. The recipe uses oil to help reduce foam during pressure-cooking.
Salt later: the beans are seasoned after the pressure stage. This keeps the cooking sequence in the recipe and gives the beans time to simmer with the seasonings afterwards.
Build flavour with onion and garlic
Onion: cook it in the remaining oil over medium heat until translucent, stirring now and then so it cooks evenly.
Garlic: add it once the onion has softened and cook for about 60 seconds. Stir it into the beans along with the bay leaves, spices, salt and vinegar.
Simmer for a thicker broth
Uncovered finish: simmer the seasoned beans for 10 to 15 minutes, using the sauté function on an electric cooker or medium heat on the stovetop. Stir during this stage and remove the bay leaves before serving.
Optional blending: blend about 1 cup of beans with some broth until smooth, then return it to the pot. This thickens the broth without adding another ingredient.
Check the texture before serving
Tender beans: the beans should be soft enough to eat comfortably after pressure-cooking. If they need more time, the method provided does not specify an additional pressure-cooking interval, so check your cooker’s guidance before extending the cycle.
Creamy broth: the uncovered simmer and optional blended portion help the liquid become thicker. Stir well before serving so the beans and broth are evenly combined.
Serve with rice or use as a base
Rice and meat: the recipe suggests serving the beans over white rice with meat of your choice. Add the optional chopped coriander or parsley just before serving.
Other uses: the beans can also be used as a starting point for dishes such as bean soup, bean salad or coconut beans.
Recipe notes & tips
- Sort the beans over a tray or plate so stones are easy to spot.
- Rinse the beans thoroughly, then drain them before adding them to the cooker.
- Use the full amount of water specified for the pressure-cooking stage.
- Add the garlic after the onion has turned translucent and cook it for about 60 seconds.
- Remove the bay leaves before serving.
- Blend a cup of beans with broth only if you want a thicker finish.
Variations
- Fresh herb finish: use chopped parsley instead of coriander, or leave the herbs out.
- Creamier broth: blend about 1 cup of cooked beans and broth, then stir it back into the pot.
- Rice serving: spoon the beans and broth over white rice as suggested in the recipe.
- Soup base: use the cooked beans as a starting point for bean soup.
- Coconut beans: use the beans as a base for a coconut-bean dish.
Common mistakes to avoid
- Skipping the sort: stones can hide among dried beans, so pick through them before rinsing.
- Soaking the beans: this method is written for unsoaked beans, so rinse and drain them instead.
- Adding salt at the start: the recipe adds it after pressure-cooking; follow that order to avoid toughening the beans.
- Burning the garlic: add it after the onion and cook for about 60 seconds, stirring occasionally.
- Leaving the bay leaves in: remove them after the simmer and before serving.
- Skipping the uncovered simmer: cook for 10 to 15 minutes after seasoning so the flavours combine and the broth can thicken.
How to store
Cool leftovers and store them in a covered container in the fridge; use within 3 to 4 days. Reheat gently in a saucepan, stirring until hot throughout, and add a little water if the broth has thickened too much.
Frequently asked questions
Do I need to soak the black beans?
No. This recipe is designed for dried beans that have been sorted, rinsed and drained without soaking.
Can I use an electric or stovetop pressure cooker?
Yes. The recipe gives instructions for both: use the bean setting for 30 minutes on an electric cooker, or cook over high heat in a stovetop pressure cooker.
When should I add the salt?
Add it after the pressure-cooking stage, with the other seasonings. That is the order specified to avoid toughening the beans.
How do I make the broth thicker?
Simmer the beans uncovered for 10 to 15 minutes. For a creamier result, blend about 1 cup of beans with broth and stir it back into the pot.
What can I serve with these beans?
The recipe suggests white rice and meat of your choice. It also proposes using the beans as a base for soup, bean salad or coconut beans.
Can I leave out the fresh herbs?
Yes. Coriander or parsley is optional and is added just before serving.
Cook it from the original
This recipe comes from easyanddelish.com. Their page has the author’s own photos, notes and tips — the best place to cook it from.
Open the recipe on easyanddelish.com