
Banh Bo Nuong
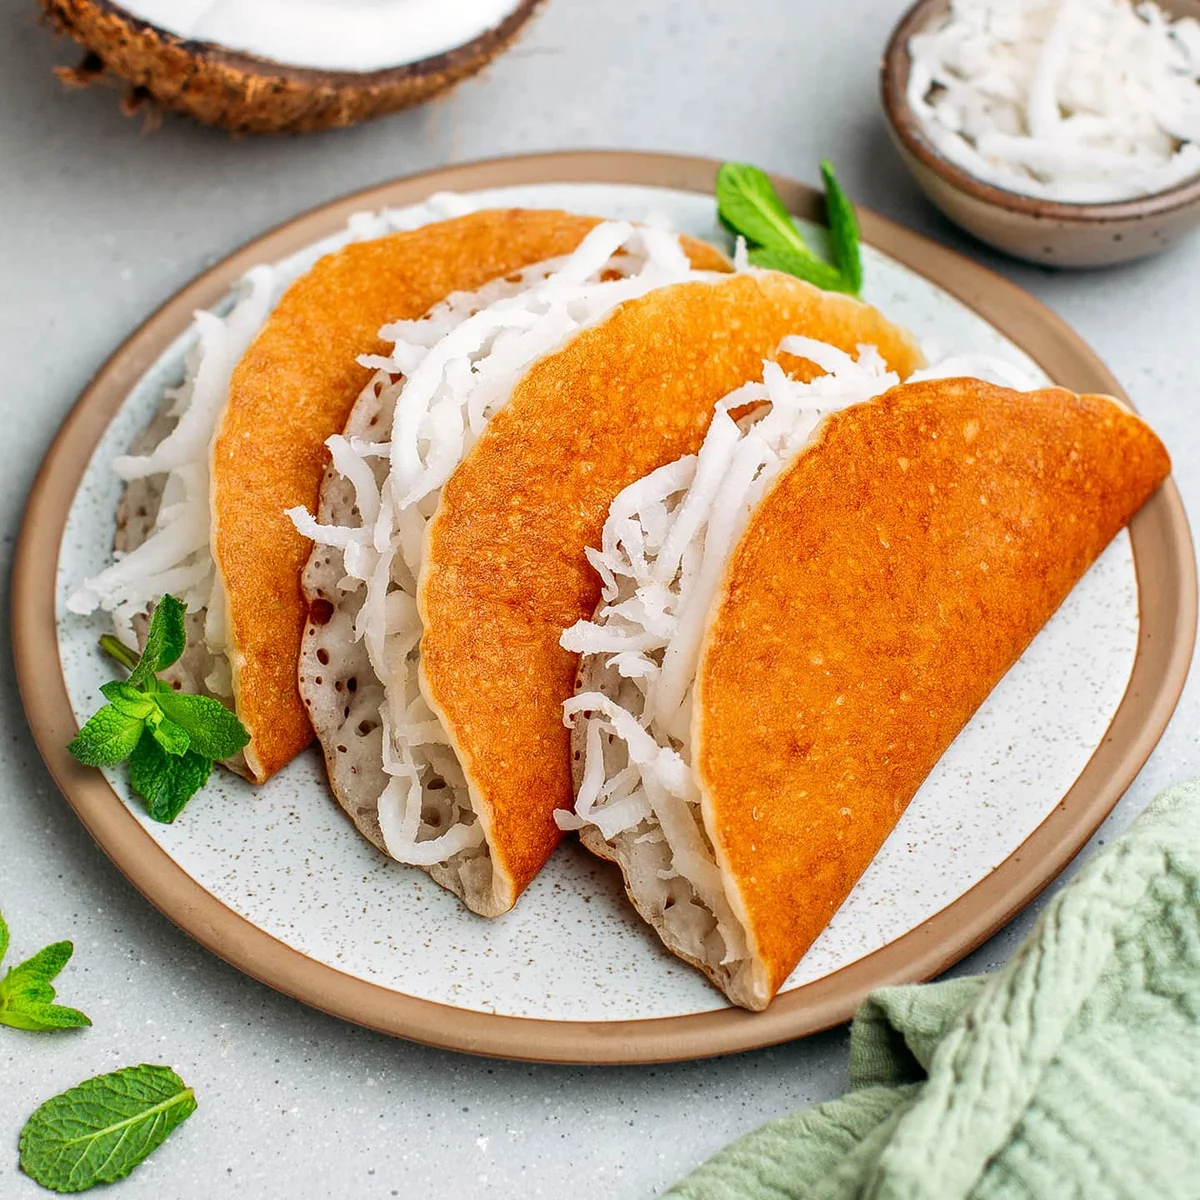
Bánh bò nướng, also known as honeycomb cake, is a classic Vietnamese sweet snack that is soft, chewy, and so delicious! Our version features chewy golden brown coconut pancakes filled with freshly grated coconut meat!
Ingredients
- 1 medium fresh coconut
- 3 tbsp sugar
- 5 tbsp rice flour
- 6 tbsp tapioca flour
- 1/4 cup sugar
- 1/2 tsp instant yeast
- 1/2 tsp baking powder
- 1/8 tsp salt
- 1/4 cup full-fat coconut milk
- 1/4 cup water
- 1 tsp vanilla extract
- 1 tbsp rice flour
- 1/4 cup water
Instructions
- 1
--- Coconut Filling ---
- 2
Drain the water. First, drain the coconut water from the coconut. To do so, poke two holes in the eyes of the coconut. You can use a screwdriver or a metal spike for this step. Place the screwdriver on one of the eyes and hit it with a hammer until it pierces the coconut. Then, drain the coconut water over a glass or bowl.
- 3
Open the coconut. Next, to crack open the coconut, use a hammer to firmly strike it in the middle, rotating it as you go. After 7-10 hits, the coconut should crack, and you will be able to open it in half. You can check this video on how to open a coconut with a hammer if you want to see the process.
- 4
Grate it. Using a coconut grater, grate the coconut flesh to make long strips. You should end up with about 2 cups of shredded coconut.
- 5
Coat it with sugar. Transfer the shredded coconut to a bowl and sprinkle with the sugar. Toss to coat and let it sit for 10-15 minutes.
- 6
Cook it in a pan. Then, transfer the shredded coconut to a pan and cook it over medium heat for 5-7 minutes, stirring regularly, until it is no longer moist. Do not cook it for too long, you do not want to toast it. Cook it just long enough to just remove the moisture and melt the sugar.
- 7
--- Pancake Batter ---
- 8
Whisk together the dry ingredients. Add the rice flour, tapioca starch, sugar, instant yeast, baking powder, and salt to a mixing bowl. Whisk until combined.
- 9
Add the wet ingredients. Next, pour in the coconut milk, water, and vanilla extract. Whisk until smooth.
- 10
Make the rice flour paste. To prevent the rice flour from separating from the water, we will cook a rice paste. It will help emulsify and bind the batter. To do so, add the rice flour (1 tablespoon) and water to a saucepan. Whisk to dissolve the flour. Heat over medium heat, whisking constantly until the mixture forms a paste. Remove from the heat and allow the rice paste to cool for about 5 minutes.
- 11
Stir the paste into the batter. Once the paste has cooled a bit, transfer it to the batter and whisk until fully combined.
- 12
Let the batter rest. Cover the bowl with plastic wrap and let it rest for about 2 hours. The batter is ready when you can see a lot of bubbles forming on the surface.
- 13
--- Assemble ---
- 14
Heat a non-stick pan. It’s now time to cook the pancakes! Start by heating a non-stick pan over medium heat.
- 15
Pour the batter. Once hot, pour about 1/2 cup of the batter onto the pan. The batter is quite thin, so it should spread into a pancake by itself. Your pancakes should have a diameter of about 4.5-inch (11cm). Cook uncovered for about 1 minute.
- 16
Cover and steam. Next, cover the pan with a lid and steam the pancake for another 2-3 minutes or until the top looks no longer liquid.
- 17
Fill the pancake with coconut. Remove the lid and top half of the pancake with a handful of shredded coconut. The amount you want to put is completely up to you.
- 18
Fold it. Finally, use a spatula to lift half of the pancake and fold it into a half-moon shape. Transfer to a plate.
- 19
Repeat. Repeat with the remaining batter and enjoy while still warm!
- 20
You can keep these pancakes for up to 2 days in an airtight container at room temperature. Be aware that they taste best on day one.
Cook it from the original
This recipe comes from fullofplants.com. Their page has the author’s own photos, notes and tips — the best place to cook it from.
Open the recipe on fullofplants.com