
Poha Chivda Recipe
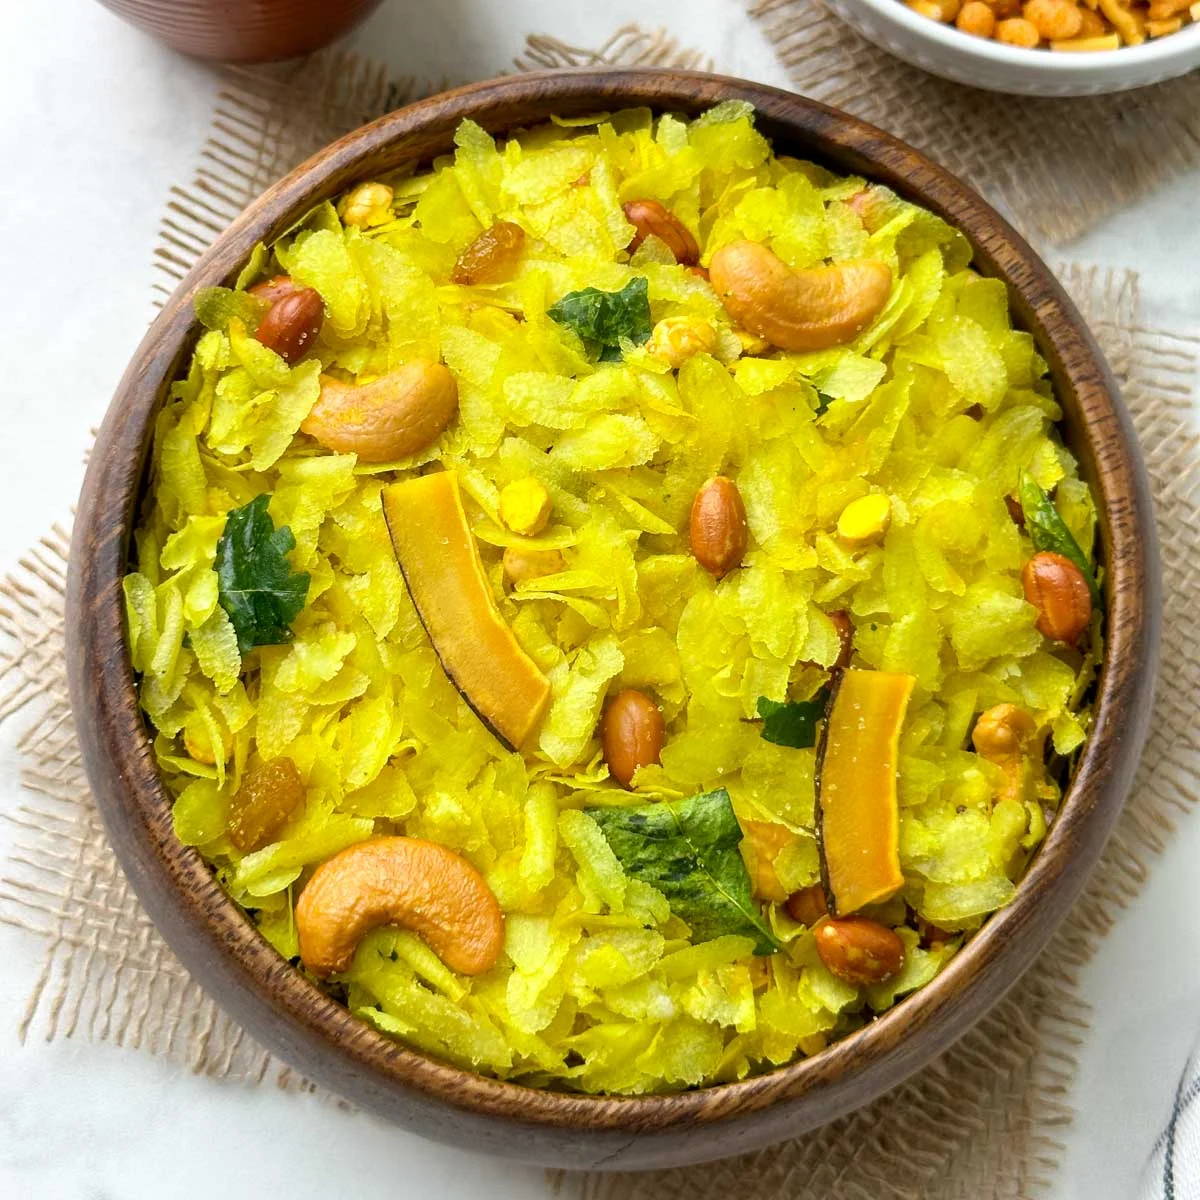
Poha chivda is a crunchy Indian snack mix made with flattened rice, nuts, fried gram, coconut, curry leaves and spices. It is cooked on the stovetop and makes a savoury, lightly sweet snack to enjoy with masala chai.
Ingredients
- 200 g (3 cups)thin poha (flattened rice)
- 45 ml (3 tablespoons)oil
- about 35 g (1/4 cup)peanuts
- about 35 g (1/4 cup)cashew nuts
- 2 tablespoonsfried gram (dalia)
- about 20 g (1/4 cup)dried coconut slices
- 2 tablespoonsraisins
- 1 teaspoonmustard seeds
- 1 teaspooncumin seeds
- 2green chillies (or dried red chillies)
- 1–2 stalkscurry leaves
- a pinchasafoetida (hing)
- 1/2 teaspoonground turmeric
- 3/4 teaspoon, or to tastesalt
- 2 teaspoons, or to tasteicing sugar
Instructions
- 1
Prepare ingredients
Measure out all the ingredients and set them aside before you start cooking.
- 2
Dry roast poha
For the pan method, warm a heavy-based pan or kadai over a low heat. Add the thin poha and stir gently with a spatula for 5–6 minutes, until crisp, taking care not to over-roast it. Tip onto a plate and set aside.
- 3
Choose another method
Alternatively, spread the poha on a baking tray lined with baking paper and roast in an oven preheated to 175°C (350°F) for 15 minutes, stirring once halfway through, until crisp. For the microwave, put it in a microwave-safe bowl and cook on high for 2–3 minutes, tossing once halfway through, until crisp. Or spread it on a large plate and leave it in direct sunlight for 1 hour, or until crisp.
- 4
Roast peanuts
Heat 2–3 tablespoons of oil in the heavy-based pan over a medium heat. Add the peanuts and stir continuously until they are light golden.
- 5
Add cashews
Stir in the cashew nuts and roast until they begin to turn lightly golden.
- 6
Roast gram coconut
Add the fried gram and dried coconut slices. Roast together for 1 minute, or until the coconut changes colour and browns slightly.
- 7
Add raisins
Stir in the raisins and roast for 30 seconds, or until they swell slightly.
- 8
Toast the seeds
Move the roasted nuts to one side of the pan. Add the mustard and cumin seeds and stir for a few seconds.
- 9
Crisp the aromatics
Turn the heat to low and add the chopped green chillies, curry leaves and asafoetida. Sauté for 1–2 minutes, until the leaves and chillies are crisp. Make sure they are free of moisture so they do not make the poha soggy.
- 10
Season the mixture
Keep the heat low and add the turmeric, salt and icing sugar. Mix well, then turn off the heat.
- 11
Fold in poha
Immediately add the roasted poha and gently combine it with a spatula or your hands, taking care not to break the flakes.
- 12
Cool and serve
Take the pan off the hob. Leave the poha chivda to cool completely, then serve with masala chai or transfer it to an airtight container.
What is poha chivda?
Poha chivda is an Indian namkeen: a savoury, crunchy snack mix built around flattened rice, also called poha. It brings together toasted grains, nuts, fried gram, coconut, spices and curry leaves.
This version balances savoury seasoning with raisins and a little sugar. Dry-roasting the poha separately helps it stay crisp when it is mixed with the seasoned ingredients.
Nutrition and macros by portion
The nutrition label shows one serving as written: 282 calories, 5g protein, 25g carbs, 19g fat.
| Portion | Adjustment | kcal | Protein | Carbs | Fat |
|---|---|---|---|---|---|
| Lighter | Use less oil | 197 kcal | 4g | 18g | 13g |
| This serving | As written | 282 kcal | 5g | 25g | 19g |
| Hungry | Serve a larger portion | 423 kcal | 8g | 38g | 29g |
The poha and raisins provide most of the carbohydrates, while the oil, peanuts, cashews and coconut contribute much of the fat. The nuts and fried gram also provide some protein. Pair a portion with fresh fruit or a yoghurt-based side if you want to make it part of a more substantial snack.
Why thin poha matters
Thin poha: this variety crisps readily with gentle dry heat, making it a good choice for a light snack mix. Stir it carefully and stop as soon as the flakes feel crisp; too much roasting can make them brittle or browned.
Build the crunchy mix
Nuts and gram: peanuts and cashews provide different sizes and textures, while fried gram adds another crisp bite. Add them in stages so each ingredient has time to toast without burning.
Coconut and raisins: the coconut should brown slightly, and the raisins need only a brief turn in the pan to swell. Both can darken quickly, so keep stirring and watch the colour.
Keep the aromatics dry
Curry leaves and chillies: fry these on a low heat until crisp, and check that they are dry before adding them. Any remaining moisture can soften the poha after mixing.
Spices: mustard and cumin seeds get a brief toast before the turmeric, salt and sugar go in. Adding the ground seasonings on low heat helps them coat the ingredients without scorching.
Mix without crushing
Once the poha is crisp, fold it into the pan gently rather than stirring vigorously. A broad spatula helps distribute the nuts and seasoning while leaving the thin flakes intact.
The mixture may seem slightly oily or warm straight from the pan. Let it cool fully before storing so trapped heat does not soften the crunchy pieces.
Serving and timing
The recipe takes about 30 minutes, with the main hands-on work happening as the nuts and aromatics are toasted. Have the measured ingredients ready before heating the pan, since several additions cook quickly.
Serve the chivda as a snack with masala chai, or alongside other savoury snacks. It can also be portioned into small bowls for sharing.
Recipe notes & tips
- Use a heavy-based pan to help the poha and nuts toast evenly.
- Keep the heat low when roasting the poha, and stir gently throughout.
- Prepare and measure the ingredients before cooking, as the later additions follow quickly.
- Check that the curry leaves and chillies are dry before frying them.
- Fold the poha in carefully to keep the thin flakes whole.
- Cool the mixture completely before closing it in a container.
Variations
- Dried red chillies: use them instead of green chillies for a different chilli flavour.
- Adjust the sweetness: add less icing sugar or adjust it to taste.
- More heat: add extra chilli to suit your preference.
- Nut choice: vary the balance of peanuts and cashews while keeping the total amount similar.
- Coconut texture: use thin dried coconut slices so they toast quickly and evenly.
Common mistakes to avoid
- Over-roasting poha: stop when it is crisp, before the flakes brown or become too brittle.
- Adding damp curry leaves: dry them first so their moisture does not soften the mix.
- Burning the spices: lower the heat before adding the aromatics and ground seasonings.
- Crowding the pan: use a pan large enough to stir the ingredients without spilling them.
- Breaking the flakes: fold the poha in gently rather than mixing vigorously.
- Storing it warm: let the chivda cool completely before sealing it.
How to store
Once completely cool, store the chivda in an airtight container at room temperature and use it within about 1–2 weeks for the best crunch. It is best eaten without reheating; if it softens, spread it on a tray and warm it briefly in a low oven, then cool before serving.
Frequently asked questions
Can I roast the poha without a pan?
Yes. Spread it on a lined baking tray and roast at 175°C (350°F) for 15 minutes, stirring halfway through. You can also microwave it on high for 2–3 minutes, tossing once, or dry it in direct sunlight for about 1 hour.
How do I know when the poha is crisp?
The flakes should feel crisp rather than soft when handled. Check as you go and stop roasting once they reach that texture.
Why did my poha chivda turn soggy?
Moisture on the curry leaves or chillies can soften the flakes. Make sure they are dry before frying, and cool the finished mixture fully before storing.
Can I make the chivda less sweet?
Yes. The sugar is listed as adjustable, so use less or leave it out if you prefer a more savoury mix.
When should I put the poha into the pan?
Add it immediately after the heat is turned off and the seasonings have been mixed in. Fold it gently so the flakes are coated without breaking.
Cook it from the original
This recipe comes from indianveggiedelight.com. Their page has the author’s own photos, notes and tips — the best place to cook it from.
Open the recipe on indianveggiedelight.com