
Dinner Rolls
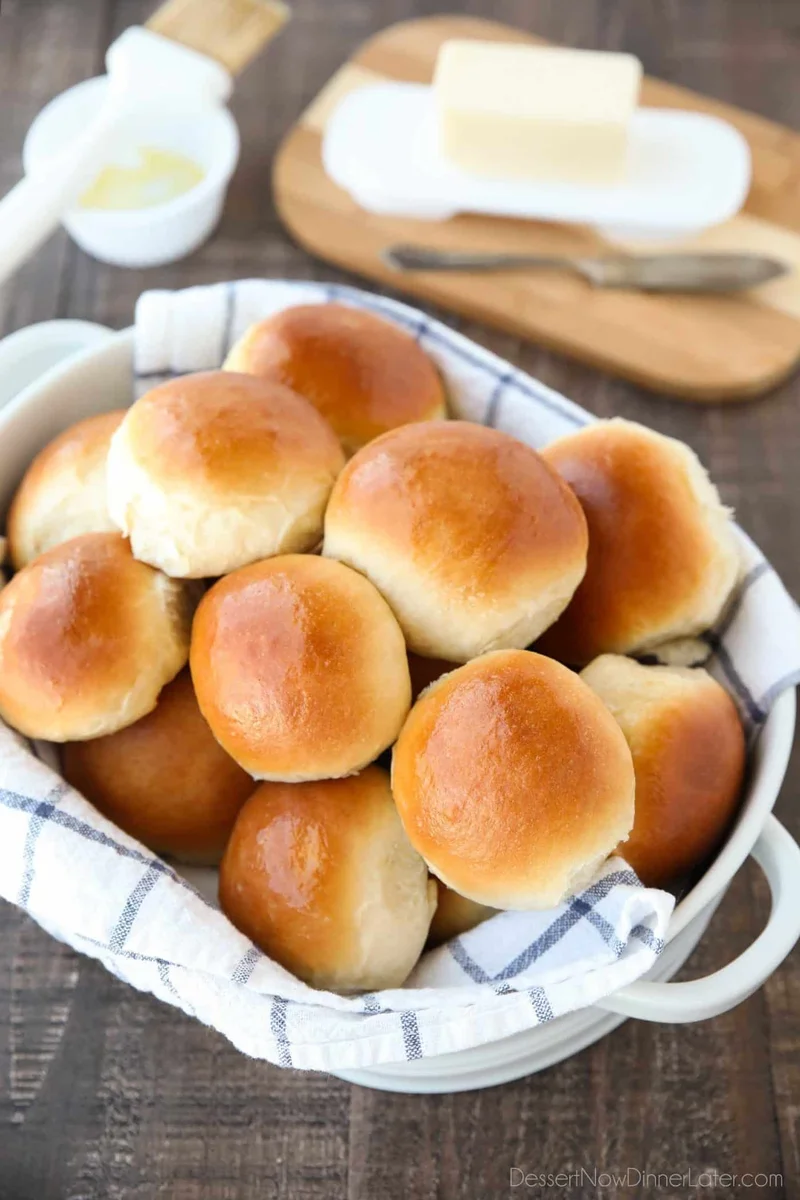
These American-style dinner rolls are soft, fluffy yeast rolls with a buttery finish. Make them for a family meal or holiday table, where they are ready to pass around warm from the oven.
Ingredients
- 120 ml (½ cup)warm water (43°C / 110°F)
- 18 g (2 tbsp)quick-rise or instant dried yeast
- 85 g (6 tbsp)softened butter
- 67 g (⅓ cup)granulated sugar
- 2 largeeggs
- 240 ml (1 cup)warm milk (43°C / 110°F)
- 10 g (2 tsp)salt
- 600–660 g (5–5½ cups)plain flour, stirred, spooned into the cup and levelled
- 28 g (2 tbsp)melted butter, for brushing the rolls
Instructions
- 1
Dissolve the yeast
Stir the yeast into the warm water until dissolved, then set it aside.
- 2
Mix the wet ingredients
Using a stand mixer with the paddle attachment, cream the softened butter and sugar together. Add the eggs and mix well, scraping down the bowl. Add the warm milk, salt and yeast mixture, then mix until combined.
- 3
Knead the dough
Measure 600 g flour by stirring it, spooning it into the measuring cup and levelling it. Add it to the wet mixture, change to the dough hook and knead for 5 minutes until a soft dough forms. If needed, add more flour 1 tablespoon at a time. The dough will be sticky but should pull away from the sides of the bowl.
- 4
Let dough rise
Grease a large bowl with cooking spray and scrape the dough into it. Lightly coat the dough's top with cooking spray, cover with cling film and leave in a warm place for 30–45 minutes.
- 5
Divide the dough
Turn the dough onto a lightly floured surface, flatten it and divide it into 24 pieces using a dough cutter or bench scraper.
- 6
Shape the rolls
Cup your hand and push each piece of dough through the space between your thumb and index finger. Pinch the ends together, then set each roll seam-side down on a greased baking sheet, about 2.5 cm apart. A 30 × 45 cm tray works well.
- 7
Proof the rolls
Cover the rolls with greased cling film and leave them to rise in a warm place for another 30–45 minutes.
- 8
Bake and brush
Heat the oven to 177°C (350°F). Bake the rolls for 15–20 minutes, until golden brown and cooked through. Take them out and brush the hot rolls with 28 g melted butter.
What are dinner rolls?
Dinner rolls are small, soft yeast breads served alongside a meal, especially in American home cooking and holiday spreads. This version enriches the dough with butter, milk, eggs and sugar for a tender crumb and a lightly sweet flavour.
The method uses a stand mixer to knead a sticky dough, then gives it two rises before baking. A final butter brushing adds a glossy, savoury finish.
Nutrition and macros by portion
The nutrition label shows one serving as written: 147 calories, 4g protein, 24g carbs, 5g fat.
| Portion | Adjustment | kcal | Protein | Carbs | Fat |
|---|---|---|---|---|---|
| Lighter | Use less brushing butter | 103 kcal | 3g | 17g | 4g |
| This serving | As written | 147 kcal | 4g | 24g | 5g |
| Hungry | Serve two rolls | 221 kcal | 6g | 36g | 8g |
The flour and sugar provide most of the carbohydrates, while butter contributes much of the fat. Eggs and milk add some protein, alongside a smaller amount from the flour. Serve a roll with vegetables and a protein-rich main to make it part of a more rounded meal.
Choosing and measuring the ingredients
Yeast: Quick-rise or instant dried yeast can be stirred directly into the warm water here. The water and milk should feel warm rather than hot; the recipe specifies 43°C.
Flour: Begin with 600 g and add more only if the dough needs it. Spoon the flour into the cup and level it rather than packing it down, which helps avoid making the dough too stiff.
Getting the dough texture right
Kneading: After 5 minutes with the dough hook, expect a soft, slightly sticky dough. It should pull away from the bowl's sides, but it does not need to feel dry or firm.
Extra flour: Add it a tablespoon at a time, allowing each addition to mix in before deciding whether to add more. Too much flour can make the finished rolls dense.
Shaping even rolls
Portioning: Divide the dough into 24 pieces so the rolls bake at a similar rate. A dough cutter or bench scraper makes it easier to portion without pulling at the dough.
Seams: Cup your hand to guide each portion through the gap between your thumb and index finger, then pinch the ends closed. Place the seam underneath so the tops look smooth as they rise.
Watching the rises
First rise: Leave the covered dough in a warm place for 30–45 minutes. It should look puffier before you turn it out and divide it.
Second rise: Give the shaped rolls another 30–45 minutes under greased cling film. Keep the covering loose enough not to squash them as they expand.
Checking for doneness
Colour: Bake at 177°C for 15–20 minutes, looking for evenly golden-brown tops. If they need more colour, continue towards the longer end of the stated baking time.
Finish: The recipe calls for the rolls to be baked through before they come out of the oven. Brush them with melted butter while hot so it coats the tops readily.
Serving the rolls
Serve the rolls warm alongside a main meal, soup or a holiday spread. Their soft texture also makes them useful for catching gravy or serving with butter.
For a balanced plate, pair a roll with a protein-rich main and vegetables rather than relying on the bread alone.
Recipe notes & tips
- Use warm rather than hot water and milk, keeping them close to the specified 43°C.
- Measure the flour by stirring, spooning and levelling it before adding it to the bowl.
- Add any extra flour gradually, one tablespoon at a time.
- Grease the cling film lightly so it is less likely to stick to the rising dough.
- Leave room between the rolls on the baking sheet, as they need space to rise.
- Brush the rolls with melted butter while they are still hot from the oven.
Variations
- Herb finish: Stir finely chopped herbs into the melted butter before brushing the baked rolls.
- Garlic butter: Mix crushed garlic into the melted butter for a savoury topping.
- Seeded tops: Sprinkle seeds over the rolls before baking for a little crunch.
- Honey finish: Replace some of the brushing butter with a light brush of honey after baking.
- Soft sides: Arrange the shaped rolls closer together on the tray so they bake touching.
Common mistakes to avoid
- Over-flouring: The dough is meant to be sticky; add extra flour only a tablespoon at a time.
- Hot liquid: Liquid that is hotter than the specified 43°C may interfere with the yeast; check its temperature before mixing.
- Skipping a rise: Give the dough both 30–45-minute rises so the rolls have time to puff up.
- Loose seams: Pinch the ends together and set each roll seam-side down to help keep its shape.
- Crowded baking sheet: Leave about 2.5 cm between rolls so they have room to rise.
- Overbaking: Check at 15 minutes and remove the rolls when golden brown and baked through.
How to store
Once cool, store the rolls in an airtight container at room temperature and eat within 2 days. Reheat briefly in a warm oven until soft; the recipe does not specify a freezing method.
Frequently asked questions
Can I use active dried yeast?
The recipe specifies quick-rise or instant dried yeast. If using active dried yeast, follow the instructions on its packaging, as it may need different handling.
How do I know when the dough has risen enough?
The recipe gives a rise time of 30–45 minutes for each stage. Look for dough and shaped rolls that have become visibly puffier.
Why is the dough sticky?
This dough is expected to be sticky while still pulling away from the bowl's sides after kneading. Add extra flour only as needed, a tablespoon at a time.
Can I make the rolls without a stand mixer?
The method is written for a stand mixer with a paddle and dough hook. You can mix and knead by hand, but the recipe does not give a separate hand-kneading method or timing.
How can I tell when the rolls are done?
Bake them for 15–20 minutes at 177°C, until golden brown and baked through. The exact time may vary with your oven and tray.
Can I prepare the rolls ahead?
The recipe does not include an overnight or make-ahead proofing method. For the stated method, allow 30–45 minutes for each rise and bake just before serving.
Cook it from the original
This recipe comes from dessertnowdinnerlater.com. Their page has the author’s own photos, notes and tips — the best place to cook it from.
Open the recipe on dessertnowdinnerlater.com