
Basic Challah Bread
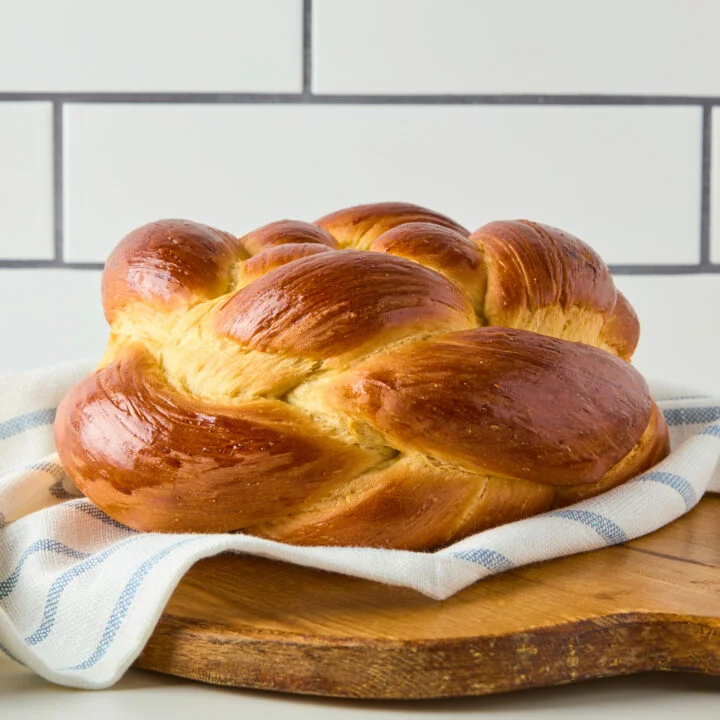
This traditional Jewish braided loaf is incredibly soft, slightly chewy, and a little sweet. Follow my step-by-step tutorial for creating beautifully shaped challah at home.
Ingredients
- 540 grams (4 1/2 cups) all-purpose flour, plus additional
- 7 grams (2 1/4 teaspoons, 1 package) instant or quick rise yeast, not active dry
- 2 teaspoons kosher salt
- 28 grams (2 tablespoons) neutral-flavored oil (canola, vegetable, safflower, grapeseed)
- 1 large whole egg
- 2 large egg yolks
- 85 grams (1/4 cup) honey
- 150 grams (1/2 cup + 2 tablespoons, 150 milliliters) water, warmed to about 110°F/ 43°C
- 1 large whole egg
- 15 grams (1 tablespoon) water
Instructions
- 1
In a large mixing bowl, combine the flour...: In a large mixing bowl, combine the flour (540 grams/ 4 ½ cups), yeast (7 grams/ 2 ¼ teaspoons), and salt (2 teaspoons). Stir together.
- 2
Add to the bowl the oil (28 grams/...: Add to the bowl the oil (28 grams/ 2 tablespoons), whole egg (1 large), egg yolks (2 large), honey (85 grams/ ¼ cup), and the warm water (150 grams/ ½ cup + 2 tablespoons). Stir to combine.
- 3
If kneading by hand, turn the dough out...: If kneading by hand, turn the dough out onto a floured countertop. Dust flour over the top of the dough and knead the dough by hand for about 8-10 minutes until smooth and elastic. If kneading with a stand mixer, fit the mixer with a dough hook and knead at medium speed for about 6-8 minutes. Add more flour as needed while kneading the dough. When the dough is finished being kneaded it will still be slightly sticky to the touch, but feels smooth and elastic and should stand tall when rounded into a ball.
- 4
Move the kneaded dough to a lightly oiled...: Move the kneaded dough to a lightly oiled bowl, turn to coat, and cover with a piece of plastic wrap, a damp cloth, or a shower cap (my preference) to bulk ferment until doubled in size, about 1-2 hours.
- 5
Gently deflate the dough by pressing the air...: Gently deflate the dough by pressing the air out of it with your hand. Pour the dough onto a lightly floured surface.
- 6
To make a braided round: (See the tutorial...: To make a braided round: (See the tutorial photos for more clarification)Divide the dough into 4 equal pieces and start to roll them into rope shapes. Cover the pieces of dough and let them rest for 20 minutes. This relaxes the gluten and will make the dough easier to shape. Roll each rope to about 20-22 inches (50-55 cm) long. Place 2 pieces of dough horizontally beside each other. Weave a 3rd piece of dough vertically in between the horizontal pieces (over and under). Repeat with the 4th piece of dough. This will create 8 ends of dough. Begin with any “under” piece of dough and gently move it over the piece of dough beside it. Working clockwise, repeat with every “under” piece of dough until you’re back at the starting point. Repeat the same process but work counter-clockwise. Repeat these steps changing direction until all of the dough is used. Tuck the ends underneath. Transfer the round to a parchment lined baking sheet.
- 7
To make a braided loaf: Divide the dough...: To make a braided loaf: Divide the dough into 3 equal pieces and roll them into long ropes. Cover the pieces of dough and let them rest for 20 minutes. This relaxes the gluten and will make the dough easier to shape. Roll each rope to about 18 inches (45 cm) long. Lay the ropes beside each other and pinch the top of each piece together. Braid them together and pinch the bottom ends together. Tuck in each end and place in a greased loaf pan or directly on a parchment lined baking sheet.
- 8
Cover the dough loosely and let proof for...: Cover the dough loosely and let proof for about 1 hour until puffy.
- 9
Preheat the oven to 375°F/ 190°C.
- 10
Whisk together the whole egg (1 large) and...: Whisk together the whole egg (1 large) and the water (15 grams/ 1 tablespoon). Using a pastry brush, gently brush the egg wash over the dough.
- 11
Bake for 30-35 minutes. The crust should be...: Bake for 30-35 minutes. The crust should be a deep golden brown color. Let cool on a wire cooling rack for at least 1 hour before slicing.
Cook it from the original
This recipe comes from bakerbettie.com. Their page has the author’s own photos, notes and tips — the best place to cook it from.
Open the recipe on bakerbettie.com