
Honey Sesame Chicken Recipe
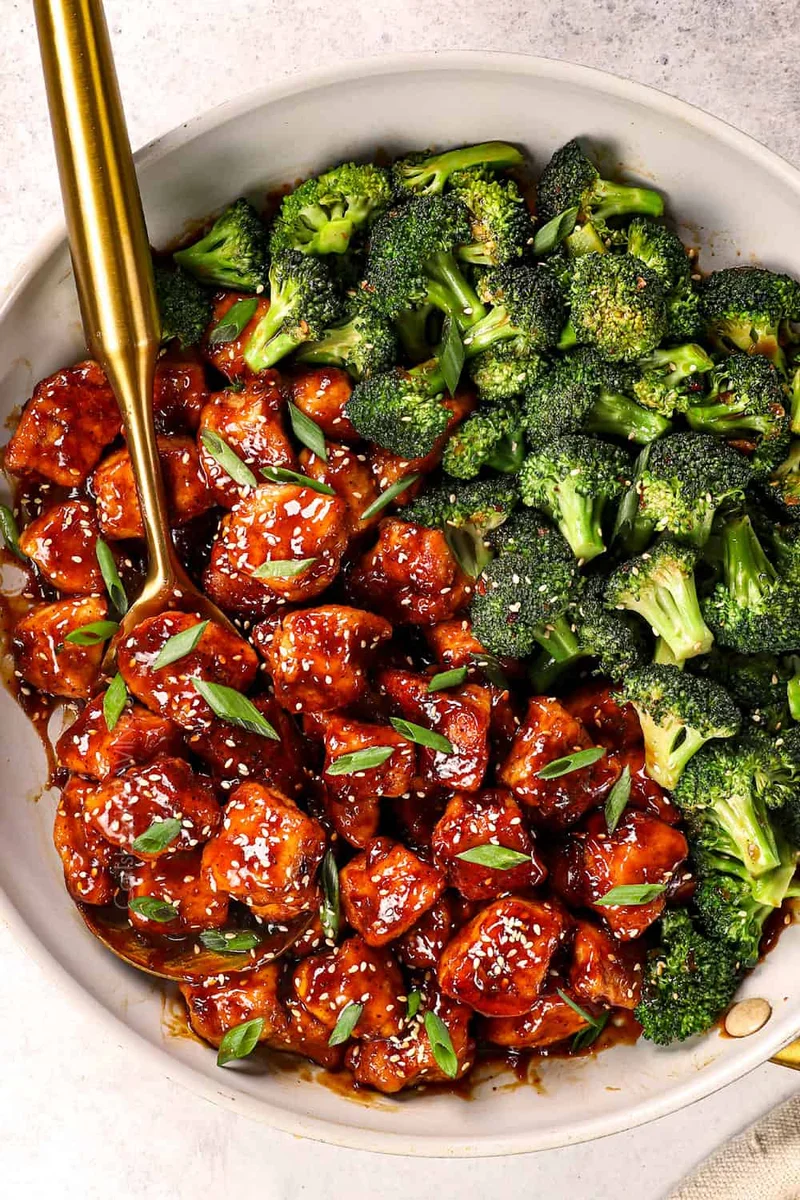
This Chinese-American-style honey sesame chicken coats crisp pieces of chicken in a sticky, sweet-and-tangy sauce with ginger, garlic and a little heat. It cooks in batches in a skillet, making it a satisfying alternative when you want a takeaway-style dinner at home.
Ingredients
- 680 g (1 1/2 lb)chicken breasts or thighs, cut into 2.5 cm (1-inch) pieces
- 2eggs
- 60 g (1/2 cup)plain flour
- 32 g (1/4 cup)cornflour
- 1/2 teaspoon eachground ginger, garlic powder, onion powder, paprika, salt and pepper
- For pan-frying; the method uses 45 ml (3 tablespoons), plus a little more if neededrapeseed or vegetable oil
- 113 g (1/3 cup)honey
- 60 ml (1/4 cup)reduced-salt soy sauce
- 60 ml (1/4 cup)ketchup
- 30 ml (2 tablespoons)oyster sauce
- 25 g (2 tablespoons)sugar
- 30 ml (2 tablespoons)Asian sweet chilli sauce
- 15 ml (1 tablespoon)toasted sesame oil
- 15 ml (1 tablespoon)rice wine
- 7.5 ml (1 1/2 teaspoons)Asian chilli sauce, such as sambal oelek
- 1 1/2 teaspoonscornflour
- 4 cloves, minced, or 1 teaspoongarlic, or garlic powder
- 1 tablespoon, freshly grated, or 1 teaspoonfresh ginger, or ground ginger
- To garnishtoasted sesame seeds
- To garnishspring onions
Instructions
- 1
Mix the sauce
Whisk the sauce ingredients together in a medium bowl until the cornflour has dissolved, then set the bowl aside.
- 2
Coat the chicken
Put the chicken and eggs in a freezer bag and turn the pieces to coat. In a separate large freezer bag, combine the flour, cornflour and seasonings. Lift the chicken out, blot away excess egg with kitchen paper, then transfer it to the flour mixture. Shake the bag until the chicken is coated, pressing the coating onto the pieces from outside the bag.
- 3
Fry the chicken
Heat 45 ml (3 tablespoons) of oil in a non-stick frying pan over medium-high heat. Cook the chicken in two batches, shaking off excess coating and arranging the pieces in a single layer. Fry each batch for about 4–6 minutes, turning halfway, until cooked through. Transfer to a plate lined with kitchen paper; add another drizzle of oil if needed for the second batch. Remove the chicken and wipe out the pan.
- 4
Thicken the sauce
Whisk the sauce again to recombine it, then pour it into the pan. Bring it to a simmer, stirring often, and cook for about 1 minute until thickened.
- 5
Toss and serve
Add the chicken to the pan and toss to coat it in the sauce. Garnish with sesame seeds and spring onions, then serve straight away.
What is honey sesame chicken?
Honey sesame chicken is a Chinese-American takeaway-style dish: bite-sized chicken is coated, fried and covered in a sweet-savoury sauce. This version uses a skillet rather than deep-frying, and combines honey, soy, sesame oil, ginger and garlic for a glossy, punchy coating.
The two-stage cooking is what makes the method work. The chicken is browned first for a crisp outside, then tossed in the sauce only at the end.
Nutrition and macros by portion
The nutrition label shows one serving as written: 430 calories, 42g protein, 43g carbs, 11g fat.
| Portion | Adjustment | kcal | Protein | Carbs | Fat |
|---|---|---|---|---|---|
| Lighter | Use less honey | 301 kcal | 29g | 30g | 8g |
| This serving | As written | 430 kcal | 42g | 43g | 11g |
| Hungry | Serve with extra rice | 645 kcal | 63g | 65g | 17g |
Chicken supplies most of the protein, while the flour, cornflour, honey and sugar contribute much of the carbohydrate. The frying oil, eggs and sesame oil provide most of the fat; serve a moderate portion with plenty of vegetables and rice to make a more balanced plate.
The coating and chicken
Chicken pieces: Cut them to a similar size so they cook at roughly the same pace. Breasts are lean; thighs tend to stay more succulent.
Flour and cornflour: Together they form a light coating that browns in the pan. Blotting off excess egg before shaking the chicken in the dry mixture helps prevent clumps.
A balanced sweet-savoury sauce
Honey and sugar: These give the sauce its sweetness and help it turn sticky as it simmers. Soy and oyster sauce add savoury depth, while ketchup brings tang.
Ginger, garlic and chilli: Fresh ginger and minced garlic give the sauce a lively, aromatic flavour. Sweet chilli sauce and Asian chilli sauce contribute different layers of heat and sweetness.
Frying in batches
Pan space: Keep the chicken in a single layer and cook it in two batches, as directed. Crowding the pan traps moisture and makes the coating less crisp.
Turning: Flip the pieces halfway through the 4–6 minute cooking time. The chicken should be cooked through before it goes into the sauce; the sauce step is brief and is not a substitute for frying.
Getting the sauce texture right
Dissolve first: Whisk the sauce until the cornflour is fully mixed in, then whisk it again just before cooking because it can settle.
Simmer briefly: Stir as the sauce heats and take it off the heat once it thickens, about 1 minute. Tossing the chicken in at the end keeps the cooking time in the sauce short.
Serve straight away
The coating is at its crispest just after the chicken is tossed with the sauce, so have the table ready before combining everything. Finish with sesame seeds and sliced spring onions.
Serve with steamed rice or noodles and a side of stir-fried vegetables. Their mild flavour and fresh texture balance the sticky sauce.
Recipe notes & tips
- Cut the chicken into evenly sized pieces so they finish cooking at about the same time.
- Use kitchen paper to blot excess egg from the chicken before adding the flour coating.
- Shake off loose flour before the chicken goes into the hot pan.
- Keep the pieces in a single layer and fry in two batches for better browning.
- Whisk the sauce again just before adding it to the pan so the cornflour is evenly distributed.
- Serve promptly after tossing so the coating does not soften for too long.
Variations
- Add vegetables: Stir-fry sliced peppers or broccoli separately and serve alongside the chicken.
- Adjust the heat: Use less Asian chilli sauce for a milder sauce or more for extra warmth.
- Use chicken thighs: Choose boneless thighs for a juicier result and cut them into even pieces.
- Make it gluten-free: Use suitable gluten-free flour and cornflour, and check the labels on the soy and oyster sauces.
- Add citrus: Finish with a little grated orange zest for a bright twist on the sweet sauce.
Common mistakes to avoid
- Crowding the pan: The chicken can steam rather than brown, so cook it in two batches.
- Leaving excess egg on: Wet patches can make the coating clump, so blot the chicken before dredging.
- Skipping the second whisk: Cornflour settles in the sauce, so whisk it again just before it goes into the pan.
- Overcooking the sauce: It thickens quickly, so stir and stop after about 1 minute of simmering.
- Saucing too early: The coating softens as it sits, so toss the chicken just before serving.
How to store
Refrigerate leftovers in an airtight container for up to 3 days. Reheat in a frying pan over medium heat until hot throughout; the coating may be softer after storage.
Frequently asked questions
Can I use chicken thighs instead of breasts?
Yes. Use boneless thighs cut into 2.5 cm pieces, as the recipe specifies either breasts or thighs.
How can I tell when the chicken is cooked?
Turn the pieces halfway through frying and check that they are cooked through before removing them from the pan. Cut into a larger piece if you need to check the centre.
Can I make the sauce less spicy?
Reduce or leave out the Asian chilli sauce. The sweet chilli sauce still adds some mild warmth and sweetness.
Why does the recipe use a non-stick pan?
The coated chicken is cooked in a relatively small amount of oil, and a non-stick surface helps it brown without sticking.
Can I prepare the chicken ahead?
For the crispiest result, fry the chicken and toss it with the sauce just before serving. The sauce can be whisked together in advance and stirred again before heating.
Cook it from the original
This recipe comes from carlsbadcravings.com. Their page has the author’s own photos, notes and tips — the best place to cook it from.
Open the recipe on carlsbadcravings.com