
Wisconsin Roasted Corn
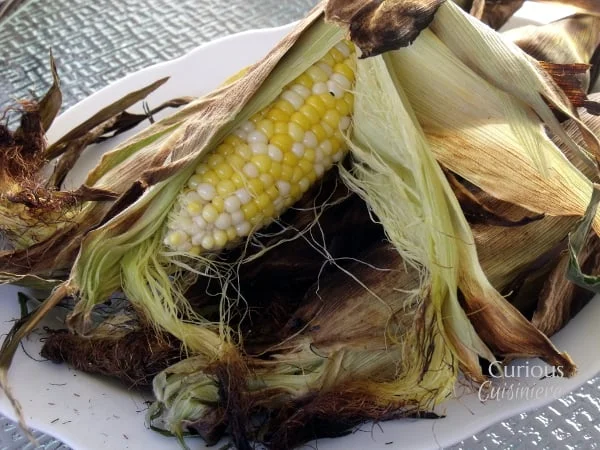
Grilled sweet corn is soaked in its husks, then cooked until the husks dry and the kernels pick up grill marks. It makes an easy summer side, with butter and seasonings left to the table.
Ingredients
- 4plump ears of Wisconsin sweetcorn
- to taste (optional)butter
- to taste (optional)salt
- to taste (optional)seasoned salt
- to taste (optional)pepper
Instructions
- 1
Soak the corn
While the grill coals heat, submerge the ears of corn in cold water and leave them to soak for 15–30 minutes.
- 2
Grill the ears
Set the corn on the grill away from intensely hot spots, then cover the grill.
- 3
Check the coals
Check the corn about every 5 minutes to make sure it is not burning and the coals are still hot.
- 4
Turn the corn
When the husks begin to dry and the underside has grill marks, turn the ears over. Cook the other side in the same way.
- 5
Check for doneness
The corn is done when the outer husks have dried out.
What is Wisconsin roasted corn?
This is a simple grilled corn on the cob, cooked in its husk rather than stripped before grilling. Corn is a familiar feature of American summer cookouts and fairs; this version keeps the preparation straightforward and lets sweet corn take centre stage.
Soaking the ears first helps keep the husks from drying too quickly over the coals. Grill marks and dry outer husks are the cues the recipe uses to signal that the corn is ready.
Nutrition and macros by portion
The nutrition label shows one serving as written: 100 calories, 4g protein, 22g carbs, 2g fat.
| Portion | Adjustment | kcal | Protein | Carbs | Fat |
|---|---|---|---|---|---|
| Lighter | Skip the butter | 70 kcal | 2g | 15g | 1g |
| This serving | As written | 100 kcal | 4g | 22g | 2g |
| Hungry | Add another ear | 150 kcal | 5g | 33g | 2g |
Most of the carbohydrates in a serving come from the sweetcorn, which also provides some fibre and protein. Butter adds most of the optional fat, while salt and seasoned salt can add sodium. Pair an ear with a protein-rich main and vegetables for a more rounded plate.
Why soak the corn?
Cold water: submerge the ears for 15–30 minutes while the coals heat. The damp husks can help shield the kernels during grilling.
Husks on: leave them in place for the whole cooking process. They also make the ears easier to handle once they have cooled a little.
Managing the grill
Heat zones: place the corn away from intense hot spots, as the method directs. This gives the ears a gentler, more even cook.
Regular checks: look in about every 5 minutes to catch any burning and check that the coals remain hot. Turn the ears when the underside has grill marks and the husks begin to dry.
How to tell when it is done
Dry husks: the recipe’s main doneness cue is that the outer husks have dried out. Check the ears as they cook rather than relying on a fixed grilling time.
Grill marks: browned lines on the underside are a useful sign that it is time to turn the corn. Repeat the same process on the other side.
Serving the corn
Toppings: offer butter, salt, seasoned salt and pepper at the table so everyone can season an ear to taste. Add butter while the corn is hot so it melts over the kernels.
On the plate: serve the corn alongside grilled vegetables, salad or another cookout main. The corn also works as a simple side for a casual summer meal.
Timing and preparation
Soaking time: allow 15–30 minutes in cold water while the grill coals heat. The recipe gives a total time of 45 minutes, but the exact grilling time depends on the heat of the coals and the ears.
Grill checks: the method calls for checking about every 5 minutes. Keep the grill covered between checks, and turn the ears once the first side shows grill marks and the husks start to dry.
Recipe notes & tips
- Soak the ears while the coals are heating to make use of the preparation time.
- Keep the corn away from the grill’s hottest spots, as the recipe recommends.
- Check the coals and the ears about every 5 minutes.
- Turn the ears when the underside has grill marks and the husks begin to dry.
- Set out the optional toppings separately so each person can season their own ear.
Variations
- Butter finish: spread butter over the hot corn just before serving.
- Pepper topping: add a few turns of pepper at the table.
- Seasoned salt: use seasoned salt instead of plain salt for a more savoury finish.
- Light seasoning: serve the corn plain and let its sweet flavour stand on its own.
Common mistakes to avoid
- Skipping the soak: soak the ears in cold water for 15–30 minutes before grilling.
- Using a hot spot: place the ears away from intense heat to reduce the chance of burning.
- Forgetting to check: look at the corn about every 5 minutes and make sure the coals are still hot.
- Turning too soon: wait for grill marks underneath and husks that are beginning to dry.
- Expecting a set cooking time: use the dry-husk cue to judge doneness instead.
How to store
Refrigerate leftover cooked corn in a covered container and use within 3–4 days. Reheat the kernels or whole ears until hot, or strip the kernels from the cob and add them to another dish.
Frequently asked questions
How long should I soak the corn?
Soak it in cold water for 15–30 minutes while the grill coals heat.
Should I remove the husks before grilling?
No. This method grills the ears in their husks, and uses the husks drying out as the main doneness cue.
How often should I check the corn?
Check about every 5 minutes to make sure it is not burning and the coals remain hot.
How do I know when to turn the ears?
Turn them when the husks start to dry and the underside has grill marks.
What can I put on the corn?
The suggested optional toppings are butter, salt, seasoned salt and pepper. Add them to taste after grilling.
Can I make this without a grill?
This recipe is written for a grill, so the cooking cues rely on coals, grill marks and drying husks. For a different cooking method, use a recipe designed for that equipment.
Cook it from the original
This recipe comes from curiouscuisiniere.com. Their page has the author’s own photos, notes and tips — the best place to cook it from.
Open the recipe on curiouscuisiniere.com