
Freezer Friendly Breakfast Burrito
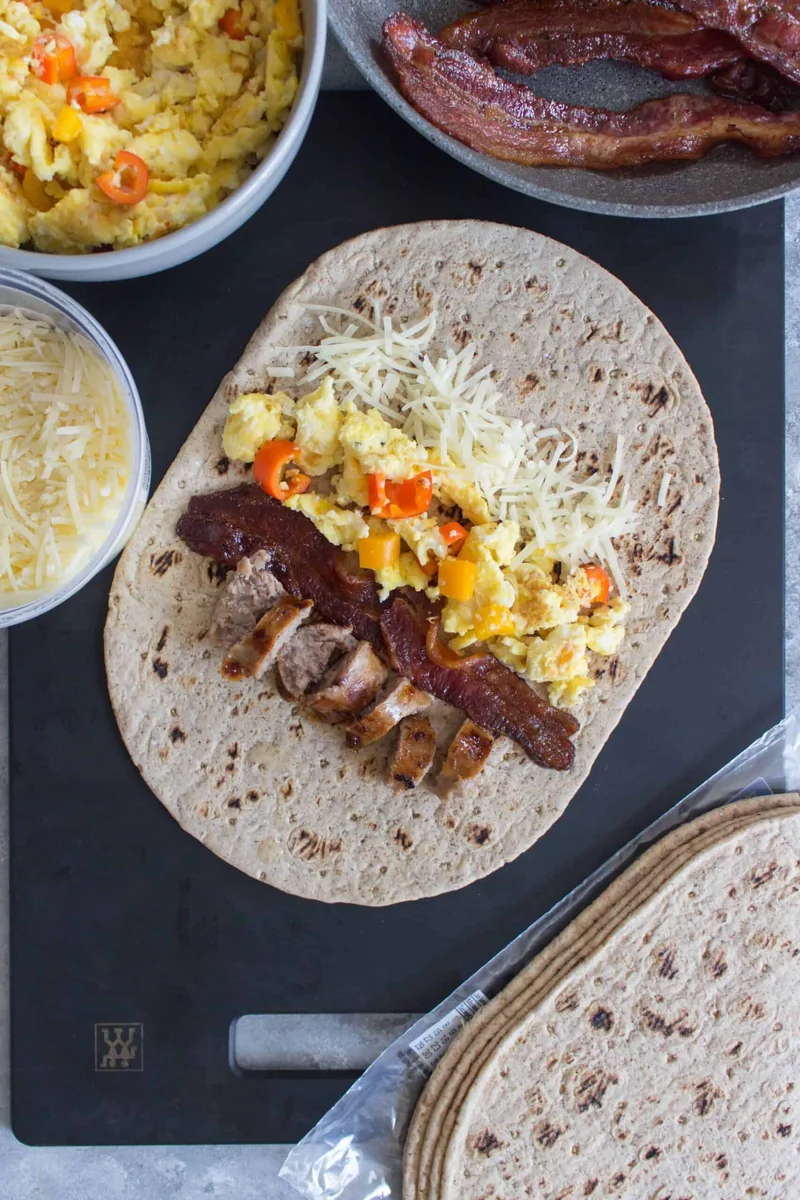
These freezer-friendly breakfast burritos combine scrambled eggs, peppers, bacon, sausages and cheese in soft tortilla wraps. Make a batch ahead, freeze them individually and warm one for a quick breakfast.
Ingredients
- 12eggs, scrambled
- 2–3mini peppers
- 6rashers of bacon, cooked until crispy
- 6sausages
- 6 tbspshredded cheese
- 6tortilla wraps
Instructions
- 1
Prepare the fillings
Prepare the scrambled eggs with the peppers, crispy bacon and sausages. The bacon can be oven-baked.
- 2
Fill the wraps
Divide the ingredients into six equal portions and place one portion on each tortilla wrap. Wrap each one tightly.
- 3
Freeze the burritos
If freezing, wrap each burrito in cling film or parchment paper. Arrange them in a single layer on a baking sheet and freeze; once frozen, transfer them to a zip-lock bag.
- 4
Reheat from frozen
Unwrap a burrito and microwave it for 1–2 minutes, until warmed through. Alternatively, heat it in a toaster oven at 175°C (350°F) for 10–12 minutes.
What is a breakfast burrito?
A breakfast burrito wraps a morning meal in a soft tortilla, making it easy to carry and eat on the go. The style draws on the broader tradition of burritos in Mexican and Mexican-American cooking, adapted here with familiar breakfast fillings.
This version pairs eggs with peppers, bacon, sausages and cheese. Making six at once means you can freeze portions ahead rather than assemble breakfast each morning.
Nutrition and macros by portion
The nutrition label shows one serving as written: 415 calories, 22g protein, 17g carbs, 27g fat.
| Portion | Adjustment | kcal | Protein | Carbs | Fat |
|---|---|---|---|---|---|
| Lighter | Less cheese and bacon | 291 kcal | 15g | 12g | 19g |
| This serving | As written | 415 kcal | 22g | 17g | 27g |
| Hungry | Add a side of beans | 623 kcal | 33g | 26g | 41g |
The tortillas provide most of the carbohydrates, while eggs and sausages contribute protein. Bacon, sausages, cheese and eggs also account for much of the fat. Add fruit or fresh vegetables alongside a burrito to balance the plate.
Choose and prepare the fillings
Eggs: Scramble the 12 eggs for the main filling, then divide them evenly across the wraps.
Meat: The bacon should be cooked until crispy, and the recipe calls for six sausages. Have both ready to add alongside the eggs.
Peppers and cheese: The mini peppers add a little colour and the shredded cheese brings the fillings together inside each wrap.
Divide the filling evenly
Portions: Split the prepared ingredients into six equal amounts before filling the tortillas. This helps each burrito get a similar mix and makes the batch easier to portion.
Wrapping: Keep the filling centred, fold in the sides and roll the tortilla tightly. A snug wrap is less likely to open during freezing or reheating.
Freeze for convenience
Wrap each burrito in cling film or parchment paper before freezing. The recipe recommends laying them in a single layer on a baking sheet first so they freeze more quickly and evenly.
Once frozen, move them to a zip-lock bag for storage. Freezing them separately first also makes it easier to take out one at a time.
Reheat until hot
Microwave: Remove the wrapping and microwave from frozen for 1–2 minutes, checking that the centre is warmed through.
Toaster oven: Heat from frozen at 175°C (350°F) for 10–12 minutes. The exact time can vary, so check the middle before serving.
Serve with something fresh
The burrito is a substantial breakfast on its own, but you can serve it with fresh fruit or sliced tomatoes for a lighter, fresh contrast.
For a more filling plate, add a side of beans or a simple salad. Keep accompaniments separate if you are packing the burrito to take away.
Recipe notes & tips
- Cook the bacon until crispy before dividing it among the wraps.
- Let the fillings stop steaming before wrapping, so the tortillas are easier to handle.
- Divide the filling into six portions before you start assembling.
- Roll each tortilla tightly and fold the sides in to contain the filling.
- Freeze the wrapped burritos in a single layer before transferring them to a bag.
- Check that the centre is hot after reheating, especially when using the microwave.
Variations
- More vegetables: Add extra chopped peppers to the egg filling.
- Extra cheese: Add a little more shredded cheese before rolling each wrap.
- Different sausages: Use your preferred cooked sausages in place of the listed ones.
- Meat-free: Leave out the bacon and sausages and increase the pepper filling.
- Fresh finish: Serve with sliced tomatoes or fruit on the side.
Common mistakes to avoid
- Uneven portions: Divide the filling into six equal amounts so each wrap gets a similar share.
- Loose rolling: Fold the sides in and roll tightly to help keep the filling inside.
- Freezing in a pile: Freeze the burritos in a single layer first so they freeze more evenly.
- Leaving the wrap on: Remove cling film or parchment before reheating.
- Serving too soon: Check the centre is warmed through before eating.
How to store
Wrap the assembled burritos individually and freeze them in a single layer on a baking sheet before transferring them to a zip-lock bag. Reheat from frozen in the microwave for 1–2 minutes or in a toaster oven at 175°C (350°F) for 10–12 minutes, checking that the centre is hot.
Frequently asked questions
Can I freeze these breakfast burritos?
Yes. Wrap each burrito in cling film or parchment paper, freeze in a single layer on a baking sheet, then transfer to a zip-lock bag.
Do I need to thaw a burrito before reheating?
No. The method reheats them from frozen in either the microwave or a toaster oven.
How long do I microwave one from frozen?
Microwave it unwrapped for 1–2 minutes, until warmed through. Check the centre before serving.
Can I use parchment paper instead of cling film?
Yes. The recipe gives cling film or parchment paper as options for wrapping the burritos before freezing.
Can I prepare these ahead of time?
Yes. Assemble and freeze the six burritos, then reheat one when you need breakfast.
Cook it from the original
This recipe comes from carmyy.com. Their page has the author’s own photos, notes and tips — the best place to cook it from.
Open the recipe on carmyy.com