
Instant Pot Hummus
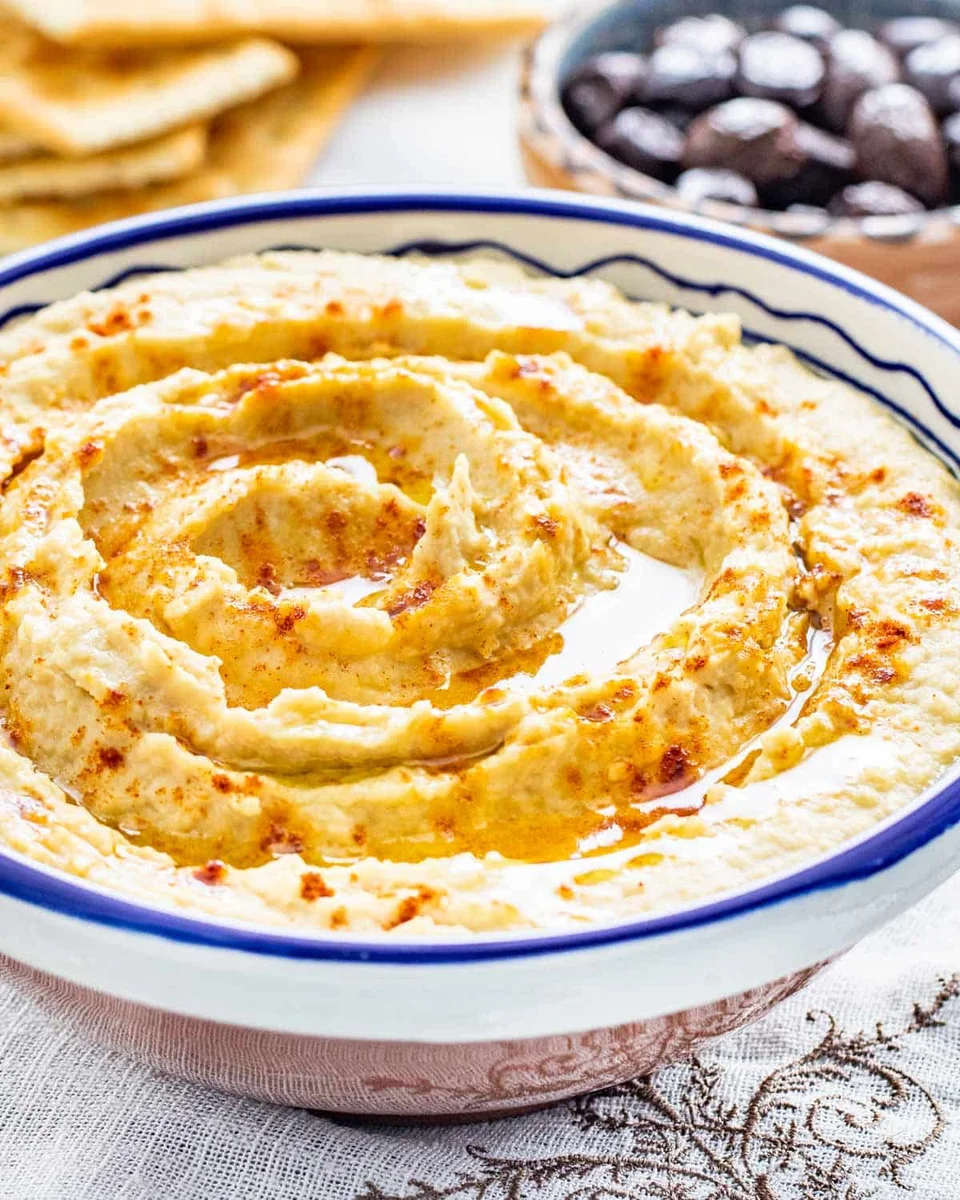
This homemade hummus blends pressure-cooked chickpeas with tahini, lemon, garlic and olive oil for a smooth, creamy dip. The Instant Pot does the long cooking, making it a handy choice when you want to prepare a generous batch at home.
Ingredients
- 400 g (2 cups)dried chickpeas
- 1.9 litres (8 cups)water
- 2.5 ml (½ teaspoon), or to tastesalt
- 3garlic cloves
- 2.5 ml (½ teaspoon)cumin
- 120 g (½ cup)tahini
- 80 ml (⅓ cup)olive oil
- 80 ml (⅓ cup; juice of 2 lemons)lemon juice
- to tastepaprika
- to tasteolive oil
Instructions
- 1
Cook the chickpeas
Add the dried chickpeas and water to the Instant Pot. Turn the valve from VENT to SEAL and cook on high pressure for 60 minutes. When the timer ends, let the pressure release naturally for 20 minutes. Reserve 240 ml (1 cup) of the cooking liquid.
- 2
Blend the hummus
Put the chickpeas in a food processor or blender with the remaining ingredients. Blend until smooth, starting with 120 ml (½ cup) of the reserved cooking liquid and adding more as needed to reach your preferred consistency. The mixture will be warm and will firm up as it chills.
- 3
Chill the hummus
Scrape the hummus into a sealable container or a bowl. If using a bowl, cover it with cling film. Refrigerate for 1 hour.
- 4
Finish and serve
Serve the hummus sprinkled with paprika and drizzled with olive oil.
What is hummus?
Hummus is a Middle Eastern chickpea dip typically made by blending chickpeas with tahini, lemon and other seasonings. This version uses an Instant Pot to cook dried chickpeas before blending them into a creamy dip.
Cooking the chickpeas from dried gives you their cooking liquid as well as the beans themselves. That liquid helps adjust the texture without changing the simple ingredient list.
Nutrition and macros by portion
The nutrition label shows one serving as written: 355 calories, 12g protein, 35g carbs, 20g fat.
| Portion | Adjustment | kcal | Protein | Carbs | Fat |
|---|---|---|---|---|---|
| Lighter | Less olive oil | 248 kcal | 8g | 25g | 14g |
| This serving | As written | 355 kcal | 12g | 35g | 20g |
| Hungry | Larger hummus portion | 533 kcal | 18g | 53g | 30g |
The chickpeas supply most of the carbohydrates and some of the protein, while tahini and olive oil contribute much of the fat. Serve a portion with plenty of fresh vegetables and a protein-rich accompaniment to make a more balanced plate.
The chickpea cooking stage
Pressure cooking: The chickpeas cook on high pressure for 60 minutes, followed by a 20-minute natural release. Reserve a cup of the liquid before draining or transferring the chickpeas.
Cooking liquid: Start blending with 120 ml and add more gradually. The hummus will be warm and softer at first, then become firmer after refrigeration.
Building the flavour
Tahini: This sesame paste gives the dip its characteristic richness and creamy body. Stir it before measuring if the oil has separated in the jar.
Lemon and garlic: Lemon juice brings brightness, while garlic adds a savoury edge. The stated lemon juice comes from two lemons, but measure the juice for the most consistent result.
Cumin: A small amount lends a warm, earthy note without overpowering the chickpeas.
Getting a smooth texture
Blend thoroughly: Give the food processor or blender time to break down the chickpeas, pausing to scrape down the sides if needed. Add reserved cooking liquid in small additions so the hummus does not become thinner than you want.
Chill before serving: Refrigerating for an hour lets the hummus firm up. Keep this change in texture in mind when deciding how much cooking liquid to add.
Seasoning and finishing
Salt: The recipe allows for salt to taste, so begin modestly and adjust the seasoning after blending. Lemon and tahini can affect how the seasoning comes through.
Garnish: A dusting of paprika and a drizzle of olive oil finish the hummus just before serving. Add these on top rather than blending them into the dip.
Serving ideas
Serve the hummus as a dip with bread or crisp vegetables, or spoon it onto a platter alongside other small dishes. It also works as a spread in a sandwich or wrap.
For a more substantial plate, pair it with vegetables and a source of protein. The smooth dip is rich, so fresh, crunchy accompaniments provide contrast.
Recipe notes & tips
- Reserve the cooking liquid before you transfer or drain the chickpeas.
- Add the reserved liquid a little at a time to control the final consistency.
- Taste and adjust the salt after blending.
- Allow for the hummus to firm up as it chills before adding extra liquid.
- Add the paprika and olive oil garnish just before serving.
Variations
- Extra lemon: Add a little more lemon juice for a sharper, brighter dip.
- More garlic: Blend in an extra clove for a stronger garlic flavour.
- Spiced finish: Add a pinch of extra cumin to the hummus before blending.
- Herb garnish: Scatter chopped fresh herbs over the finished dip.
- Chilli topping: Add a little chilli alongside the paprika for a hotter finish.
Common mistakes to avoid
- Discarding the cooking liquid: Reserve 240 ml before draining so you can adjust the hummus as it blends.
- Adding all the liquid at once: Start with 120 ml and add more gradually to avoid a runny texture.
- Stopping the blender too soon: Blend until smooth, scraping down the sides if chickpeas remain stuck there.
- Over-thinning the warm hummus: Remember that it firms up in the fridge, and add liquid cautiously.
- Skipping the chill: Refrigerate for the full hour so the hummus can set before serving.
How to store
Store the hummus in a sealed container in the fridge and use within 3–4 days. Stir before serving; if it has thickened, mix in a small splash of water or reserved cooking liquid.
Frequently asked questions
Can I use canned chickpeas?
This method is written for dried chickpeas, which are pressure-cooked in the Instant Pot. Canned chickpeas are already cooked, so they would need a different method and would not produce the same cooking liquid.
Why reserve the chickpea cooking liquid?
It loosens the blended chickpeas and helps you control the consistency. Add it a little at a time, as the hummus will thicken as it chills.
Can I make the hummus ahead?
Yes. Prepare it, cover it in a sealed container and refrigerate it for up to 3–4 days. Add the paprika and olive oil garnish when you serve it.
How can I make it smoother?
Blend thoroughly and pause to scrape down the sides of the processor or blender. Add reserved cooking liquid gradually if the mixture needs loosening.
Do I have to refrigerate it for an hour?
The recipe calls for a one-hour chill, which helps the warm hummus firm up. It can be served sooner, but its texture will be softer.
What should I serve with Instant Pot hummus?
Try it with bread, crisp vegetables, or as a spread in a sandwich or wrap. It also suits a platter of small dishes.
Cook it from the original
This recipe comes from cravinghomecooked.com. Their page has the author’s own photos, notes and tips — the best place to cook it from.
Open the recipe on cravinghomecooked.com