
Chocolate Chip Scone Recipe
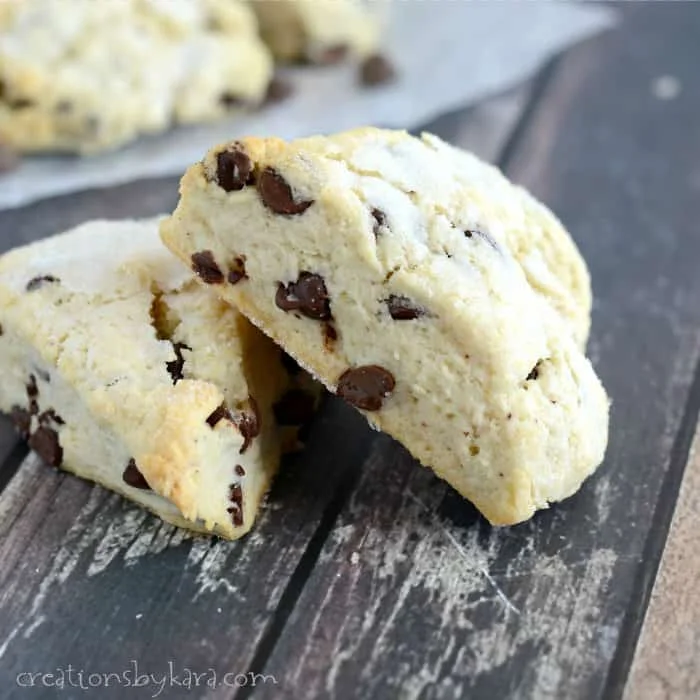
These American-style cream scones are tender, lightly sweet and packed with chocolate chips, with a crisp sugar-dusted top. They come together quickly without needing to cut butter into the flour, making them a handy bake for breakfast or an afternoon treat.
Ingredients
- 344 g (2 3/4 cups)plain flour
- 67 g (1/3 cup)sugar
- 3 g (1/2 tsp)salt
- 6 g (1 1/2 tsp)baking powder
- 130 g (3/4 cup)chocolate chips
- 360 ml (1 1/2 cups)double cream
- 5 ml (1 tsp)vanilla extract
- 15 ml (1 Tbsp)milk
- 25 g (2 Tbsp)sugar
Instructions
- 1
Mix the dough
Whisk the flour, sugar, salt and baking powder together in a mixing bowl, then stir in the chocolate chips. Add the cream and vanilla and stir only until the mixture is barely combined. Press the dough together into a ball.
- 2
Shape the scones
Divide the dough in half and pat each piece into a circle about 2.5 cm (1 inch) thick. Cut each circle into 6 wedges and place them on lightly greased or silicone-lined baking trays. Brush the tops with milk, then sprinkle with sugar.
- 3
Bake until golden
Bake at 180°C (350°F) for 25–30 minutes, or until the scones are lightly browned.
What are cream scones?
Scones are a familiar British bake, while this cream-rich, chocolate-studded version is an American-style take. Rather than rubbing butter into flour, the cream supplies the richness and brings the dough together.
The method keeps things simple: shape the dough into two rounds, cut them into wedges and bake. Chocolate chips add pockets of sweetness, while a little sugar on top gives the crust a gentle crunch.
Nutrition and macros by portion
The nutrition label shows one serving as written: 293 calories, 4g protein, 38g carbs, 14g fat.
| Portion | Adjustment | kcal | Protein | Carbs | Fat |
|---|---|---|---|---|---|
| Lighter | Smaller scone portions | 205 kcal | 3g | 27g | 10g |
| This serving | As written | 293 kcal | 4g | 38g | 14g |
| Hungry | Serve two scones | 440 kcal | 6g | 57g | 21g |
The flour and sugar provide most of the carbohydrates, while the cream and chocolate chips contribute much of the fat; the cream and flour also supply some protein. Pair a scone with fruit or yoghurt for a more balanced plate.
The ingredients that matter
Cream: It enriches the dough and provides its moisture, so stir it in just until the dry ingredients are barely mixed. Overworking the dough can make the scones firm.
Chocolate chips: Fold them through the dry mixture before adding the cream to distribute them evenly. Plain or milk chocolate chips both work.
Baking powder: This is the raising agent, so whisk it thoroughly with the flour, salt and sugar for an even rise.
Handle the dough gently
Mixing: Stop as soon as the dough begins to come together; it need not look perfectly smooth. Press any loose bits into the ball rather than kneading.
Shaping: Pat each half into a round about 2.5 cm thick, keeping the thickness as even as you can. Cut the wedges cleanly so they bake at a similar rate.
Look for light browning
Timing: Bake for 25–30 minutes at 180°C (350°F), checking near the shorter end of the range. The tops should be lightly browned when the scones are ready.
Finish: Brushing with milk helps the sugar adhere and gives the tops colour. Let the scones cool briefly on the tray before serving.
Serve them simply
These scones are enjoyable warm or at room temperature, when the chocolate chips have softened or set again. Serve them plain, or alongside tea or coffee.
For a more substantial snack, add fruit or yoghurt on the side. The scones are already sweet, so extra toppings are optional.
Plan the tray
Spacing: Arrange the wedges with room between them so the edges can bake and brown. If the tray is crowded, use two trays rather than pushing the pieces together.
Preparation: The recipe makes 12 wedges from two rounds. A lightly greased tray or silicone liner helps prevent sticking.
Recipe notes & tips
- Measure the flour without packing it tightly into the cup.
- Stir the cream in only until the dough is barely combined.
- Pat the dough rather than rolling or kneading it.
- Keep the two rounds about 2.5 cm thick for evenly sized wedges.
- Check the scones from 25 minutes and take them out once lightly browned.
Variations
- Dark chocolate: Use dark chocolate chips for a less sweet, more cocoa-forward bite.
- Milk chocolate: Swap in milk chocolate chips for a sweeter version.
- Citrus note: Add finely grated orange zest to the dry ingredients for a fresh aroma.
- Nutty crunch: Fold chopped pecans into the dough with the chocolate chips.
- Spiced dough: Add a pinch of cinnamon to the flour mixture for gentle warmth.
Common mistakes to avoid
- Overmixing: The scones can turn firm; stop stirring as soon as the dough comes together.
- Uneven rounds: Wedges may bake at different rates; pat both circles to a consistent thickness.
- Crowded tray: The scones may not brown evenly; leave space between the wedges or use two trays.
- Skipping the topping: The sugar will not stick as well to dry dough; brush the tops with milk first.
- Baking too long: The scones can dry out; check for light browning from 25 minutes.
How to store
Once cool, store the scones in an airtight container at room temperature for up to 2 days. Warm them briefly in a low oven to refresh, or freeze them airtight for longer storage and thaw before serving.
Frequently asked questions
Can I use single cream instead of double cream?
Double cream is thicker and richer, so single cream may make the dough looser and less rich. If using it, add it gradually and stop once the dough just comes together.
Can I make the dough ahead?
For the best lift, shape and bake the dough soon after mixing. You can prepare the dry ingredients in advance and add the cream and vanilla when ready to bake.
How do I know when the scones are done?
Look for lightly browned tops after 25–30 minutes. Avoid waiting for a deep brown crust, which can leave them dry.
Can I freeze the baked scones?
Yes. Cool them completely, pack them airtight and freeze; thaw before serving. A short warm-up in a low oven helps revive the texture.
Why is the dough crumbly?
It may need a little more gentle pressing to hold together. Press the loose pieces into the dough rather than kneading it.
Cook it from the original
This recipe comes from creationsbykara.com. Their page has the author’s own photos, notes and tips — the best place to cook it from.
Open the recipe on creationsbykara.com