
Baked Honey Garlic Chicken
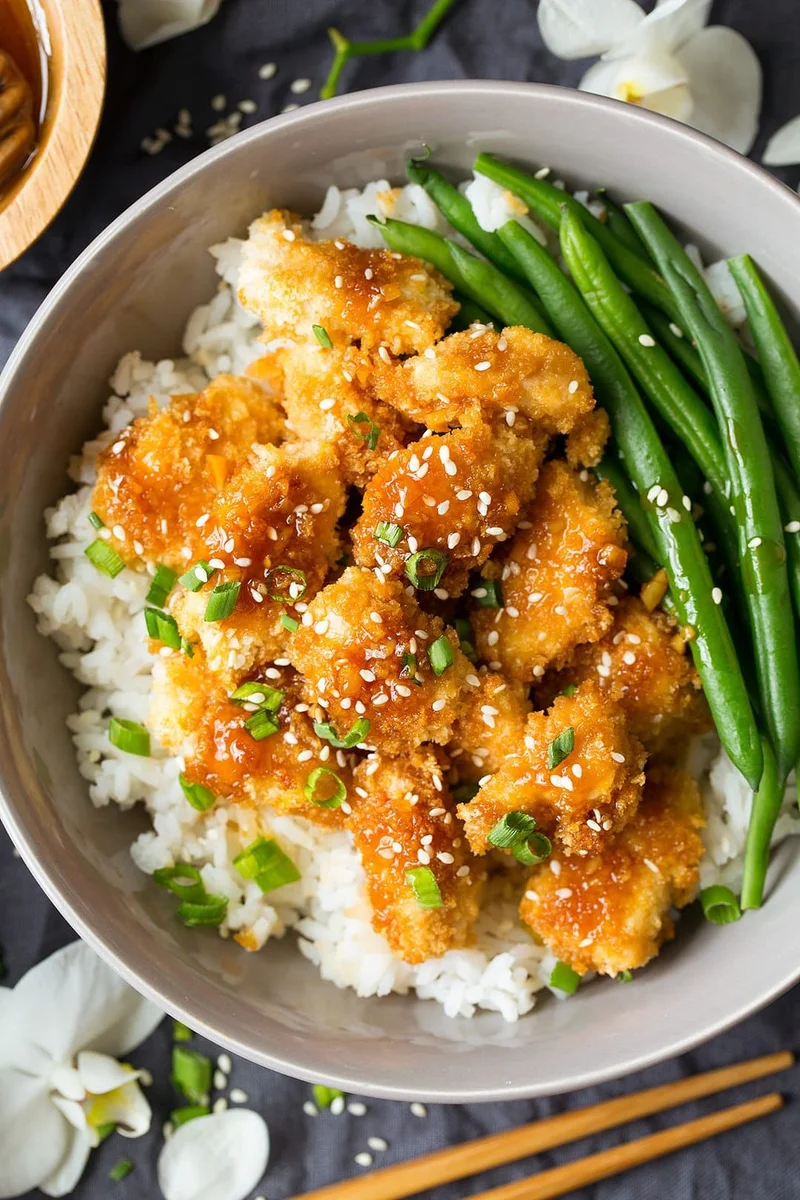
Bite-sized chicken breast is coated in panko, baked until tender and tossed in a glossy honey, garlic and soy sauce. It is a straightforward oven-baked take on a sweet-and-savoury Asian-inspired favourite.
Ingredients
- 680 g (1 1/2 lb)boneless, skinless chicken breasts, diced into 2.5 cm (1-inch) cubes
- 2 largeeggs
- 150 g (1 1/2 cups)panko breadcrumbs
- 79 ml (1/3 cup), dividedwater
- 6.5 g (2 1/2 tsp)cornflour
- 7.5 ml (1 1/2 tsp)olive oil
- 1 1/2 tbspminced garlic
- 1 tspfinely peeled and minced ginger
- 113 g (1/3 cup)honey
- 52.5 ml (3 1/2 tbsp)soy sauce
Instructions
- 1
Preheat the oven
Heat the oven to 200°C (400°F). Line a rimmed 46 × 33 cm (18 × 13-inch) baking tray with baking parchment and set it aside.
- 2
Prepare the coating
Whisk the eggs in a bowl until combined. Tip the panko into a separate shallow dish.
- 3
Coat the chicken
Dip the chicken pieces in the egg, working in batches of about six pieces, then transfer them to the panko and turn to coat.
- 4
Fill the tray
Arrange the coated chicken in a single layer on the prepared tray. Repeat until all the pieces are coated.
- 5
Bake until cooked
Bake for about 14–18 minutes, until cooked through. The centre of the largest pieces should reach 74°C (165°F) on an instant-read thermometer. The coating will not become very golden; most of the colour comes from the sauce, so avoid overbaking or the chicken may dry out.
- 6
Mix the cornflour
While the chicken bakes, put 1 tablespoon of the water in a small bowl and whisk in the cornflour until smooth. Stir in the remaining water and set aside.
- 7
Cook the aromatics
Heat the oil in a small saucepan over a medium heat. Add the garlic and ginger and sauté for about 30 seconds, just until lightly golden. Take the pan off the heat.
- 8
Add the sauce ingredients
Add the honey and soy sauce to the pan. Whisk the water and cornflour mixture again, then pour it in.
- 9
Thicken the sauce
Return the pan to the heat and bring the mixture to the boil. Boil for about 30 seconds to 1 minute, until thickened, then remove from the heat and cover to keep warm while the chicken finishes baking.
- 10
Toss and serve
Toss the chicken with the sauce just before serving. Sprinkle with green onions and sesame seeds, and serve with rice or cauliflower rice if desired.
What is baked honey garlic chicken?
This dish takes inspiration from the sweet, savoury honey-garlic chicken often found on Asian-inspired menus. Rather than frying the chicken, this version bakes panko-coated pieces and finishes them in a sticky sauce.
The contrast is what makes it work: crisp-textured crumbs meet tender chicken, while honey, soy, garlic and ginger bring sweetness, salt and aromatic depth.
Nutrition and macros by portion
The nutrition label shows one serving as written: 347 calories, 35g protein, 34g carbs, 7g fat.
| Portion | Adjustment | kcal | Protein | Carbs | Fat |
|---|---|---|---|---|---|
| Lighter | Serve with cauliflower rice | 243 kcal | 25g | 24g | 5g |
| This serving | As written | 347 kcal | 35g | 34g | 7g |
| Hungry | Add a larger rice portion | 521 kcal | 53g | 51g | 11g |
The chicken provides most of the protein, while the panko and honey contribute most of the carbohydrates. The honey and olive oil contribute fat, with the egg also adding some. Serve with rice or cauliflower rice and add vegetables alongside for a balanced plate.
The panko coating
Egg first: the beaten egg helps the panko cling to each piece of chicken. A shallow dish makes it easier to roll the pieces through the crumbs.
Keep it loose: panko gives the coating its coarse texture. Arrange the pieces in one layer so they bake rather than steam against one another.
The quick honey garlic sauce
Cornflour slurry: whisking the cornflour with a little water first helps it blend smoothly into the sauce. Stir it again just before adding it to the pan, as it can settle.
Gentle aromatics: briefly cooking the garlic and ginger takes the raw edge off without needing a long simmer. Add the honey and soy after taking the pan off the heat, as directed.
How to judge doneness
Temperature: check the centre of one of the larger chicken pieces; it should reach 74°C (165°F). The recipe gives a baking window of 14–18 minutes, but piece size and oven performance can affect the timing.
Colour: do not wait for a deeply golden coating in the oven. The sauce supplies much of the finished colour, and extra baking can dry out the chicken.
Timing the finish
Make the sauce while the chicken is in the oven, then cover it to keep it warm once thickened. This keeps the final toss quick and helps dinner come together within the stated 30 minutes.
Sauce the chicken just before serving. Leaving the pieces coated for too long softens the panko.
What to serve with it
Rice is a simple accompaniment that catches the sweet-savoury sauce. Cauliflower rice is another option mentioned in the recipe.
For a more rounded plate, add a side of vegetables such as steamed broccoli or stir-fried greens. Keep them separate until serving so the coating stays as textured as possible.
Recipe notes & tips
- Cut the chicken into similarly sized cubes so the pieces cook at roughly the same rate.
- Work in small batches when dipping the chicken to keep the panko dish manageable.
- Use a thermometer to check the centre of the largest pieces rather than relying only on the clock.
- Whisk the cornflour slurry again just before pouring it into the saucepan.
- Toss the chicken with the sauce immediately before serving to help preserve the coating's texture.
Variations
- Add heat: stir chilli flakes into the sauce for a spicy edge.
- Use chicken thighs: cut boneless, skinless thighs into bite-sized pieces and check that they are cooked through.
- Try a citrus note: finish the sauce with a little grated lemon zest.
- Add vegetables: serve with steamed broccoli, greens or another favourite vegetable.
- Choose a rice base: serve over rice or cauliflower rice, as suggested in the recipe.
Common mistakes to avoid
- Crowding the tray: pieces packed together may not bake as evenly; arrange them in a single layer.
- Overbaking the chicken: the panko will not be deeply golden in the oven, so use the temperature check and avoid waiting for a dark crust.
- Skipping the slurry whisk: settled cornflour can make the sauce uneven; whisk it again just before adding.
- Leaving the chicken in sauce: the coating softens as it sits; toss just before serving.
- Cooking the garlic too long: it can become bitter; sauté it with the ginger for about 30 seconds, until lightly golden.
How to store
Refrigerate leftovers in a covered container for up to 3 days. Reheat until piping hot; an oven or air fryer can help bring back some texture, though the sauced coating will soften.
Frequently asked questions
Can I prepare the chicken ahead?
You can dice the chicken and measure out the ingredients ahead of time. For the best coating texture, bake the chicken and toss it with sauce shortly before serving.
How can I tell when the chicken is cooked?
Check the centre of one of the larger pieces with an instant-read thermometer; it should register 74°C (165°F).
Why isn't the panko very golden?
The recipe notes that the coating may not brown much in the oven and that much of the finished colour comes from the sauce. Do not extend the baking time just to darken the crumbs.
Can I use chicken thighs instead of breast?
Boneless, skinless thighs can be cut into similar-sized pieces, though cooking time may vary. Check the centre for doneness rather than relying on the stated time alone.
Can I make the sauce in advance?
Yes. Keep it covered after thickening, then warm it gently before tossing with the cooked chicken.
What can I serve alongside it?
The recipe suggests rice or cauliflower rice. Vegetables such as broccoli or greens also work well alongside.
Cook it from the original
This recipe comes from cookingclassy.com. Their page has the author’s own photos, notes and tips — the best place to cook it from.
Open the recipe on cookingclassy.com