
Stuffed Peppers
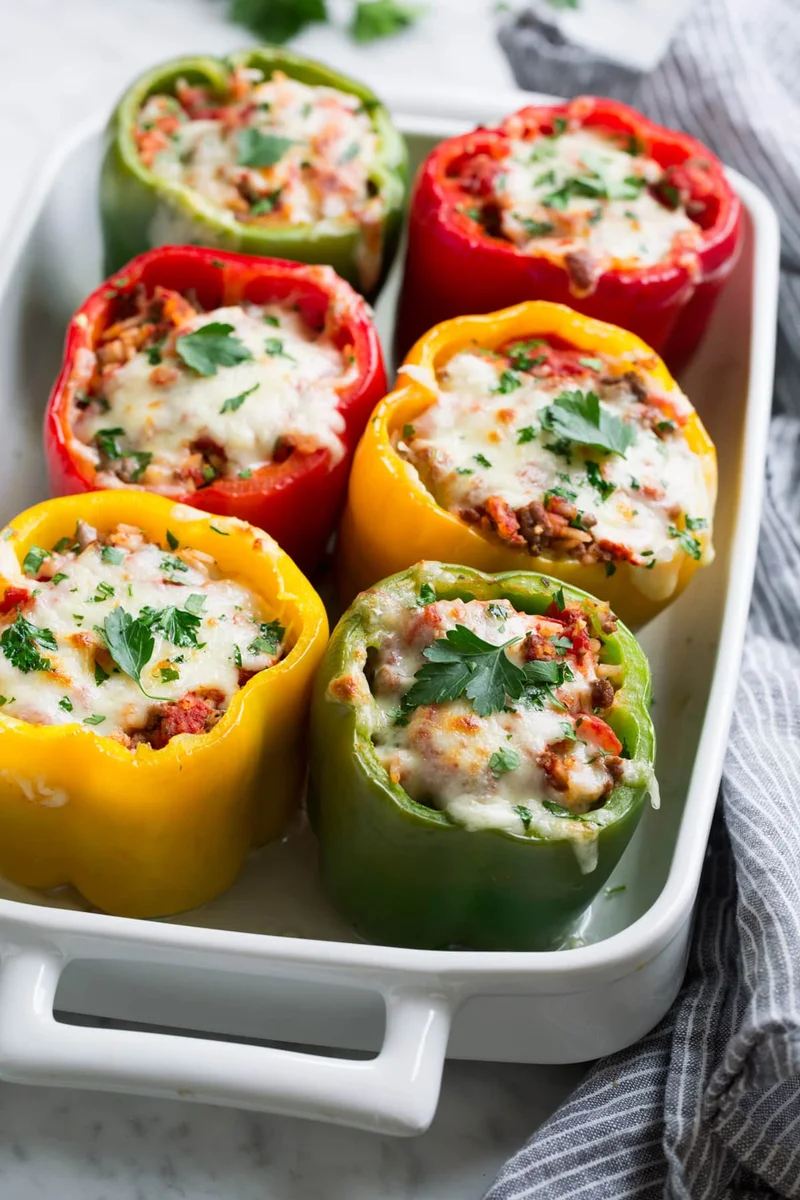
These American-style stuffed peppers pair tender bell peppers with a savoury filling of seasoned beef, rice and tomatoes, finished with melted mozzarella. They make a hearty oven-baked meal, with the filling and peppers cooked in stages before baking together.
Ingredients
- 125 g (2/3 cup)long-grain white rice
- to tastesalt and freshly ground black pepper
- 6 medium-largebell peppers, any colour
- 15 ml (1 Tbsp)olive oil
- 567 g (1 1/4 lb)lean minced beef
- 1 small (about 150 g; 1 cup chopped)yellow onion, finely chopped
- 3 cloves (about 15 g; 1 Tbsp minced)garlic, minced
- 1 can, 411 g (14.5 oz), drainedpetite diced tomatoes
- 1 can, 227 g (8 oz)tomato sauce
- 45 ml (3 Tbsp), plus extra for garnishfresh parsley, minced
- 10 ml (2 tsp)Italian seasoning
- about 113 g (1 cup)mozzarella, shredded
Instructions
- 1
Cook the rice
Heat the oven to 200°C (400°F). Cook the rice according to the packet instructions.
- 2
Prepare the peppers
Trim about 6 mm (1/4 inch) from the top of each pepper, then remove the stems, ribs and seeds. Pour about 1.3 cm (1/2 inch) of water into a baking dish large enough to hold the peppers.
- 3
Soften the peppers
Set the peppers upside down in the water, cover the dish with foil and bake for 20 minutes.
- 4
Brown the beef
Meanwhile, heat the olive oil in a large non-stick frying pan over medium-high heat. Add the onion and sauté for 3–4 minutes, then push it to one side of the pan. Add the beef in chunks, season with salt and pepper, and leave it to brown on the underside for about 3 minutes.
- 5
Finish the filling
Break up the beef, mix it with the onion and cook for 2 minutes. Add the garlic and cook for about 1 minute more, until the beef is cooked through. Take the pan off the heat and drain away excess fat.
- 6
Mix the filling
Stir in the drained tomatoes, half the tomato sauce (about 120 ml, or 1/2 cup), cooked rice, parsley and Italian seasoning. Season to taste with salt and pepper.
- 7
Fill and bake
Lower the oven to 180°C (350°F). Turn the peppers upright, lightly salt their insides and fill them with the beef mixture. Pour the remaining tomato sauce over the peppers, cover with foil and bake for 20 minutes.
- 8
Add the cheese
Take the dish out of the oven and sprinkle the peppers with mozzarella. Return it to the oven uncovered and bake for 10–20 minutes more, until the peppers are as tender as you like. Finish with extra parsley and serve warm.
What are stuffed peppers?
Stuffed peppers are hollowed bell peppers filled with a savoury mixture and baked until tender. This American-style version combines beef, rice and tomatoes, then adds mozzarella for a cheesy finish.
Cooking the peppers briefly upside down in water gives them a head start, while the filling is prepared separately. That makes it easier to bring the components together for the final bake.
Nutrition and macros by portion
The nutrition label shows one serving as written: 395 calories, 27g protein, 33g carbs, 16g fat.
| Portion | Adjustment | kcal | Protein | Carbs | Fat |
|---|---|---|---|---|---|
| Lighter | Use less mozzarella | 277 kcal | 19g | 23g | 11g |
| This serving | As written | 395 kcal | 27g | 33g | 16g |
| Hungry | Serve two peppers | 593 kcal | 41g | 50g | 24g |
The rice and peppers provide most of the carbohydrates, while beef supplies much of the protein and the olive oil, beef and mozzarella contribute fat. Pair a pepper with a generous portion of green vegetables or salad to round out the plate.
Choosing the ingredients
Peppers: Medium-large peppers provide room for a generous portion of filling. Any colour works; choose ones that sit steadily once turned upright.
Beef and rice: Lean minced beef brings savoury flavour and protein, while cooked white rice makes the filling substantial. Draining the tomatoes helps prevent the mixture from becoming too wet.
Build flavour in the pan
Onion first: Sauté it until softened, then move it aside before adding the beef. Leaving the beef undisturbed for about 3 minutes helps it brown before you break it up.
Garlic last: Add the garlic after the beef has cooked for a few minutes and stir it in for about 1 minute. This brief cooking releases its aroma without leaving it in the pan for the full browning time.
Getting the texture right
Pepper tenderness: The first 20-minute bake softens the peppers before filling. After the cheese goes on, bake for 10–20 minutes more, checking until they reach the tenderness you prefer.
Filling consistency: The drained tomatoes and measured portion of sauce keep the beef and rice mixture moist without adding all the sauce at once. Pour the remainder over the filled peppers for the covered bake.
Timing the stages
While the rice cooks, trim the peppers and get them started in the oven. The recipe uses two oven temperatures: 200°C (400°F) for the initial pepper bake, then 180°C (350°F) for the filled peppers.
The final uncovered bake is guided by tenderness rather than a fixed endpoint. Begin checking after 10 minutes, allowing up to 20 minutes for softer peppers and melted cheese.
What to serve alongside
A crisp green salad or steamed green vegetables make a fresh contrast to the warm, tomato-rich filling. Serve the peppers straight from the baking dish while the mozzarella is still melted.
If you want a more substantial meal, add bread to mop up the tomato sauce. The peppers already contain rice, so a simple side is often enough.
Recipe notes & tips
- Choose peppers of similar size so they cook at roughly the same rate.
- Drain the diced tomatoes well before adding them to the filling.
- Cook the rice according to its packet directions before mixing it into the beef.
- Taste the filling for seasoning before stuffing the peppers.
- Check pepper tenderness after the first 10 minutes of the final bake.
Variations
- Use brown rice: Cook it according to its packet instructions before adding it to the filling.
- Change the cheese: Top the peppers with another good-melting cheese in place of mozzarella.
- Add herbs: Use extra fresh parsley for a more pronounced herbal finish.
- Make it spicier: Add chilli flakes to the beef mixture while seasoning it.
- Use different peppers: Mix colours for a varied look while keeping the same method.
Common mistakes to avoid
- Skipping the first bake: The peppers may stay firmer than intended; soften them upside down for 20 minutes first.
- Leaving the tomatoes undrained: Extra liquid can loosen the filling; drain the can before mixing.
- Stirring the beef too soon: It may not brown well; let it sear for about 3 minutes before breaking it up.
- Adding garlic too early: It can cook for too long; add it after the beef and onion have cooked.
- Overbaking by the clock: Peppers vary in thickness; check tenderness during the final 10–20 minutes.
How to store
Refrigerate cooled leftovers in an airtight container for up to 3 days. Reheat in a covered oven-safe dish at 180°C (350°F) until hot throughout, or microwave individual portions.
Frequently asked questions
Can I prepare the filling ahead?
Yes. Cook the rice and beef mixture, then refrigerate it in a covered container. Fill the peppers when you are ready to bake.
Do I have to pre-bake the peppers?
The initial 20-minute bake starts softening them before they are filled. Skipping it will change the texture and may leave them firmer after the remaining bake.
How do I know when the peppers are done?
They should be tender when pierced, with the filling heated through and the cheese melted. Check after 10 minutes of the final bake and continue for up to 20 minutes as needed.
Can I use a different colour of pepper?
Yes. The recipe works with bell peppers of any colour; choose medium-large ones that fit your baking dish.
Can I freeze stuffed peppers?
They can be frozen once cooled in a freezer-safe container. Thaw them in the fridge before reheating, noting that the peppers may soften further.
Cook it from the original
This recipe comes from cookingclassy.com. Their page has the author’s own photos, notes and tips — the best place to cook it from.
Open the recipe on cookingclassy.com