
Chicken Piccata Pasta
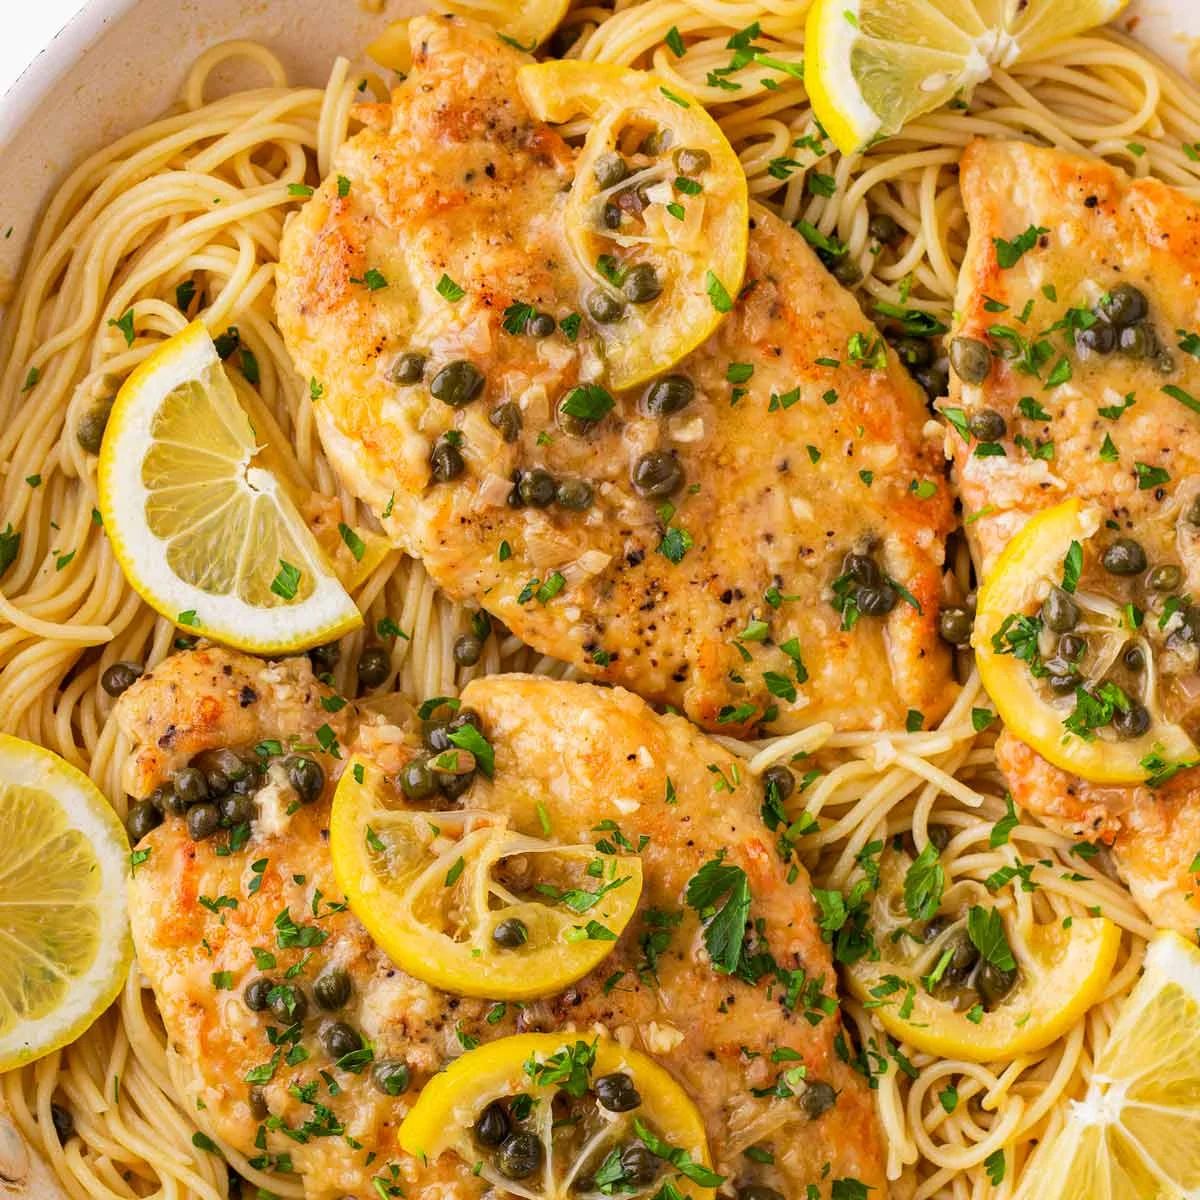
Chicken piccata pasta brings golden chicken cutlets and spaghetti together in a bright lemon, caper and butter sauce. It makes a satisfying meal with plenty of sauce to coat both the pasta and chicken.
Ingredients
- 340 g (¾ lb)thin spaghetti or your favourite pasta
- 4 cutlets, about 0.6 cm (¼ inch) thickthin chicken cutlets
- al gustosalt and pepper
- 60 g (½ cup)plain flour
- a few drizzlesolive oil, for the pan
- 1 tablespoonfinely minced shallot
- 3 clovesfresh garlic, minced
- 120 ml (½ cup)white wine, such as Sauvignon Blanc
- 360 ml (1½ cups), plus more as neededchicken broth
- 2 tablespoons, or to tastefresh lemon juice
- ½ lemonlemon, thinly sliced
- 3 tablespoons, drainedcapers
- 70 g (5 tablespoons), dividedunsalted butter
- to garnishfresh Italian parsley, chopped
Instructions
- 1
Cook the pasta
Cook the spaghetti in generously salted water according to the packet directions until al dente. Reserve about 240 ml (1 cup) of pasta water, then drain the pasta and set it aside.
- 2
Prepare the chicken
Season the cutlets generously with salt and pepper, using about ¼ teaspoon of salt per cutlet. Coat each one in flour, shaking off the excess.
- 3
Brown the cutlets
Heat a few drizzles of olive oil in a large frying pan over medium heat. Cook the chicken on both sides until golden and cooked through in the centre, then remove it from the pan and set aside.
- 4
Build the sauce
Add 2 tablespoons of butter to the same pan. Sauté the shallot and garlic for about 1–2 minutes, until fragrant. Add the capers and wine, then scrape up the browned bits with a wooden spoon.
- 5
Add lemon and broth
Stir in the chicken broth, lemon juice to taste and lemon slices. Season the sauce with salt and pepper to taste.
- 6
Simmer the chicken
Return the chicken to the pan and bring the sauce to a low simmer. Simmer for 2–3 minutes, until slightly thickened, then transfer the chicken to a plate, leaving the sauce in the pan.
- 7
Finish the sauce
Turn off the heat and immediately stir the remaining 3 tablespoons of butter into the sauce until it is glossy and thickened. Spoon half the sauce and its garnishes over the chicken, leaving the rest in the pan.
- 8
Toss the pasta
Add the cooked pasta to the sauce in the pan and toss to coat, adding reserved pasta water as needed to reach the desired consistency.
- 9
Serve the dish
Top the pasta with the chicken and its sauce. Garnish with Italian parsley and more lemon slices.
What is chicken piccata pasta?
Piccata is an Italian-style preparation known for a lively sauce made with lemon and capers, often served with meat. This pasta version turns those familiar flavours into a complete meal by pairing chicken cutlets with spaghetti.
The method builds the sauce in the same pan used to brown the chicken, then divides it between the cutlets and pasta. Butter stirred in off the heat gives the sauce a glossy finish.
Nutrition and macros by portion
The nutrition label shows one serving as written: 790 calories, 50g protein, 80g carbs, 27g fat.
| Portion | Adjustment | kcal | Protein | Carbs | Fat |
|---|---|---|---|---|---|
| Lighter | Less butter, more greens | 553 kcal | 35g | 56g | 19g |
| This serving | As written | 790 kcal | 50g | 80g | 27g |
| Hungry | Add extra spaghetti | 1185 kcal | 75g | 120g | 41g |
The spaghetti and flour provide most of the carbohydrates, while butter and olive oil contribute much of the fat. Chicken supplies most of the protein, with smaller amounts from the pasta and flour. Balance the plate with a side of green vegetables or salad.
The ingredients that shape the sauce
Lemon and capers: lemon juice and slices bring a fresh, tart note, while capers add a salty, briny flavour. Taste the sauce before adding extra salt, since the capers and broth can already contribute seasoning.
Wine and broth: white wine lifts the browned bits from the pan, and chicken broth gives the sauce its savoury base. The reserved pasta water is there to loosen the sauce when it coats the spaghetti.
Get the cutlets ready
Thin chicken: cutlets about 0.6 cm (¼ inch) thick cook quickly and are easy to serve alongside pasta. If starting with a thick breast, the recipe notes that one can be split into two cutlets.
Light flour coating: dredge each cutlet and shake away the excess before it goes into the pan. A thin layer helps the chicken brown without leaving a heavy coating in the sauce.
Build flavour in the same pan
Browned bits: after cooking the chicken, use the same pan for the shallot, garlic, capers and wine. Scrape the pan gently with a wooden spoon to incorporate the browned residue into the sauce.
Gentle simmer: return the cutlets to the sauce for 2–3 minutes, just until it thickens slightly. Take care not to let the sauce boil vigorously.
Finish with a glossy sauce
Butter off the heat: turn off the hob before stirring in the final 3 tablespoons of butter. This step helps the sauce become glossy and thickened.
Pasta water: toss the spaghetti with the sauce and add reserved water a little at a time. Stop when the sauce coats the strands without pooling heavily at the bottom of the pan.
Check the pasta and serve
Al dente pasta: cook the spaghetti according to its packet directions and taste it before draining. Keeping it firm helps it hold up when tossed with the warm sauce.
To serve: arrange the chicken and sauce over the pasta, then finish with parsley and extra lemon slices. A simple green salad or lightly cooked vegetables make an easy accompaniment.
Recipe notes & tips
- Use a large frying pan so the cutlets have room to brown.
- Reserve the pasta water before draining the spaghetti.
- Shake excess flour off each cutlet to keep the coating light.
- Scrape the browned bits with a wooden spoon when adding the wine.
- Taste the sauce before adding more salt, especially after the capers go in.
- Add pasta water gradually so the sauce does not become too thin.
Variations
- Use another pasta: choose a favourite shape that can be tossed easily with the sauce.
- Adjust the lemon: add the lemon juice to taste for a sharper or milder sauce.
- Add more capers: increase their amount for a brinier finish.
- Swap the garnish: finish with chopped parsley and extra lemon slices as written, or use only one of the two.
- Use extra broth: add a little more chicken broth if you need to loosen the sauce.
Common mistakes to avoid
- Crowded chicken: the cutlets may not brown evenly; cook them in batches if the pan is too full.
- Too much flour: excess coating can make the pan residue heavy; shake each cutlet well before cooking.
- Skipped pasta water: the sauce may cling unevenly; reserve about 240 ml before draining.
- Boiling the sauce hard: it can reduce too quickly; keep it at a low simmer.
- Adding butter over high heat: the sauce may not turn glossy; switch off the heat before stirring in the final butter.
How to store
Refrigerate leftovers in an airtight container for up to 3 days. Reheat gently in a pan with a splash of broth or water to loosen the sauce, or microwave in short intervals, stirring as needed.
Frequently asked questions
Can I use a different type of pasta?
Yes. The recipe allows for your favourite pasta in place of thin spaghetti. Cook it according to the packet directions until al dente.
How can I tell when the chicken is cooked?
The cutlets should be golden on both sides and cooked through in the centre. Their thinness helps them cook quickly, so keep an eye on them in the pan.
Do I need to use the pasta water?
Use some as needed to adjust the sauce after tossing it with the pasta. Add it gradually until the spaghetti is coated to your liking.
Can I leave out the wine?
The listed method uses white wine to deglaze the pan. If you prefer not to use it, substitute chicken broth and scrape up the browned bits as you stir.
When should I add the last of the butter?
Turn off the heat first, then stir in the remaining 3 tablespoons straight away. This is the step that gives the sauce its glossy finish.
Cook it from the original
This recipe comes from cookingformysoul.com. Their page has the author’s own photos, notes and tips — the best place to cook it from.
Open the recipe on cookingformysoul.com