
Receta de Kara Paniyaram bajo en carbohidratos y sin gluten
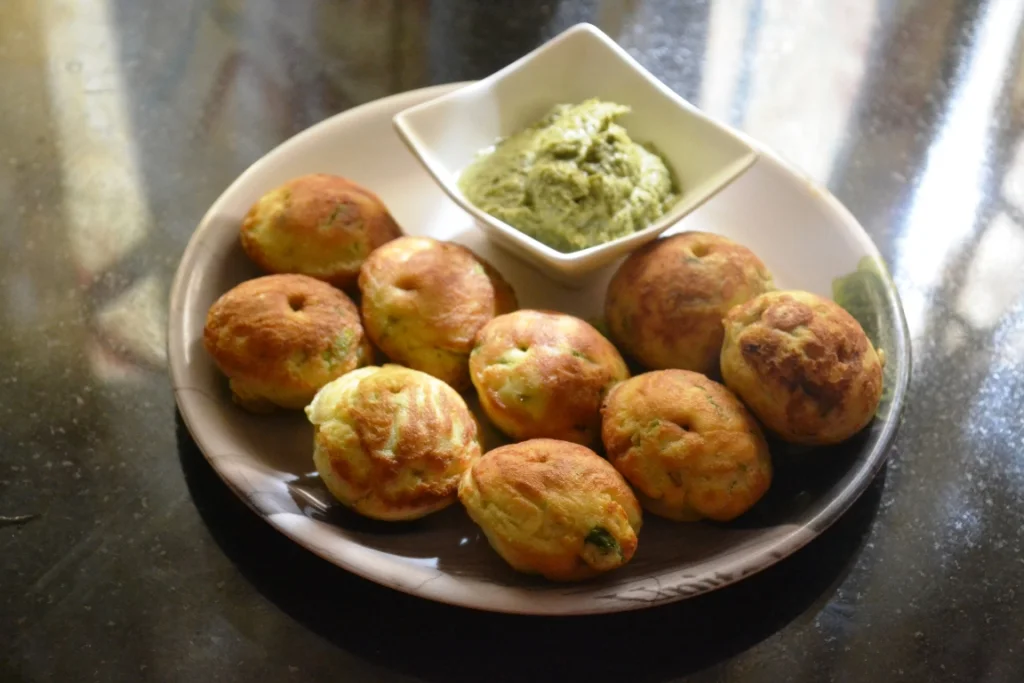
Kara paniyaram are savoury South Indian bites cooked in a moulded pan; this version uses coconut flour and eggs for a quick, gluten-free batter. Make it when you want a small hot snack, and serve it with chutney for dipping.
Ingredients
- 2 tbsp (about 30 ml)Coconut flour
- To tasteSalt
- 3Eggs
- 3Pearl onions
- 2–3 tbsp (30–45 ml)Coriander leaves
- For cookingGhee
Instructions
- 1
Mix the batter
Combine the coconut flour, salt, eggs, pearl onions and coriander leaves in a bowl, mixing until the batter is smooth.
- 2
Heat the pan
Heat a paniyaram pan and grease its moulds with ghee.
- 3
Fill the moulds
Spoon the batter into the greased moulds.
- 4
Turn the paniyaram
When the undersides are cooked, flip the paniyaram.
- 5
Cook through
Continue cooking until the paniyaram are completely cooked.
- 6
Serve hot
Take the paniyaram out of the pan and serve hot with a chutney of your choice.
What is kara paniyaram?
Paniyaram are small South Indian savoury dumplings cooked in a special pan with rounded wells. They are often made from fermented rice-and-lentil batter, while kara refers to a savoury or spicy style.
This recipe takes a quicker route, using eggs and coconut flour instead of the traditional fermented batter. Pearl onions and coriander add aromatic flavour to the little pan-cooked bites.
Nutrition and macros by portion
The nutrition label shows one serving as written: 290 calories, 20g protein, 12g carbs, 19g fat.
| Portion | Adjustment | kcal | Protein | Carbs | Fat |
|---|---|---|---|---|---|
| Lighter | Use less ghee | 203 kcal | 14g | 8g | 13g |
| This serving | As written | 290 kcal | 20g | 12g | 19g |
| Hungry | Double the batch | 435 kcal | 30g | 18g | 29g |
The eggs provide most of the protein and fat, while the coconut flour contributes most of the carbohydrates in this small serving. Ghee adds additional fat, and the quantity used can vary with the pan. Serve with a vegetable side or fresh salad to make the plate more balanced.
A different kind of batter
Coconut flour: it absorbs liquid readily, so mix it thoroughly with the eggs to avoid dry pockets. The recipe gives no resting time, so cook the batter after it has been mixed smooth.
Eggs: these form the main structure of this version and help the paniyaram hold together as they cook. The batter will not behave exactly like a rice-based one.
Prepare the aromatics
Pearl onions: chop them finely so they distribute through the batter and fit comfortably in the moulds. Larger pieces can make the small paniyaram harder to turn.
Coriander: stir in the leaves for a fresh herbal note. Add salt to taste, bearing in mind that the paniyaram may be served with a seasoned chutney.
Cook in the moulds
Ghee: coat each mould before adding batter so the paniyaram release more easily and develop a cooked surface. Re-grease between batches if the pan starts to stick.
Turning point: wait until the bottom is cooked before flipping, as the egg-based mixture needs time to set. Cook the other side until the centres are completely cooked, as the method specifies.
Check for doneness
The recipe does not give a cooking time or pan temperature, so use the visual cues instead. The underside should be cooked enough to turn without the batter falling apart.
After flipping, allow the paniyaram to cook through rather than relying only on a browned exterior. If unsure, open one to check that the centre is set.
Serve with chutney
Serve these straight from the pan while hot, with a chutney of your choice for dipping. A tangy or gently spiced chutney pairs well with the mild egg and coconut flavour.
For a more substantial meal, add a vegetable side or a bowl of soup. The recipe makes one serving, so scale the ingredients up if cooking for more people.
Recipe notes & tips
- Finely chop the pearl onions so they fit neatly into the moulds.
- Mix until no dry coconut flour remains in the batter.
- Grease every mould before adding batter to help the paniyaram release.
- Wait for the underside to cook before attempting to flip each piece.
- Serve promptly while the paniyaram are hot.
Variations
- Add chilli: stir finely chopped green chilli into the batter for extra heat.
- Use curry leaves: finely chop a few leaves and mix them in for a fragrant variation.
- Add cumin: mix a small amount of cumin into the batter for a warm, savoury note.
- Change the herbs: use chopped mint alongside or instead of some of the coriander.
- Serve with coconut chutney: pair the hot paniyaram with coconut chutney for a classic-style accompaniment.
Common mistakes to avoid
- Large onion pieces: they can disrupt the small moulds; chop the pearl onions finely.
- Dry flour pockets: they make the batter uneven; mix until smooth before cooking.
- Insufficient greasing: the paniyaram may stick; coat the moulds with ghee before filling.
- Flipping too soon: unset batter can break apart; wait until the bottom is cooked.
- Relying on browning alone: the centre may remain undercooked; continue cooking until fully set.
How to store
Cool leftovers and refrigerate in a covered container for up to 2 days. Reheat in a lightly greased pan until hot throughout; the texture is best freshly cooked.
Frequently asked questions
Can I make the batter ahead?
The recipe does not specify a resting time, and coconut flour absorbs liquid readily. For the most predictable texture, mix it shortly before cooking.
Do I need a paniyaram pan?
The method is written for a paniyaram pan with moulds. A standard frying pan will not give the same rounded shape, though you can cook small portions of batter in it.
How do I know when to flip them?
Flip once the underside is cooked and the paniyaram can be turned without the batter falling apart. Cook the other side until the centre is set.
What can I serve with kara paniyaram?
Serve them hot with any chutney you like. Coconut or coriander chutney would suit their savoury flavour.
Can I make these without ghee?
The recipe uses ghee to grease the moulds. You can use another suitable cooking fat, though the flavour will differ.
Cook it from the original
This recipe comes from gayathriscookspot.com. Their page has the author’s own photos, notes and tips — the best place to cook it from.
Open the recipe on gayathriscookspot.com