
Receta de harina de coco casera
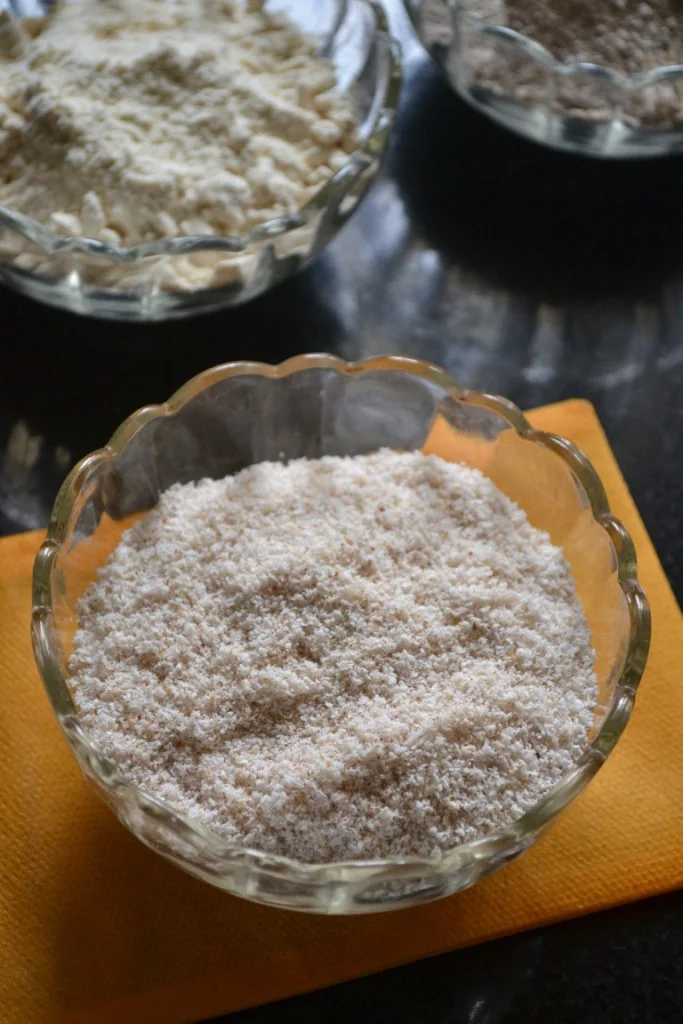
This homemade coconut flour uses the pulp left after grinding coconut with water. Dry it thoroughly, then break it into fine granules for use in recipes, gravies and crisp coatings.
Ingredients
- 1grated coconut
- to grindwater
Instructions
- 1
Dry the pulp
Spread the coconut pulp on a plate or tray. Dry it in the sun or in an oven set to its lowest temperature until completely dry.
- 2
Break the granules
Once the pulp is completely dry, put it in a mixer jar and grind briefly to break it into granules.
- 3
Store the flour
Transfer the coconut flour to a jar, keep it in the fridge and use it in recipes that call for coconut flour.
- 4
Thicken gravies
Use the flour to thicken gravies, or to give cutlets and other deep-fried dishes a crisp coating.
- 5
Use as crumbs
Use it in the same way as breadcrumbs for coating dishes.
What is homemade coconut flour?
Coconut flour is made from dried coconut pulp, often the fibrous material left after coconut has been ground with water. This version is a simple home method rather than a finely milled commercial flour.
Coconut is widely used in Indian cooking, including in gravies and coatings. Drying the pulp first makes it easier to store and grind into usable granules.
Nutrition and macros by portion
The nutrition label shows one serving as written: 1416 calories, 13g protein, 60g carbs, 133g fat.
| Portion | Adjustment | kcal | Protein | Carbs | Fat |
|---|---|---|---|---|---|
| Lighter | Use a smaller coating amount | 991 kcal | 9g | 42g | 93g |
| This serving | As written | 1416 kcal | 13g | 60g | 133g |
| Hungry | Use a larger coating amount | 2124 kcal | 20g | 90g | 200g |
The coconut supplies most of the energy and fat, along with some fibre and carbohydrate; the water adds no meaningful macros. Since this makes a full batch from one coconut rather than a clearly defined single-use portion, pair a measured amount with vegetables and a protein-rich food when serving it in a meal.
The pulp matters
Starting material: use the coconut pulp left after grinding the grated coconut with water. The recipe does not specify how much water to use, so add only what is needed to grind it.
Texture: this homemade version may be coarser than shop-bought coconut flour. A mixer can break the dried pieces down, but it may not produce a completely fine powder.
Dry it thoroughly
Sun drying: spread the pulp out on a plate or tray so it can dry evenly. Keep it protected from dust and insects while it dries.
Oven drying: use the oven's lowest temperature setting and check the pulp regularly. The recipe gives no fixed drying time, so rely on the cue that it is completely dry.
Getting the right grind
Before grinding: make sure the pulp has cooled if it was dried in the oven. Any remaining moisture can make the granules clump in the mixer jar.
After grinding: stop once the granules are broken down to the texture you want. Short pulses can help avoid turning the mixture into a paste.
Using it in cooking
For gravies: add a little at a time and stir it in, checking the thickness before adding more.
For coatings: use the coconut granules in place of breadcrumbs to coat cutlets or other items before deep-frying. The coarser texture can give the coating a distinct coconut finish.
Serving ideas
Try the flour in gravies where coconut suits the other flavours, or use it to coat cutlets before frying. Serve coated cutlets with a fresh salad or vegetables for a more balanced plate.
Because this homemade flour can be coarser than commercial flour, use it first in dishes where a granular texture is welcome.
Recipe notes & tips
- Spread the pulp in an even layer to help it dry consistently.
- Protect the tray from dust and insects during sun drying.
- Check that the pulp is fully dry before putting it in the mixer.
- Grind in short pulses to control the final texture.
- Add the flour gradually when using it to thicken gravy.
Variations
- Finer flour: grind the fully dried pulp for longer, checking often to avoid clumping.
- Coarse coating: leave the dried granules a little larger for a more textured crust.
- Seasoned coating: mix the flour with spices that suit the cutlets before coating them.
- Gravy thickener: stir a small amount into a compatible gravy and adjust as needed.
Common mistakes to avoid
- Damp pulp: it can clump during grinding; dry it completely before processing.
- Thick layer: the centre may stay moist; spread the pulp thinly across the tray.
- High oven heat: the pulp may brown before drying; use the lowest temperature setting.
- Over-grinding: the granules may become pasty; use short pulses and check the texture.
- Adding too much to gravy: the sauce can become overly thick; stir in small amounts.
How to store
Store the dried flour in a clean, airtight jar in the fridge, as directed in the recipe. Keep it dry and use a clean spoon; discard it if it develops an off smell or shows signs of spoilage.
Frequently asked questions
What part of the coconut should I dry?
Dry the coconut pulp left after grinding the grated coconut with water. The method refers to this pulp as the pith.
How much water should I use?
The recipe does not give a measurement; use only enough water to grind the coconut.
How long does drying take?
No drying time is specified. It depends on the weather or oven, so continue until the pulp is completely dry.
Will it be as fine as shop-bought coconut flour?
Not necessarily. The recipe only calls for breaking the dried granules in a mixer, so the result may be coarser.
Can I use it instead of breadcrumbs?
Yes. The method suggests using it as a coating for cutlets and other deep-fried dishes, in the same way as breadcrumbs.
Cook it from the original
This recipe comes from gayathriscookspot.com. Their page has the author’s own photos, notes and tips — the best place to cook it from.
Open the recipe on gayathriscookspot.com