
FRIED MOCHI SURPRISE
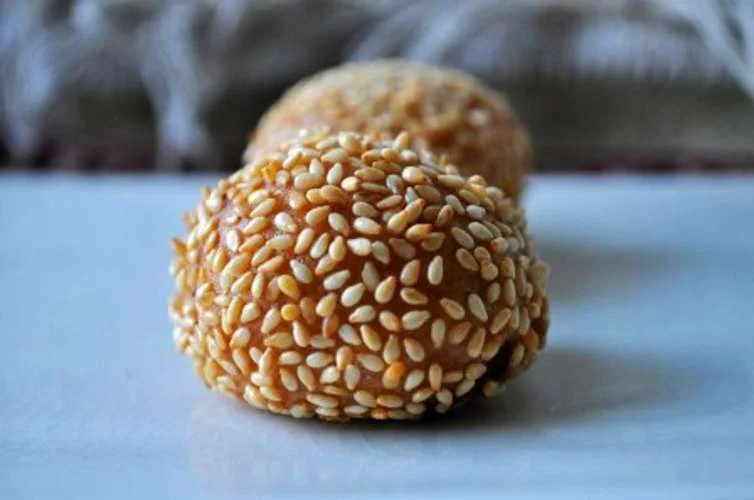
These fried mochi are chewy sweet-rice dough parcels filled with coconut, peanuts and sugar, then coated in toasted sesame seeds. They make a shareable treat when you want something crisp outside and soft and sticky in the middle.
Ingredients
- 40 g (½ cup)desiccated coconut
- 65 g (½ cup)roasted peanuts, chopped
- 38 g (3 tablespoons)sugar
- 240 ml (1 cup)water
- 220 g (1 cup, firmly packed)brown sugar
- 454 g (16 oz)mochiko (sweet glutinous rice flour)
- 5 ml (1 teaspoon)dry sherry
- 36 g (¼ cup)sesame seeds, toasted
Instructions
- 1
Mix the filling
Combine the coconut, chopped peanuts and sugar in a mixing bowl, then set aside.
- 2
Dissolve the sugar
Bring the water to a boil in a saucepan over medium heat. Stir in the brown sugar until it has dissolved.
- 3
Make the dough
Take the pan off the heat, then stir in the mochiko and dry sherry.
- 4
Flatten the dough
Turn the dough out onto a work surface and flatten it to 1.3 cm (½ inch) thick.
- 5
Cut into pieces
Cut the flattened dough into 24 pieces.
- 6
Fill and seal
Put 1 tablespoon of coconut mixture in the centre of each piece. Pinch the edges together to seal in the filling.
- 7
Coat with sesame
Roll the sealed pieces in the toasted sesame seeds.
- 8
Fry until golden
Deep-fry the mochi until golden, then drain on paper towels.
- 9
Try another cooking method
Alternatively, steam the mochi or cook it in boiling water.
What is fried mochi?
Mochi is a chewy food made with glutinous rice, and mochiko is the finely milled sweet rice flour used here. The source describes this as a Filipino co-worker’s recipe, while the writer recalls a similar sesame-coated treat at a Chinese restaurant; its precise origin is not established.
This version combines coconut and peanuts in one sweet filling, then adds toasted sesame seeds on the outside. The contrast of sticky dough, nutty filling and crisp coating is what makes each piece distinctive.
Nutrition and macros by portion
The nutrition label shows one serving as written: 190 calories, 3g protein, 26g carbs, 8g fat.
| Portion | Adjustment | kcal | Protein | Carbs | Fat |
|---|---|---|---|---|---|
| Lighter | Use less filling | 133 kcal | 2g | 18g | 6g |
| This serving | As written | 190 kcal | 3g | 26g | 8g |
| Hungry | Serve extra pieces | 285 kcal | 4g | 39g | 12g |
The sweet rice flour and sugars provide most of the carbohydrates, while coconut, peanuts and sesame seeds contribute much of the fat; peanuts and the flour also provide some protein. For a more balanced plate, serve a piece or two after a meal that includes vegetables and a protein-rich main.
Choose the right flour
Mochiko: use sweet glutinous rice flour, not ordinary rice flour. Its particular starch gives the cooked dough its characteristic stretchy, chewy texture.
Peanuts: chop the roasted peanuts so they mix evenly with the coconut and are easier to portion into the small pieces.
Seal the filling well
Portion: use about 1 tablespoon of filling for each piece, as directed, and keep it towards the centre. Leave enough dough around the edges to bring them together.
Seal: pinch the edges firmly closed before rolling in sesame seeds. Any gaps can let filling escape during cooking.
Look for a golden finish
Frying: the recipe gives no oil temperature or cooking time, so use the golden colour as its stated cue and avoid leaving the pieces unattended. Drain them on paper towels after frying.
Texture: the sesame-coated exterior should be golden, while the mochiko dough stays chewy. The method does not specify a separate internal doneness test.
A note on the alternatives
Steam or boiling water: the source lists these as optional alternatives but does not give timings or further instructions. They will not produce the same fried, golden exterior, so check the texture as they cook.
Serve as a small treat
These filled mochi are naturally suited to sharing: the recipe makes 24 pieces. Serve them as a sweet snack or alongside tea, allowing freshly cooked pieces to cool enough to handle.
Recipe notes & tips
- Measure the filling into 24 portions so it is spread evenly among the mochi.
- Pinch each parcel closed before coating it with sesame seeds.
- Keep the sesame seeds toasted, as specified, for a fuller toasted flavour.
- Drain the fried pieces on paper towels to remove excess surface oil.
- Work gently when flattening the dough so the pieces stay thick enough to enclose the filling.
Variations
- Coconut only: leave out the peanuts and use more coconut in the filling.
- Peanut only: omit the coconut and increase the chopped peanuts.
- Sesame finish: coat the outside generously with the toasted sesame seeds.
- Steam instead: use the listed steaming alternative, noting that the source gives no cooking time.
- Boil instead: try the listed boiling-water alternative, checking the pieces as they cook.
Common mistakes to avoid
- Using ordinary rice flour: choose mochiko, which gives the dough its chewy texture.
- Overfilling: stick to about 1 tablespoon per piece so the edges can close.
- Loose seams: pinch the edges firmly together to help keep the filling inside.
- Uneven pieces: flatten the dough to 1.3 cm (½ inch) before cutting the 24 portions.
- Skipping the drain: place fried pieces on paper towels after cooking.
How to store
Let the mochi cool, then store it in an airtight container in the fridge and eat within 3 days. Reheat gently until warmed through; the texture may be less crisp than when freshly fried.
Frequently asked questions
What is mochiko?
Mochiko is sweet glutinous rice flour. It is different from ordinary rice flour and gives these parcels their chewy texture.
Can I leave out the peanuts?
Yes. The recipe description notes that similar treats may use a choice of coconut or peanuts; use one filling ingredient instead of combining both.
Do I have to fry the mochi?
No. The method also lists steaming or cooking in boiling water as options, but does not provide timings for them.
How much filling goes in each piece?
The method calls for 1 tablespoon of the coconut mixture in the centre of each piece.
How many pieces does the recipe make?
It makes 24 pieces.
Cook it from the original
This recipe comes from cookinghawaiianstyle.com. Their page has the author’s own photos, notes and tips — the best place to cook it from.
Open the recipe on cookinghawaiianstyle.com