
Homemade Brown Rice Flour (Gluten-Free, Vegan)
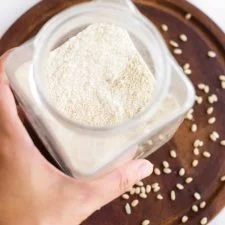
Make brown rice flour at home by blending uncooked brown rice and sifting it until fine. It is a quick way to prepare a small batch when you need flour for another recipe.
Ingredients
- 370 g (2 cups)uncooked brown rice
Instructions
- 1
Blend first batch
Put 185 g (1 cup) of uncooked brown rice in a high-speed blender. Blend for 30 seconds to 1 minute, until it resembles flour; it may still be coarse.
- 2
Sift the flour
Pass the flour through a fine-mesh sieve to separate out any larger grains.
- 3
Blend sifted flour
Return the sifted flour to the blender and blend for another 30 seconds to 1 minute, until very smooth.
- 4
Process remaining rice
Repeat the same blending and sifting process with the remaining rice until all of it has become smooth flour.
- 5
Use or store
Use the flour as directed in your recipe, or transfer it to an airtight jar for storage.
What is brown rice flour?
Brown rice flour is made by finely grinding whole brown rice, including its bran. It is a useful gluten-free pantry ingredient for home cooks, and this version relies on a blender and sieve rather than specialist milling equipment.
Small batches are straightforward to make as needed. Sifting and blending the coarse bits again helps make the flour more even.
Nutrition and macros by portion
The nutrition label shows one serving as written: 344 calories, 7g protein, 72g carbs, 3g fat.
| Portion | Adjustment | kcal | Protein | Carbs | Fat |
|---|---|---|---|---|---|
| Lighter | Use a smaller portion | 241 kcal | 5g | 51g | 2g |
| This serving | As written | 344 kcal | 7g | 72g | 3g |
| Hungry | Make a larger batch | 516 kcal | 11g | 109g | 4g |
The listed nutrition is for one of two portions: most of the carbohydrates and protein come from the brown rice, with a small amount of fat also coming from the grain. If using the flour in a meal, pair that dish with vegetables and a protein source to round out the plate.
Why blend in batches?
Small batches: the method starts with 185 g (1 cup) of rice at a time. This gives the grains room to move around the blender rather than leaving some whole while others turn to powder.
Repeat the process with the rest of the rice to keep the texture consistent across the batch.
Sifting and texture
First blend: the flour may look coarse after 30 seconds to 1 minute, which is expected. The sieve catches larger pieces without discarding them.
Second blend: return those larger pieces and the sifted flour to the blender for another 30 seconds to 1 minute. Look for a finer, more uniform texture before using.
Choosing the rice
Uncooked rice: use brown rice as listed, rather than cooked rice, which contains moisture and will not grind into dry flour in the same way.
Blender: a high-speed blender is specified for this method. Check its instructions before processing dry grains, and work in batches if its capacity is limited.
Using the flour
Measure the flour for your chosen recipe after grinding, since its volume can differ from that of whole grains. Follow the recipe's directions for combining it with other ingredients.
This flour is gluten-free, but if you need to avoid gluten, check that the rice and equipment have not been exposed to gluten-containing ingredients.
Serving ideas
This is a recipe ingredient rather than a ready-to-eat dish, so use it in a recipe that calls for brown rice flour. It can be handy for baking or other cooking where the recipe specifies this flour.
For a balanced plate, pair the finished dish with a source of protein and vegetables, depending on what you make with the flour.
Recipe notes & tips
- Blend the rice in batches so the grains can circulate around the blender.
- Sift over a bowl to catch any flour that passes through the sieve.
- Return larger grains to the blender rather than throwing them away.
- Use a dry blender jug and sieve for the best chance of keeping the flour free-flowing.
- Let the blender rest if it becomes warm during processing.
Variations
- Finer flour: sift and reblend any coarse pieces again until the texture suits your recipe.
- Smaller batch: halve the rice and process it using the same steps.
- Larger batch: work through the rice in repeated batches rather than overfilling the blender.
- Fresh grinding: make only as much flour as your next recipe needs.
Common mistakes to avoid
- Overfilling the blender: the grains may not grind evenly; process them in smaller batches.
- Stopping after the first blend: coarse pieces can remain; sift the flour and blend it again.
- Discarding the sieve contents: those pieces can be processed further; return them to the blender.
- Using damp equipment: moisture can make the flour clump; start with a clean, completely dry jug and sieve.
- Expecting the first blend to be very smooth: follow it with sifting and a second blend.
How to store
Store the flour in an airtight jar in a cool, dry place and use it while it smells fresh. For longer storage, keep it in an airtight container in the fridge or freezer, and let it come to room temperature before opening to limit condensation.
Frequently asked questions
Can I use a food processor instead of a blender?
This method specifies a high-speed blender. A food processor may leave the flour coarser, so sift and reprocess any larger pieces if your appliance can handle dry grains.
Why is the flour still coarse after blending?
The first blend is not expected to be completely smooth. Sift it, then blend the sifted flour again for 30 seconds to 1 minute.
Do I need to wash the rice first?
The method uses uncooked rice as it is and does not include washing. If you wash it, it must be completely dry before blending.
Can I make more than this recipe yields?
Yes. Process the rice in batches so it can move freely in the blender, repeating the sifting and second-blend steps for each batch.
How can I tell whether the flour is ready?
After the second blend, it should look fine and even. Sift and reblend any noticeable coarse grains.
Cook it from the original
This recipe comes from dishbydish.net. Their page has the author’s own photos, notes and tips — the best place to cook it from.
Open the recipe on dishbydish.net