
5-Minute Creamy Mango Ice Cream
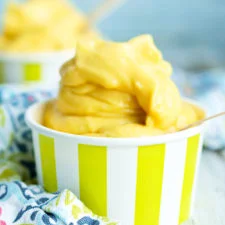
This instant mango ice cream blends frozen mango with coconut milk, vanilla and a little sweetener for a smooth, creamy dessert. It takes about five minutes to make and needs no extra freezing time.
Ingredients
- 450 g (3 cups)frozen mango chunks
- 120 ml (½ cup)canned coconut milk (full-fat recommended)
- 2.5 ml (½ teaspoon)pure vanilla extract
- 30–60 ml (2–4 tablespoons)agave nectar, or another liquid sweetener such as honey or maple syrup, to taste
- A pinch (optional)salt
Instructions
- 1
Add the ingredients
Put all the ingredients into a high-powered blender or food processor.
- 2
Blend until creamy
Process until the mixture is smooth and creamy, with no mango chunks remaining. Avoid blending for too long or it will start to melt. If using a Vitamix, use the tamper stick.
- 3
Serve straight away
Serve immediately and enjoy.
What is mango ice cream?
This is a quick, American-style frozen fruit dessert rather than a churned custard ice cream. Frozen mango gives it a thick, scoopable texture, while coconut milk adds creaminess.
The short method relies on blending the fruit while it is still frozen. That makes it ready to serve as soon as it is smooth.
Nutrition and macros by portion
The nutrition label shows one serving as written: 160 calories, 2g protein, 27g carbs, 7g fat.
| Portion | Adjustment | kcal | Protein | Carbs | Fat |
|---|---|---|---|---|---|
| Lighter | Use less agave | 112 kcal | 1g | 19g | 5g |
| This serving | As written | 160 kcal | 2g | 27g | 7g |
| Hungry | Serve a larger scoop | 240 kcal | 2g | 41g | 10g |
Mango supplies most of the carbohydrates, while coconut milk and the added sweetener contribute much of the fat and additional energy; the recipe has little protein. Pair a serving with a source of protein, such as plain yoghurt on the side, to make a more balanced snack.
Choosing the ingredients
Mango: Use chunks that are fully frozen and separated enough to blend. Ripe mango tends to bring more natural sweetness.
Coconut milk: Full-fat canned coconut milk gives the mixture a richer feel. Stir the can before measuring if the cream and liquid have separated.
Sweetener: Start with the smaller amount of agave, then adjust to taste. Honey or maple syrup can be used instead, as the recipe suggests.
Getting a smooth blend
Blending: Add the ingredients to a high-powered blender or food processor and process until no mango pieces remain. Stop once the mixture is creamy, since further blending can warm and soften it.
Tamper: In a Vitamix, use the tamper stick to help move the frozen fruit towards the blades. Follow your appliance’s instructions while blending.
Serving texture and timing
Texture: The finished mixture should be smooth and thick, with no visible mango chunks. It is designed to be served immediately, while the fruit is still frozen.
Timing: The preparation takes about five minutes, and there is no additional freezing step in the method. If the mixture starts to melt, serve it promptly.
Balancing the flavour
Sweetness: Mango and the chosen liquid sweetener provide the sweetness, so the amount can be adjusted within the recipe’s range. A small pinch of salt is optional and can help round out the flavour.
Vanilla: The vanilla adds a gentle background note without competing with the mango. Measure it carefully so it stays in balance with the fruit.
What to serve it with
On its own: Serve the ice cream straight after blending for its soft, creamy texture. It works as a quick dessert or a refreshing afternoon treat.
With toppings: Add fresh fruit, toasted coconut or chopped nuts at the table if you want contrast. Keep toppings separate until serving so the ice cream stays easy to scoop.
Recipe notes & tips
- Measure the frozen mango before blending so the fruit-to-coconut-milk balance stays consistent.
- Begin with 2 tablespoons of agave and add more only if needed.
- Use a high-powered blender or food processor to handle the frozen chunks.
- Stop blending as soon as the mixture is smooth to limit melting.
- Use the Vitamix tamper stick if that is the blender you are using.
- Serve as soon as it is blended for the thickest texture.
Variations
- Use honey: Replace the agave with honey, adding it to taste.
- Try maple syrup: Use maple syrup as the liquid sweetener for a different flavour.
- Add toasted coconut: Scatter toasted coconut over each serving for a little crunch.
- Finish with fresh fruit: Top each portion with small pieces of fresh mango or other fruit.
- Add chopped nuts: Sprinkle nuts over the ice cream just before serving for texture.
Common mistakes to avoid
- Using thawed mango: The mixture may turn loose; start with fully frozen chunks.
- Over-blending: The ice cream can begin to melt; stop as soon as it is smooth.
- Adding all the sweetener at once: The mango may already be sweet; begin with the lower amount and taste.
- Skipping the tamper: Frozen fruit may not move towards the blades in a Vitamix; use the tamper stick.
- Waiting to serve: The mixture softens as it sits; serve it immediately after blending.
How to store
This recipe is intended to be served straight after blending. If you have leftovers, transfer them to a covered freezer-safe container and freeze; let them soften briefly before serving, as they will become firmer in the freezer.
Frequently asked questions
Can I make this without a Vitamix?
Yes. The recipe also works in a high-powered blender or food processor. Use the appliance’s instructions for processing frozen fruit.
Do I need to freeze it after blending?
No. It is ready to serve as soon as the mixture is smooth and creamy.
Can I use a different sweetener?
Yes. The recipe suggests honey or maple syrup as alternatives to agave. Add the amount to taste, within the stated range.
Can I leave out the salt?
Yes. The salt is optional and can be omitted.
Why is my mixture not blending smoothly?
The frozen chunks may need help moving towards the blades. Use the tamper stick with a Vitamix, or follow your blender or food processor’s guidance for frozen ingredients.
Can I make it ahead?
It is best served straight after blending. You can freeze leftovers in a covered container, but allow them to soften briefly before serving.
Cook it from the original
This recipe comes from happyhealthymama.com. Their page has the author’s own photos, notes and tips — the best place to cook it from.
Open the recipe on happyhealthymama.com