
Recipe for Brioche
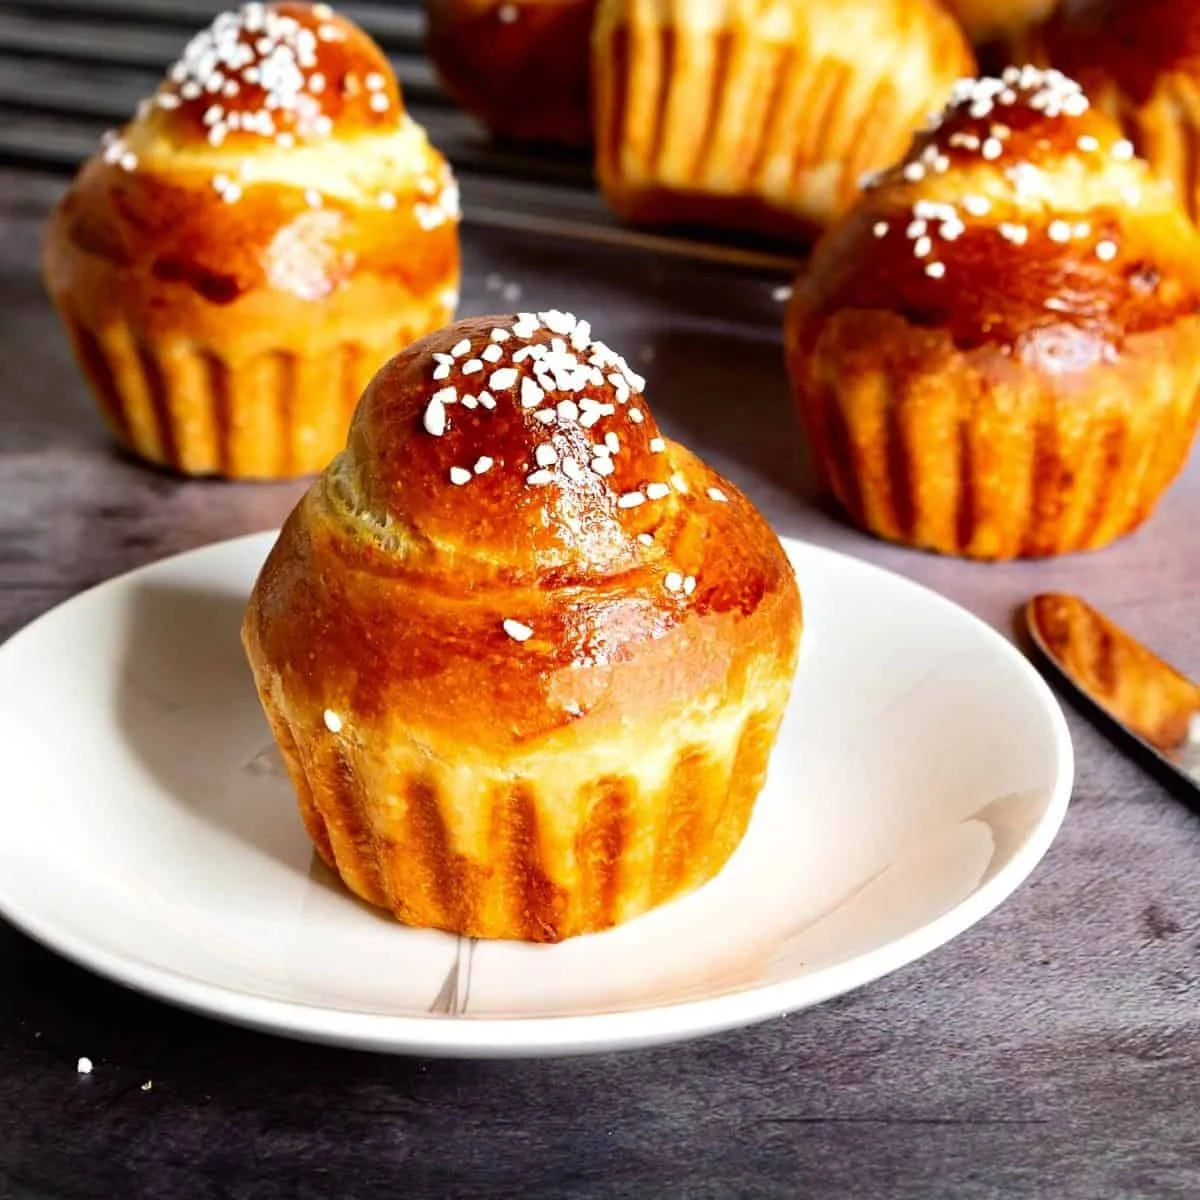
Brioche à tête is a French enriched yeast bread, shaped with a small topknot and baked until golden. This recipe makes 12 tender, buttery rolls that work for breakfast or as the base for sweet and savoury treats.
Ingredients
- 180 gWhole milk
- 200 gEggs (the original recipe uses 4 small eggs and 2 yolks)
- 14 gActive dry yeast
- 75 gSugar
- 625 gBread flour
- 10 gSalt
- 113 gUnsalted butter, at room temperature
- 1Egg yolk, for the egg wash
- 2 tbspWater, for the egg wash
- 2 tbsp, optionalPearl sugar
Instructions
- 1
Combine dry ingredients
Mix the salt and flour together in a bowl and set it aside.
- 2
Mix wet ingredients
In the bowl of a stand mixer fitted with a dough hook, combine the warm milk at 43°C, yeast, sugar and eggs. Add the flour mixture.
- 3
Knead the dough
When the flour is incorporated, knead on medium speed for 6–8 minutes. Alternatively, knead by hand on a well-floured work surface for 10–12 minutes.
- 4
Add the butter
Add the soft, room-temperature butter a cube at a time. Once it is all incorporated, knead for a further 6 minutes.
- 5
Cover the dough
Transfer the dough seam-side down to an oiled bowl and coat its surface with oil to keep it from drying out. Cover with a clean tea towel or cling film.
- 6
Chill the dough
Leave the dough in a warm place for about 1 hour; it should rise a little, but not dramatically. Punch it down and shape it into a smooth ball, then cover and refrigerate for 6–12 hours, or up to 24 hours. Take it out and leave it at room temperature for 2–3 hours.
- 7
Divide the dough
Butter the brioche moulds and set them aside. Divide the dough into two portions, then divide each portion into six equal pieces of about 110 g, making 12 rolls. Alternatively, divide it into eight pieces of about 80 g each. Shape the pieces into balls.
- 8
Shape the brioche
For the first shaping method, press each ball into a slightly oblong shape, like a snowman with a large head and a small body. Make a hole in the centre of the larger part with your fingers, then push the smaller part through it. Alternatively, divide each ball into a large piece and a small piece, make a hole in the large piece and place the small one on top.
- 9
Leave to rise
Place the shaped dough in the prepared brioche moulds. Cover with a clean tea towel and leave in a warm place until doubled in size, about 1–1½ hours.
- 10
Preheat the oven
About 10 minutes before baking, heat the oven to 190°C.
- 11
Brush and bake
Brush each brioche with egg wash and sprinkle with pearl sugar. Bake for 20–25 minutes, until lightly golden on top.
- 12
Cool before serving
Transfer the brioche to a cooling rack and leave to rest for at least 15 minutes before serving.
What is brioche à tête?
Brioche is a French enriched yeast bread, made tender and rich with eggs and butter. The à tête style is shaped with a small piece of dough perched on a larger one, giving each roll its distinctive topknot.
This version uses an overnight chill to develop the dough and make it easier to handle. Individual moulds help the rolls keep their shape as they rise and bake.
Nutrition and macros by portion
The nutrition label shows one serving as written: 166 calories, 4g protein, 24g carbs, 6g fat.
| Portion | Adjustment | kcal | Protein | Carbs | Fat |
|---|---|---|---|---|---|
| Lighter | Smaller brioche portions | 116 kcal | 3g | 17g | 4g |
| This serving | As written | 166 kcal | 4g | 24g | 6g |
| Hungry | Larger brioche portion | 249 kcal | 6g | 36g | 9g |
The flour and sugar provide most of the carbohydrates, while the butter and eggs contribute much of the fat; the eggs and flour also supply protein. Pair a roll with fruit and a protein-rich topping, such as yoghurt or eggs, for a more balanced plate.
Why chill the dough?
Butter-rich dough can feel soft and sticky, so chilling firms it and makes portioning and shaping more manageable. The long rest also fits the recipe's schedule: prepare the dough the day before, then shape and bake it later.
After refrigeration, allow 2–3 hours at room temperature before shaping, as directed. The dough should be workable rather than cold and stiff.
Working in the butter
Add the butter gradually, one cube at a time, only after the flour has been kneaded into the wet mixture. Giving each addition time to blend in helps the dough take on the fat evenly.
The extra kneading after the butter goes in is part of the method; avoid adding all the butter at once.
Making the topknot
The first shaping option threads the smaller ball through a hole in the larger portion, helping the two pieces join. Keep the larger piece as the base and the smaller piece as the topknot.
The second option is simpler: make a hole in the larger ball and set the smaller piece on top. Whichever method you choose, place the shaped dough in buttered moulds before its final rise.
Final rise and doneness
Leave the moulds covered in a warm place until the dough has doubled; this can take 1–1½ hours. Use the change in size as your cue rather than relying on the clock alone.
Bake until the tops are lightly golden, checking within the stated 20–25-minute window. Let the rolls cool on a rack for at least 15 minutes so they can settle before serving.
Serving ideas
Serve the brioche warm or at room temperature with butter, jam or honey. Its soft crumb also suits French toast or a sweet bread pudding.
For savoury use, pair it with eggs or mild cheese, or use it as the bread for a sandwich. Pearl sugar gives the tops a little extra sweetness and crunch.
Recipe notes & tips
- Weigh the dough portions for more even rolls that bake at a similar rate.
- Use butter that is soft enough to press but not melted.
- Keep the dough covered whenever it is resting so the surface does not dry out.
- Butter the moulds thoroughly to make it easier to release the baked brioche.
- If the tops brown quickly, check the rolls during the final minutes of baking.
Variations
- Skip the pearl sugar: leave it off for a less sweet finish.
- Make eight rolls: divide the dough into eight portions of about 80 g each, as suggested in the method.
- Serve with chocolate: use the baked brioche as a base for a chocolate-filled treat.
- Make French toast: slice leftover brioche and cook it as French toast.
- Use for savoury sandwiches: fill a cooled roll with eggs or cheese.
Common mistakes to avoid
- Adding butter too soon: knead the flour into the wet mixture first, then add the butter gradually.
- Using melted butter: use soft butter at room temperature so it can be incorporated as directed.
- Skipping the chill: refrigerate the dough for 6–12 hours, or up to 24 hours, before bringing it back to room temperature.
- Rushing the final rise: wait until the shaped rolls have doubled, allowing up to 1½ hours.
- Overbaking: begin checking at 20 minutes and take the brioche out when the tops are lightly golden.
How to store
Once cool, keep the brioche in an airtight container at room temperature and eat within 2 days for the best texture. Warm briefly in a low oven to refresh, or freeze well-wrapped rolls for longer storage and thaw before serving.
Frequently asked questions
Can I make the dough by hand?
Yes. Knead it on a well-floured work surface for 10–12 minutes before adding the butter. After adding the butter, knead for a further 6 minutes.
How long can the dough stay in the fridge?
The recipe allows 6–12 hours, or up to 24 hours. Bring it to room temperature for 2–3 hours before shaping.
How do I know when the rolls are ready to bake?
After shaping, let them rise until doubled in size. The recipe estimates 1–1½ hours in a warm place.
Do I need brioche moulds?
The method uses buttered brioche moulds. If you do not have them, the recipe does not specify an alternative, so expect the shape to be less defined in another suitable baking tin.
Can I leave off the pearl sugar?
Yes. It is optional, so you can simply omit it before baking.
Why does the dough rise in the fridge?
The recipe includes a refrigerated rise of 6–12 hours, or up to 24 hours, followed by 2–3 hours at room temperature. The chilled dough is also easier to handle when it is time to shape.
Cook it from the original
This recipe comes from veenaazmanov.com. Their page has the author’s own photos, notes and tips — the best place to cook it from.
Open the recipe on veenaazmanov.com