
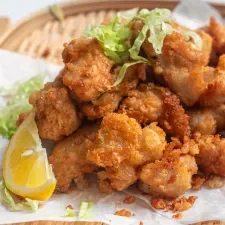
Japanese Fried Chicken (Karaage)
Nutrition per Serving
—
Calories
—
Protein
—
Carbs
—
Fat
Make one of the most popular Japanese dishes at home. This juicy Japanese-style popcorn chicken features a light and delicate crust. It is simply marinated and deep-fried to golden perfection.
📝 Ingredients
- 1 lb boneless, skin-on chicken thighs (about 4 pieces)
- 1 tablespoon light soy sauce
- 2 teaspoons mirin
- 1/2 teaspoon salt
- 1/2 teaspoon garlic powder
- 1/4 teaspoon ground ginger
- 1/4 teaspoon ground black pepper
- 1/4 cup kewpie mayo or 1 egg
- 1/4 cup corn starch (can sub with potato starch or rice flour)
- Neutral oil for frying
👨🍳 Instructions
- 1Prepare the chicken: Cut the chicken thighs into 1 1/2-inch bite-sized pieces and set aside.
- 2Make the sauce and marinate: In a medium bowl, combine the soy sauce, mirin, salt, garlic powder, ground ginger, and ground black pepper. Stir until well mixed, tasting and adjusting as needed. Add the chicken to the marinade and mix thoroughly so every piece is evenly coated. Cover and refrigerate for at least one hour, or overnight for the best flavor.
- 3Add egg and flour: Once you are ready to deep fry, mix egg into the chicken evenly and then the starch and mix well. You should have a light batter on the chicken.
- 4Deep fry: Fill a heavy-bottomed pot with cooking oil to a depth of about 1-1/2 inches. Heat the oil to 350°F, using an instant-read thermometer to maintain a steady temperature. Carefully lower the chicken pieces into the hot oil one at a time to prevent them from sticking together. Work in small batches to avoid overcrowding the pot. Fry for about 3 minutes per batch, then remove the chicken and place it on a wire rack or a paper-lined plate to drain excess oil.
- 5Finish: Serve hot on a bed of thinly sliced ice berg lettuce and lemon or lime wedges on the side for a traditional, restaurant-style look.
About the Chef & Original Recipe
This recipe was published by Vicky Pham on vickypham.com. Visit the original source for step-by-step photos, chef notes and additional details.
Source: vickypham.com