
Idli podi recipe
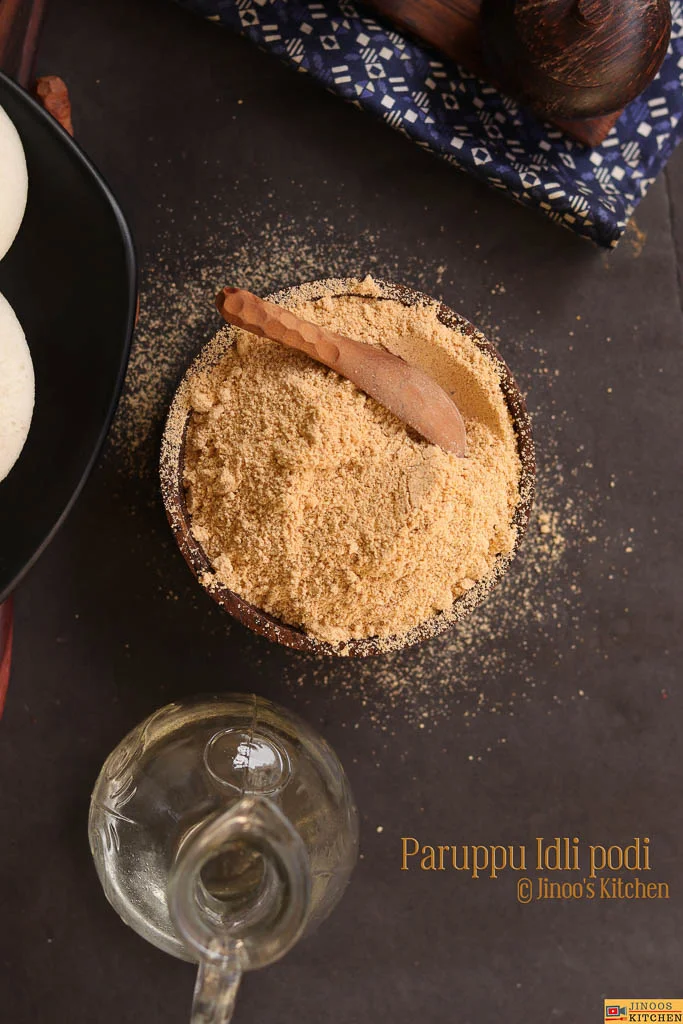
Idli podi is a coarse South Indian spice-and-lentil powder served alongside idlis and dosas. Toasting the ingredients separately builds a savoury, aromatic condiment that is easy to keep on hand.
Ingredients
- 1.25 ml (¼ tsp)coconut oil
- 13–15dried red chillies
- 2 sprigscurry leaves
- 200 g (1 cup)urad dal
- 50 g (¼ cup)chana dal
- 1.25 ml (¼ tsp)oil
- 2garlic cloves
- 1 tsppeppercorns
- 1 tspcumin seeds
- 1 pinchasafoetida
- 30–45 g (3–4 tbsp)rice
- to tastesalt
Instructions
- 1
Toast chillies
Heat the coconut oil in a pan. Roast the red chillies and curry leaves until crisp, then transfer them to a plate.
- 2
Roast the dals
Add the urad dal and chana dal to the same pan. Roast over medium heat until slightly reddish, then transfer them to the same plate or a bowl.
- 3
Add aromatics
Drizzle ¼ tsp oil into the pan, then add the garlic, peppercorns, cumin seeds and asafoetida.
- 4
Fry gently
Cook over a low heat until the garlic is lightly roasted, then transfer everything to the plate.
- 5
Toast the rice
Add the rice to the same pan and roast until it puffs up.
- 6
Cool and grind
Let everything cool, add salt, and grind to a semi-coarse powder.
What is idli podi?
Idli podi, also called idli milagai podi, is a dry South Indian condiment made by roasting and grinding lentils, chillies and spices. It is traditionally served with idli or dosa, often mixed with oil or ghee at the table.
This version combines two dals with rice, garlic and whole spices. Toasting each ingredient in stages helps the mix develop flavour while keeping its texture pleasantly coarse.
Nutrition and macros by portion
The nutrition label shows one serving as written: 260 calories, 15g protein, 42g carbs, 5g fat.
| Portion | Adjustment | kcal | Protein | Carbs | Fat |
|---|---|---|---|---|---|
| Lighter | Use less oil at serving | 182 kcal | 11g | 29g | 4g |
| This serving | As written | 260 kcal | 15g | 42g | 5g |
| Hungry | Serve with extra idlis | 390 kcal | 23g | 63g | 8g |
Most of the carbohydrates come from the urad dal, chana dal and rice, while the dals also provide most of the protein. The small amount of oil contributes the fat; serving the podi with idli or dosa adds more carbohydrate to the meal. Pair it with a vegetable-rich side, such as sambar, for a more balanced plate.
Why roast the ingredients separately?
Chillies and curry leaves: roasting them until crisp helps remove moisture and brings out their fragrance. Take care not to let the chillies darken too much, as they can become bitter.
Dals and rice: these need different amounts of time in the pan, so cooking them in separate batches makes it easier to toast them evenly.
Getting the garlic and spices right
Garlic: fry it gently until lightly roasted rather than deeply browned. The recipe uses only a little oil, so keep the heat low and watch it closely.
Whole spices: peppercorns, cumin and asafoetida add a warm, savoury aroma. Stir them as they fry so they toast without scorching.
How to tell when it is ready
Dals: look for a slightly reddish colour, as specified in the method, and a toasted aroma. They should not be allowed to burn.
Rice: roast it until the grains puff up, then remove the pan from the heat. Cool all the ingredients before grinding so the powder stays dry.
Choose your preferred texture
A semi-coarse grind gives the podi a little crunch and keeps the toasted ingredients distinct. Pulse the grinder in short bursts and check the texture as you go.
For a finer powder, grind for longer, stopping if the mixture begins to warm. Add the salt during grinding so it is distributed through the batch.
Serving idli podi
Serve it beside hot idlis or dosas, either dry or mixed with a little oil or ghee to make a dipping paste. Start with a small amount and add more to taste.
It also makes a savoury topping for other South Indian dishes such as uttapam. Keep the powder in a small bowl at the table so everyone can choose how much to use.
Recipe notes & tips
- Keep the heat moderate when roasting the dals so they colour gradually.
- Transfer each batch to a plate promptly once it is toasted.
- Let the roasted ingredients cool completely before grinding.
- Grind in short pulses to keep the powder semi-coarse.
- Taste the podi before adding more salt, especially if serving it with a salty accompaniment.
Variations
- Adjust the heat: use fewer red chillies for a milder powder.
- Add sesame: toast sesame seeds separately and grind them with the cooled ingredients.
- Use ghee to serve: stir a little ghee into a portion just before eating.
- Make it garlic-forward: add another clove and roast it gently with the spices.
- Try a finer grind: process for longer for a smoother powder.
Common mistakes to avoid
- Scorching the chillies: roast them just until crisp and remove them before they darken.
- Crowding the pan: toast ingredients in batches so they roast evenly.
- Over-browning the garlic: keep the heat low and take it out when lightly roasted.
- Grinding while warm: cool everything first to help the powder stay dry.
- Grinding too long: pulse and check often to avoid losing the intended coarse texture.
How to store
Once completely cool, store the podi in an airtight, dry container at room temperature and use within 2–3 weeks for the best aroma. Always use a clean, dry spoon, and avoid storing it mixed with oil or ghee.
Frequently asked questions
What is idli podi eaten with?
It is commonly served with idli and dosa. You can eat it dry or mix a little with oil or ghee.
Can I make it less spicy?
Yes. Use fewer red chillies, then taste the cooled powder and adjust the next batch to suit your preference.
Why does the rice need to puff up?
The recipe uses puffed, roasted rice as part of the powder. Toast it until it puffs, without letting it burn.
Can I grind the podi until it is fine?
Yes. Grind for longer if you prefer a finer texture, checking regularly so the mixture does not warm up.
Can I prepare idli podi in advance?
Yes. Cool it fully and store it in an airtight, dry container. Add oil or ghee only to the portion you are about to serve.
Cook it from the original
This recipe comes from jinooskitchen.com. Their page has the author’s own photos, notes and tips — the best place to cook it from.
Open the recipe on jinooskitchen.com