
Canned Meat
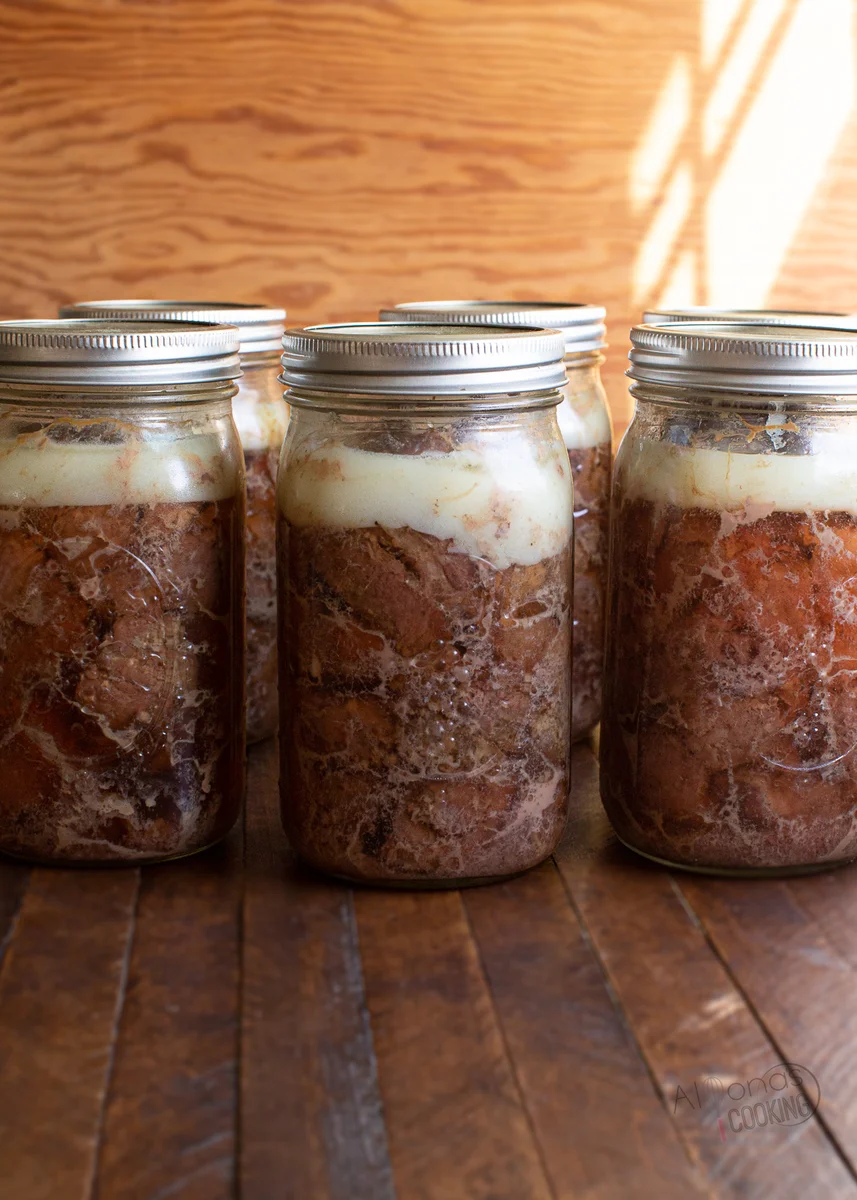
This is a guide-style recipe for seasoning beef or venison, packing it into jars and pressure canning it for later use. Because meat is a low-acid food, use a tested canning process matched to your jar size, canner and altitude; the directions provided here do not specify all the details needed to verify a safe process.
Ingredients
- 5,897 g (13 pounds)beef or venison, cut into 1½-inch chunks
- 3 headsgarlic, cloves peeled and crushed
- 4½ tbspsea salt
- 2 tbspblack pepper
- 414 ml (1¾ cups)palm fruit shortening
Instructions
- 1
Prepare the jars
Wash the jars in warm, soapy water. The recipe says to put ¼ cup (about 59 ml) of shortening in each jar and set them aside; check this quantity against the tested canning recipe you are following.
- 2
Season the meat
Combine the meat with the garlic, salt and pepper, mixing thoroughly by hand.
- 3
Fill the jars
Pack the meat into the jars, leaving the headspace specified by your tested recipe. Use the end of a wooden spoon to remove air pockets and settle the meat. Apply the lids according to their manufacturer's directions; do not overtighten.
- 4
Pressure can
The supplied directions call for 3 quarts of water in a 23-quart pressure canner and processing at 10 pounds pressure for 90 minutes. Do not rely on this schedule without confirming it against an authoritative, tested process for your jar size, canner type and altitude.
- 5
Cool the jars
Switch off the heat and let the canner depressurise naturally until the gauge reads zero, then open it and lift out the jars. Do not tighten the lids after processing. Leave the jars undisturbed to cool for 24 hours, then check the seals and follow tested guidance for any jar that has not sealed.
What is canned meat?
Pressure-canned meat is cooked in sealed jars under pressure so it can be stored without freezing. It is a practical American home-preserving tradition, especially for hunters and households processing large quantities of meat.
This version seasons beef or venison with garlic, salt and pepper. Venison is naturally leaner than many cuts of beef, while the added shortening makes the mixture richer.
Nutrition and macros by portion
The nutrition label shows one serving as written: 654 calories, 36g protein, 1g carbs, 55g fat.
| Portion | Adjustment | kcal | Protein | Carbs | Fat |
|---|---|---|---|---|---|
| Lighter | Use less shortening | 458 kcal | 25g | 1g | 39g |
| This serving | As written | 654 kcal | 36g | 1g | 55g |
| Hungry | Serve a larger portion | 981 kcal | 54g | 2g | 83g |
The meat supplies most of the protein, while the palm fruit shortening contributes much of the fat and energy. Carbohydrate is minimal, coming mainly from the small amount in the garlic. Serve a portion with vegetables and a starch such as potatoes or bread for a more rounded plate.
Choosing the meat
Beef or venison: Use sound, fresh meat and trim it as directed by the tested canning instructions you choose. Cut the meat into evenly sized chunks so the jars pack consistently.
Shortening: The recipe includes palm fruit shortening, but its amount per jar and suitability for this process need to be checked against a tested canning method. Do not assume that adding fat is interchangeable with a standard meat-canning recipe.
Seasoning and packing
Garlic and pepper: Mix these evenly through the chunks so the flavour is distributed from jar to jar.
Headspace: Leave the exact clearance required by the tested recipe. Removing air pockets helps pack the meat evenly, but the wooden spoon should not damage the jar or alter the required headspace.
The pressure-canning details
Jar size and equipment: Safe processing depends on details that are missing here, including jar size and whether the canner is a dial-gauge or weighted-gauge model. The required pressure can also vary with altitude.
Use a tested schedule: Meat is a low-acid food, so pressure canning is essential. Check an authoritative, tested canning source for the exact process before preparing these jars; do not treat the stated 10 pounds and 90 minutes as universally suitable.
Cooling and sealing
Natural depressurising: Let the canner return to zero pressure on its own before opening it, and follow the canner manufacturer's instructions for the rest of the cooling process.
After processing: Keep jars upright and undisturbed while they cool. Lids should not be tightened after canning; once cool, check each seal and handle any unsealed jar according to tested food-preservation guidance.
Ways to serve it
For a quick meal: Once a jar has been safely processed and opened, use the meat in sandwiches, a hash, or a stew. Heat it thoroughly as part of the dish.
For balance: Pair a portion with vegetables and a starch such as potatoes, bread or rice. The vegetables add colour and texture alongside the rich meat.
Recipe notes & tips
- Use jars intended for home canning and inspect them for chips or cracks before filling.
- Weigh the meat if you need to divide the batch evenly among jars.
- Follow the tested recipe's headspace rather than filling jars to the rim.
- Use the correct pressure setting for your canner type and local altitude.
- Let processed jars cool undisturbed and check their seals only after cooling.
Variations
- Venison: Choose venison instead of beef for the leaner option named in the recipe.
- Beef: Use beef chunks for a flavour closer to a conventional beef stew.
- Garlic: Adjust the garlic only within a tested canning recipe, since seasoning changes must not replace its safety instructions.
- Serving idea: Stir opened, safely canned meat into a stew shortly before serving.
- Serving idea: Warm the meat and serve it over potatoes or toast.
Common mistakes to avoid
- Assuming every jar size uses the same schedule: Check a tested process for your exact jar size.
- Guessing the pressure: Account for canner type and altitude using authoritative guidance.
- Filling to the rim: Leave the headspace specified by the tested recipe.
- Opening the canner too soon: Wait until pressure falls naturally to zero.
- Tightening lids after processing: Leave them untouched while the jars cool.
How to store
After 24 hours of undisturbed cooling, check the seals and store sealed jars according to tested home-canning guidance in a cool, dark, dry place. Refrigerate any unsealed jar and use it promptly, or follow authoritative guidance for reprocessing; discard jars with signs of spoilage without tasting.
Frequently asked questions
Can I use venison instead of beef?
Yes, venison is one of the two meats listed. Follow a tested canning process appropriate to the meat and jar size rather than assuming the supplied schedule applies.
Is the stated 90-minute process suitable for every jar?
No single schedule can be confirmed from the information provided. Jar size, canner type and altitude affect the process, so consult an authoritative tested recipe.
Can I use a water-bath canner?
No. Meat is a low-acid food and requires a tested pressure-canning process; a boiling-water bath is not a safe substitute.
Should I tighten the lids after processing?
No. Do not tighten lids after processing; leave jars undisturbed as they cool and then check their seals.
How can I use the meat once a jar is open?
Add it to a stew, hash or sandwich filling. Heat it thoroughly as part of the dish.
Cook it from the original
This recipe comes from alyonascooking.com. Their page has the author’s own photos, notes and tips — the best place to cook it from.
Open the recipe on alyonascooking.com