
Show-Stopping Gluten Free and Vegan Apple Pie
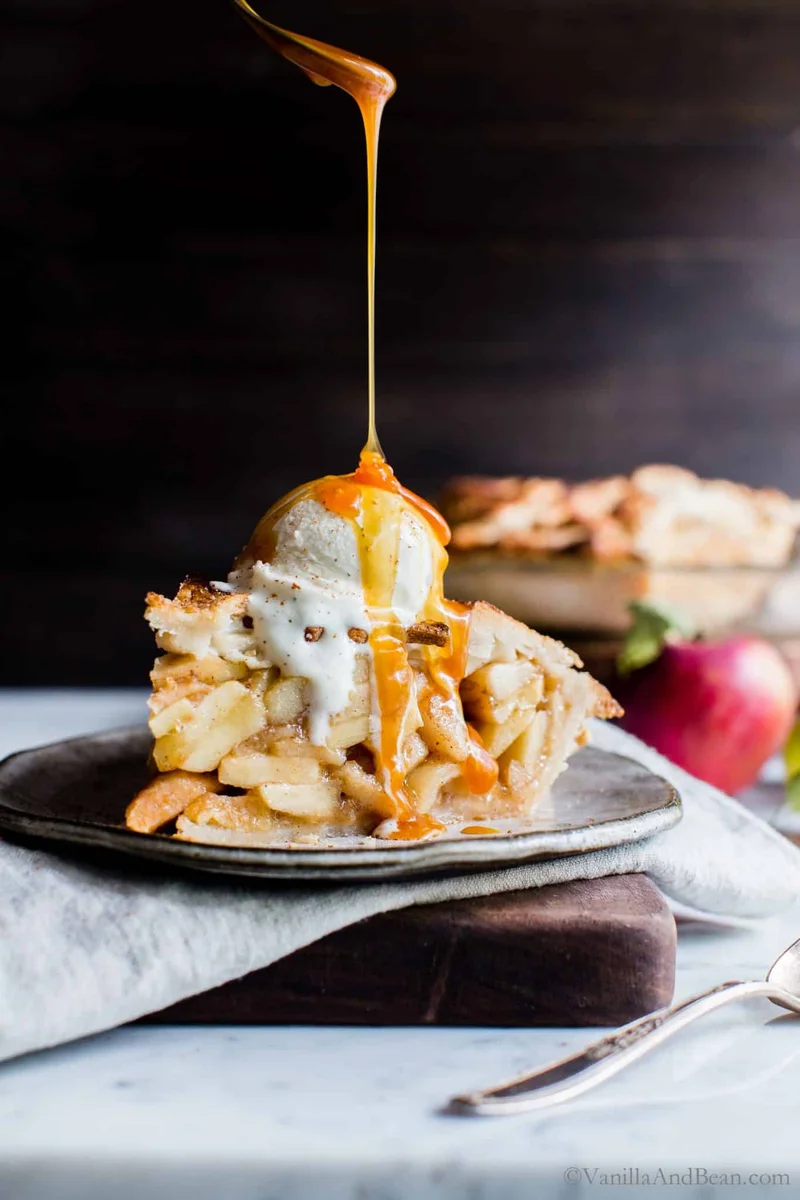
This American-style apple pie layers gently spiced apples beneath a decorative, cut-out pastry top. Its coconut-oil pastry is made in a food processor, and the apple filling is cooked and cooled before assembly for a pie that is easier to put together and share.
Ingredients
- 135 g (½ cup + 1½ tablespoons)plant milk
- 1 tablespoonapple cider vinegar
- 310 g (2 cups)gluten-free 1-to-1 baking flour
- 70 g (½ cup)tapioca flour
- 2 tablespoonsorganic cane sugar
- 1 teaspoonfine sea salt
- 195 g (1 cup)unrefined coconut oil, solid
- 2.3 kg (5 pounds)whole apples, about 11 medium, a mix of three sweet-tart and firm varieties
- 105 g (½ cup), packedbrown sugar
- 60 g (¼ cup)organic cane sugar
- 65 ml (¼ cup), optionalbourbon, apple juice or apple cider
- 1 teaspoonground cinnamon
- ¼ teaspoonground nutmeg
- ¼ teaspoonfine sea salt
- 2 teaspoonsvanilla bean paste or vanilla extract
- 1½ tablespoonslemon juice
- 1 tablespooncornflour
- To brush the pastryplant milk
- 3 tablespoonsorganic cane sugar
- ½ teaspoonground cinnamon
Instructions
- 1
Mix the pastry liquid
Whisk the plant milk and apple cider vinegar together in a measuring jug with a spout. Leave to rest for 5 minutes.
- 2
Make the pastry
Add the gluten-free flour, tapioca flour, sugar and salt to a food processor fitted with an S blade, and pulse 5–6 times to combine. Add the solid coconut oil and pulse 7–8 times, until the mixture is chunky. With the processor running, pour in the milk mixture, holding back 1–2 tablespoons, and process for 10–15 seconds, until the mixture starts to come together but still looks crumbly. Squeeze a handful: it should hold together. If it does not, add the reserved milk, process again and test once more.
- 3
Rest the pastry
Tip the dough onto a large piece of baking parchment. Use the parchment to press and fold the loose pieces together until they form one pliable piece. Shape it into a smooth, thick disc, divide it in half, then shape each half into a rounded disc 2.5–5 cm thick, smoothing out cracks where possible. Wrap each disc in parchment or cover with an upturned bowl; they can be stacked. The dough should feel tacky, not sticky. If it is sticky, refrigerate it for about 15 minutes, then bring it back to room temperature. Leave it to rest while you prepare the apples.
- 4
Cook the apples
Peel, core and slice the apples about 6 mm thick; a little thicker is fine. Gently toss them with both sugars, the bourbon if using, cinnamon, nutmeg, salt, vanilla and lemon juice. Put the apples and their juices in a large heavy-based Dutch oven or stockpot. Cook over medium heat, stirring gently and often, for 10–15 minutes, until just tender when pierced with a fork; about 11 minutes gives a tender-crisp result, while 13–15 minutes makes them softer. Take the pan off the heat and gently stir in the cornflour.
- 5
Cool the filling
Spread the apples and all their juices in an even layer on a baking tray lined with parchment. Put the tray in the freezer for about 12–15 minutes, until the apples have cooled to room temperature. Set aside.
- 6
Line the pie plate
While the apples cool, melt a little coconut oil and brush it over the bottom, sides and edges of a 23 cm pie plate, taking care to coat the edges. Roll one pastry disc between two sheets of parchment to about 3 mm thick and a 30 cm circle. If it cracks too much, sprinkle over about ¼ teaspoon water. Remove the top parchment, roll the pastry and bottom parchment around a rolling pin, then turn it over above the plate and unroll it into place. Carefully peel away the parchment. Press the pastry into the plate and trim it to about 2.5 cm beyond the edge. Tuck the edges under, patching thin or torn spots with scraps of dough and a dab of water. Crimp the rim, trim away excess without cutting into the crimp, and leave at room temperature.
- 7
Cut the top pastry
Roll the remaining pastry between two pieces of parchment to about 3 mm thick. Carefully remove the top sheet, lightly flour the pastry and cut out shapes with a biscuit cutter or knife. Brush away any flour left on the cut-outs and set them aside at room temperature.
- 8
Fill the pie
Drain the apples, shaking off the juices, and discard the liquid. Transfer the apples to the pastry-lined plate, arranging them close together with their curved sides towards the edge where possible. Gently press and nudge them into a smooth dome with as few gaps as you can.
- 9
Arrange the top
Lift the pastry shapes with an offset spatula and arrange them over the apples, overlapping some pieces. Use a dab of water to join pieces so they stay in place. Leave small gaps between the shapes to let steam escape.
- 10
Chill and preheat
Freeze the assembled pie for about 15 minutes. Meanwhile, place a rack in the centre of the oven and preheat it to 218°C. Put a parchment-lined baking tray on the centre rack as the oven heats. Just before baking, take the pie from the freezer and brush the top, edges and all the cut-outs with plant milk. Mix the cinnamon and sugar and sprinkle generously over the pie.
- 11
Bake the pie
Bake the pie on the preheated, parchment-lined tray at 218°C for 45–55 minutes, rotating the tray halfway through. If the edges or top get too dark, cover the edges with foil or a pie shield; tent foil over the top with a hole for steam to escape. The pie is ready when fragrant, the pastry is golden (some dark edges are fine) and juices are bubbling slightly in the centre.
- 12
Cool and serve
Cool the pie completely for at least 2 hours before cutting or covering it. Just before slicing, run a paring knife around the edge of the pastry to loosen it from the plate. Set the plate in a shallow pool of hot tap water for 1 minute to soften the fats and help the pie release from the base. Reheat individual slices at 180°C for about 15 minutes. Serve with ice cream and caramel sauce if desired. Keep the covered pie at room temperature for up to 2 days; reheating helps refresh the pastry.
What is American apple pie?
Apple pie is a familiar American bake built around fruit tucked into pastry, often with a spiced filling and a top crust. This version keeps that classic combination while using plant milk and coconut oil for a vegan, gluten-free pastry.
Cooked apples are cooled and drained before they go into the shell, and pastry cut-outs form the top. That approach makes the filling easier to arrange and gives steam a way to escape.
Nutrition and macros by portion
The nutrition label shows one serving as written: 616 calories, 4g protein, 102g carbs, 26g fat.
| Portion | Adjustment | kcal | Protein | Carbs | Fat |
|---|---|---|---|---|---|
| Lighter | Smaller slice, skip toppings | 431 kcal | 3g | 71g | 18g |
| This serving | As written | 616 kcal | 4g | 102g | 26g |
| Hungry | Larger slice with ice cream | 924 kcal | 6g | 153g | 39g |
Most of the carbohydrates come from the apples, sugars and pastry flours, while coconut oil provides most of the fat. The apples and flour contribute a little protein, but the pie is not a protein-led dish; pair a slice with a protein-rich side or serve it after a balanced meal.
Choosing apples and pastry ingredients
Apple mix: Use three sweet-tart, firm varieties as directed. Firm apples are useful here because they are cooked before baking and should still have some shape when the pie is sliced.
Coconut oil: The recipe uses solid, unrefined coconut oil in the pastry. Keep it solid for the food-processor step so it can be pulsed into chunky pieces rather than blended into a smooth paste.
Flour blend: Gluten-free baking flour and tapioca flour make up the pastry base. Measure the listed amounts carefully; the dough is meant to look crumbly before it is pressed and folded together.
Getting the pastry together
Test the dough: Squeeze a handful after processing; it should hold together. Add the reserved plant milk gradually if it remains loose, checking again rather than pouring it all in at once.
Patch as needed: Gluten-free dough may crack or break when moved, so transfer it between parchment and use scraps to repair thin spots. A dab of water helps smooth tears and join the decorative pieces.
Cooking and cooling the apples
Tenderness: Stir the apples gently as they simmer for 10–15 minutes. Stop when a fork meets only slight resistance for a tender-crisp filling, or cook towards 15 minutes for softer fruit.
Cool and drain: Spreading the filling on a tray speeds cooling; the recipe calls for about 12–15 minutes in the freezer. Drain it well before filling the shell, since the juices are discarded and the apples should be arranged without excess liquid.
Building the cut-out top
Even shell: Roll the pastry to about 3 mm thick and build up the edges by tucking them under. Patch thin areas so the rim is as even as possible before crimping.
Steam gaps: Overlap some top shapes and join them with a dab of water, but leave openings between them. The gaps let steam escape while the design covers the apples.
Baking and serving
Browning: Bake at 218°C for 45–55 minutes, rotating the tray halfway through. Look for golden pastry, a fragrant pie and a little bubbling in the centre; shield any areas that darken too quickly.
To serve: Let the pie cool for at least 2 hours before cutting so the filling can settle. Serve slices as they are or with ice cream and caramel sauce, as suggested in the recipe.
Recipe notes & tips
- Hold back the last 1–2 tablespoons of plant milk until you have tested whether the dough clumps.
- Use parchment above and below the pastry when rolling to make it easier to transfer.
- Arrange the apple slices snugly so the filling forms a smooth, compact dome.
- Brush the pastry edges as well as the cut-outs with plant milk before adding the cinnamon sugar.
- Keep a close eye on the pastry near the end of baking and shield any parts that are browning too fast.
- Allow the pie to cool fully before slicing for neater portions.
Variations
- Bourbon option: Use apple juice or apple cider instead, or leave the optional liquid out.
- Softer filling: Cook the apples for 13–15 minutes rather than stopping around 11.
- Pastry shapes: Cut the top pastry into a different pattern, keeping gaps for steam to escape.
- Serving idea: Add ice cream and caramel sauce when serving, as suggested in the recipe.
- Vanilla choice: Use vanilla extract instead of vanilla bean paste in the apple filling.
Common mistakes to avoid
- Adding all the milk at once: Hold back 1–2 tablespoons and add them only if the squeezed dough will not hold together.
- Overcooking the apples: Check them with a fork during the 10–15 minute simmer so they do not become softer than you want.
- Leaving the filling too wet: Drain the cooled apples and discard the juices before arranging them in the shell.
- Rolling the pastry too thin: Aim for about 3 mm so it is easier to transfer and patch.
- Sealing every gap: Leave spaces between the top cut-outs so steam can escape.
- Cutting too soon: Wait at least 2 hours for the pie to cool completely before slicing.
How to store
Keep the covered pie at room temperature for up to 2 days. Reheat individual slices at 180°C for about 15 minutes to refresh the pastry; it may soften as it sits.
Frequently asked questions
Can I use apple juice instead of bourbon?
Yes. The recipe lists apple juice or apple cider as alternatives to the optional bourbon.
How soft should the apples be before baking?
They should be just tender when pierced with a fork. About 11 minutes gives a tender-crisp result; 13–15 minutes makes them softer.
Why do I need to drain the cooked apples?
The recipe calls for discarding the cooking juices before filling the pie. Draining lets you arrange the apples snugly in the pastry shell.
What if the pastry cracks?
Patch breaks with scraps of dough and use a dab of water to help join or smooth the edges. A small sprinkle of water can also help if the rolled pastry is cracking too much.
How do I know when the pie is baked?
Look for golden pastry, a fragrant pie and a little bubbling in the centre. Baking takes 45–55 minutes at 218°C, with the tray rotated halfway through.
Can I cut the pie while it is warm?
The recipe recommends cooling it completely for at least 2 hours before slicing. This gives the filling time to settle.
Cook it from the original
This recipe comes from vanillaandbean.com. Their page has the author’s own photos, notes and tips — the best place to cook it from.
Open the recipe on vanillaandbean.com