
No-Knead Sourdough Bread in Loaf Pan
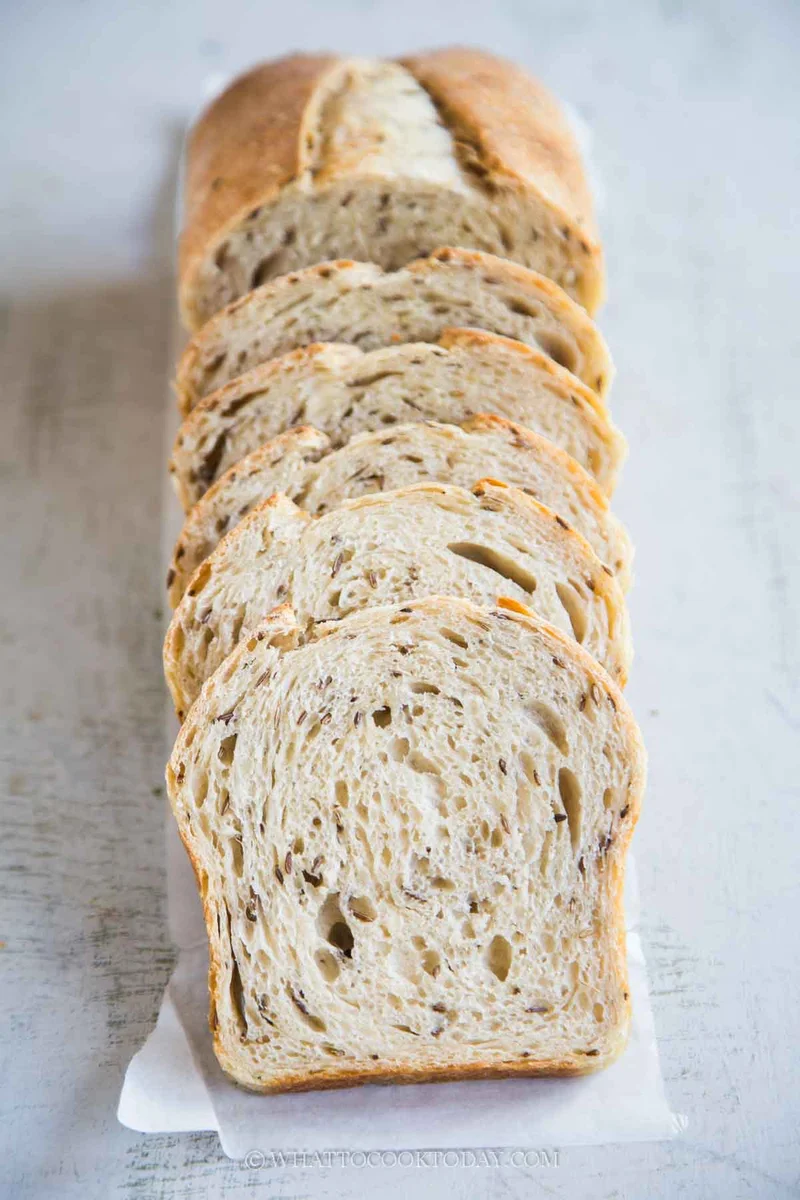
This no-knead sourdough loaf is baked in a standard loaf pan, with caraway seeds adding a gentle savoury note if you choose to use them. Make it for toast or sandwiches, and plan ahead for the long rise and full cooling time.
Ingredients
- 110 gactive sourdough starter (100% hydration)
- 220 gwater
- 20 ghoney
- 10 goil
- 350 gbread flour (12.7% protein)
- 7 gsalt
- 15 ml (1 tbsp)caraway seeds (optional; adjust to taste)
Instructions
- 1
Check the starter
Use the starter when it is at its peak, having doubled or tripled in volume.
- 2
Mix the liquids
At a room temperature of about 25–26°C, weigh 110 g starter into a mixing bowl. Add the water, honey, oil, caraway seeds and salt, then stir to loosen and combine the starter.
- 3
Make the dough
Add the bread flour and stir for about 3–5 minutes, until you have a rough, wet dough with no dry flour visible. If it feels dry, add another teaspoon of water and mix again so all the flour is hydrated. Cover and leave for 1 hour.
- 4
Fold the dough
Complete four sets of stretch and folds, 30 minutes apart. For each set, lightly wet your fingers, lift and stretch an edge of the dough, then fold it over; repeat around the dough for about 4–5 stretches, stopping where the dough resists. Turn the smooth side over if you like, cover and rest for 30 minutes between sets. The dough will become tighter as the gluten develops.
- 5
Choose fermentation
For an overnight schedule, after the last fold transfer the dough to a lightly oiled, lidded container. Press it into the container and mark its starting height. Let it rise to about 50% larger, then refrigerate; it will continue to rise slowly and may double by the next morning. Take it out and let it finish rising at room temperature if needed. Shape once doubled. For a same-day bake, cover the bowl after the last fold and let the dough double in volume, using the same lightly oiled container and height mark if helpful.
- 6
Shape the loaf
Oil all sides of an 8½ × 4½-inch or 9 × 5-inch loaf pan; the larger pan makes a slightly shorter loaf. Turn the dough onto a lightly floured work surface and gently press out the air. Dust it lightly with flour and roll it into a rectangle about 25 × 36 cm (10 × 14 inches). Fold the top and bottom long edges towards the middle, then roll the dough down, sealing the seam with the heel of your hand each time to build tension.
- 7
Proof in the pan
Put the shaped dough in the prepared pan, press it gently to fit and even it out, then cover with plastic wrap. Let it rise until it reaches the rim of the pan. At 28°C this took about 2 hours; a cooler room may require longer.
- 8
Prepare the oven
About 30 minutes before the proof is due to finish, preheat a conventional oven to 220°C or a convection oven to 200°C. Set a baking stone or baking pan on the middle rack, with a cast-iron or other thick, heat-resistant pan beside it. Pour 475 ml (2 cups) water into that pan as the oven heats to create steam. The stone or steel can be skipped, but it helps retain heat; steam keeps the dough moist while it rises before the crust sets.
- 9
Bake the bread
When the oven is ready, score a line about 1.3 cm (½ inch) deep down the middle of the loaf with a bread lame or very sharp pointed knife, then spray the dough with water. Set the loaf pan on the preheated stone or baking pan. Reduce the temperature to 200°C for a conventional oven or 195°C for convection and bake for 15 minutes. Remove the pan of water, then bake for about 30 minutes more, starting to check at around 30 minutes, until an instant-read thermometer inserted into the loaf reads at least 93°C. If it is not ready, bake for another 5 minutes and check again.
- 10
Cool and store
Take the loaf from the oven and set it on a cooling rack for about 1 minute. Gently shake it out of the pan and leave it on the rack until completely cool; do not slice it while hot or warm. When serving, slice from the middle and keep the cut halves pressed together in a bread bag or airtight container for 2–3 days. For longer storage, seal sliced bread in a bread bag with the air pressed out, then place it in a freezer bag. Thaw at room temperature or toast from frozen.
What is loaf-pan sourdough?
Sourdough bread gets its rise and tang from a fermented starter rather than relying solely on commercial yeast. This loaf uses a familiar bread-pan shape, making it convenient to slice for toast and sandwiches.
A long, gentle fermentation and a few rounds of folding develop the dough without kneading. Honey, oil and optional caraway give this version a little extra flavour and softness.
Nutrition and macros by portion
The nutrition label shows one serving as written: 153 calories, 5g protein, 29g carbs, 2g fat.
| Portion | Adjustment | kcal | Protein | Carbs | Fat |
|---|---|---|---|---|---|
| Lighter | Thinner slices | 107 kcal | 4g | 20g | 1g |
| This serving | As written | 153 kcal | 5g | 29g | 2g |
| Hungry | Larger portion | 230 kcal | 8g | 44g | 3g |
Most of the carbohydrates come from the bread flour, with a smaller contribution from the honey; the starter also contains flour. The oil contributes most of the fat, while flour and starter provide some protein. Pair a slice with a protein-rich topping and fruit or vegetables for a more rounded plate.
The starter and flour
Peak starter: use it when it has doubled or tripled, as described in the method. A lively starter helps the dough rise through its long fermentation.
Bread flour: the specified flour has 12.7% protein, which helps the dough develop structure. Mix until no dry flour remains; add a teaspoon of water if needed rather than leaving dry patches.
Why the dough is folded
Stretch and folds: wet fingers lightly so the dough is easier to handle, then lift each edge only as far as it will stretch comfortably. Repeating this around the dough gives it structure without conventional kneading.
Rest periods: allow 30 minutes between each of the four sets. The dough becoming tighter over the course of the folds is expected.
Plan the fermentation
Same day: after the last fold, cover the dough and wait for it to double before shaping. Marking the starting height in a clear container makes the increase easier to judge.
Overnight: let the dough grow by about half before refrigerating it. It continues to ferment in the fridge, so check its volume the next day and leave it at room temperature to finish doubling if necessary.
Shape for an even loaf
Rectangle: roll the gently degassed dough to roughly 25 × 36 cm, then fold the long sides towards the centre. Roll it down into a loaf shape.
Seam: seal the dough with the heel of your hand as you roll. This builds tension in the shaped loaf, while gently pressing it into the pan helps it fit evenly.
Use steam and check doneness
Steam: the water-filled pan creates a steamy oven during the first 15 minutes. A preheated stone or baking pan provides a hot surface beneath the loaf pan, though the recipe says it can be omitted.
Doneness: remove the water pan after the first bake stage, then continue baking until the centre reaches at least 93°C. If it has not reached that temperature, bake for another 5 minutes and check again.
Cool before slicing
Cooling: leave the bread in its pan only briefly before turning it out onto a rack. Wait until it is completely cool before cutting so the loaf can set.
Serving: keep the two cut halves facing one another between servings to help protect the cut surfaces. The loaf works well for toast or sandwiches.
Recipe notes & tips
- Use the starter at its peak, when it has doubled or tripled.
- Keep a mark at the dough’s starting height so you can judge when it has doubled.
- Use lightly wet fingers for the stretch-and-fold sets.
- Let the dough determine how far each stretch goes; do not force it.
- Start checking the loaf after about 30 minutes of baking without steam.
- Let the loaf cool completely before slicing.
Variations
- Caraway seeds: leave them out for a plainer loaf or adjust their amount to taste.
- Overnight schedule: refrigerate the dough after it has risen by about 50%, then finish proofing at room temperature if needed.
- Same-day schedule: skip refrigeration and let the dough double at room temperature before shaping.
- Larger pan: use a 9 × 5-inch pan for a slightly shorter loaf.
- No baking stone: use the preheated baking pan instead, as the stone or steel is optional.
Common mistakes to avoid
- Using an inactive starter: wait until it has doubled or tripled before mixing.
- Dry flour in the dough: stir until all the flour is hydrated, adding a teaspoon of water if needed.
- Forcing a stretch: stop when the dough resists and continue gently around its edges.
- Shaping before the dough doubles: allow the bulk rise to reach the stated cue before proceeding.
- Cutting while warm: cool the loaf completely on a rack before slicing.
- Removing the loaf too soon: check the centre temperature and bake in 5-minute increments until it reaches at least 93°C.
How to store
Keep the sliced loaf in a bread bag or airtight container at room temperature for 2–3 days, with the cut halves pressed together. For longer storage, seal slices in a bread bag with the air pressed out, place it in a freezer bag and freeze. Thaw at room temperature or toast straight from frozen.
Frequently asked questions
Can I make the dough the day before?
Yes. After the final set of folds, let it rise by about 50%, then refrigerate it in a tightly covered container. The next day, let it finish doubling at room temperature if it has not already done so.
Can I bake it all on the same day?
Yes. After the last fold, cover the dough and let it rise until doubled, then shape it and follow the final proof and baking steps.
Do I need a baking stone?
No. The method says you can skip the stone or steel. It is used to retain heat, and a baking pan can be used in its place.
How do I know when the loaf is fully baked?
Insert an instant-read thermometer into the dough. The loaf is ready when it reaches at least 93°C; if not, bake for another 5 minutes and check again.
When should I slice the loaf?
Wait until it is completely cool on the rack. The method cautions against slicing it while it is hot or warm.
Can I freeze the bread?
Yes. Freeze sliced bread in a sealed bread bag with the air pressed out, inside a freezer bag for extra protection. Thaw it at room temperature or toast slices from frozen.
Cook it from the original
This recipe comes from whattocooktoday.com. Their page has the author’s own photos, notes and tips — the best place to cook it from.
Open the recipe on whattocooktoday.com