
Chickpea Curry Without Coconut Milk
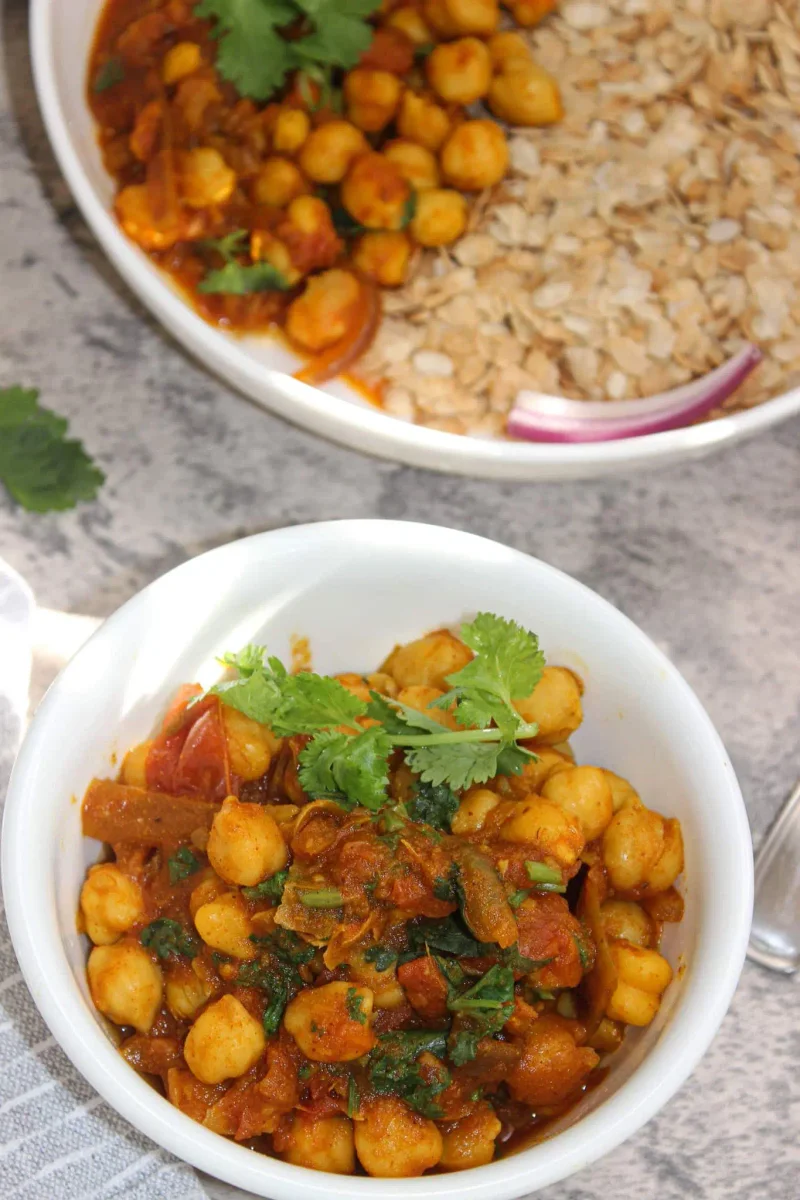
This Indian-style chickpea and tomato curry makes a quick, warmly spiced meal without coconut milk. It comes together in one pan and is easy to serve with rice or rotis.
Ingredients
- 75 g (½ cup)chopped onion
- 180 g (1 cup)chopped tomato
- 1 canchickpeas
- 15 g (¼ cup)chopped fresh coriander
- ½ tsp (2.5 ml)ginger
- 1 tsp (5 ml)garlic
- ½ tbsp (7.5 ml)olive oil
- ¼ tspground turmeric
- ¼ tspKashmiri red chilli powder
- ¼ tspcurry powder
- To tastesalt
- 120 ml (½ cup)water
- 120 ml (½ cup)water
Instructions
- 1
Heat the oil
Warm the olive oil in a non-stick frying pan over medium heat.
- 2
Soften the onion
When the oil is hot, add the onion and cook for 3–4 minutes, until softened.
- 3
Add aromatics
Stir in the garlic and ginger and cook for 1 minute, until fragrant.
- 4
Stir in spices
Add the spices and stir them through the onion until well combined.
- 5
Add the tomatoes
Add the chopped tomatoes and stir to combine.
- 6
Cook the sauce
Pour in 120 ml water and stir well. Cover the pan and cook for 5–8 minutes, stirring occasionally.
- 7
Add chickpeas
Once the sauce has thickened, add the chickpeas and stir everything together.
- 8
Simmer the curry
Add the remaining 120 ml water and simmer for 5–10 minutes, until the chickpeas are heated through.
- 9
Garnish and serve
Finish with fresh coriander. Serve the chickpea tomato curry with rice or rotis.
What is chickpea tomato curry?
This is a simple Indian-style curry built around chickpeas simmered in a spiced tomato sauce. It skips coconut milk, so the tomatoes and aromatics provide the sauce’s flavour and body.
The quick method layers onion, garlic, ginger and spices before adding the tomatoes. Chickpeas go in after the sauce has had time to thicken.
Nutrition and macros by portion
The nutrition label shows one serving as written: 150 calories, 2g protein, 10g carbs, 4g fat.
| Portion | Adjustment | kcal | Protein | Carbs | Fat |
|---|---|---|---|---|---|
| Lighter | Serve with less rice | 105 kcal | 1g | 7g | 3g |
| This serving | As written | 150 kcal | 2g | 10g | 4g |
| Hungry | Add extra chickpeas | 225 kcal | 3g | 15g | 6g |
The chickpeas and tomatoes contribute most of the carbohydrate, while olive oil provides the main source of fat; chickpeas also supply some protein. Serve it with a sensible portion of rice or rotis, and add vegetables alongside if you want a more varied plate.
Build flavour in the pan
Onion: Give it the full 3–4 minutes to soften before adding the garlic and ginger, so it forms a savoury base.
Spices: Stir them into the onion before adding the tomatoes. This coats the aromatics evenly and helps distribute the seasoning through the sauce.
Let the tomato sauce thicken
Covered simmer: Cook the tomatoes with the first 120 ml water for 5–8 minutes, stirring occasionally. The recipe’s cue is a thickened sauce before the chickpeas are added.
Final simmer: Add the second 120 ml water with the chickpeas and cook for 5–10 minutes, until they are heated through.
Choosing and adding chickpeas
Canned chickpeas: The recipe calls for one can but does not specify a can size or whether to drain it. Use the chickpeas from your can; if you drain them, the sauce may need a little attention as it simmers.
Gentle stirring: Once they are in the pan, stir to coat them without breaking them up. They need only to heat through in the sauce.
Season and finish
Salt: The amount is to taste, so season the sauce as you cook and adjust it before serving.
Coriander: Add the fresh chopped coriander at the end as a garnish. Its fresh flavour contrasts with the warm spices.
What to serve with it
Rice: Serve the curry alongside rice to make a simple, filling meal.
Rotis: These are the other suggested accompaniment and can be used to scoop up the chickpeas and sauce.
Recipe notes & tips
- Keep the pan over medium heat while softening the onion.
- Stir the spices through the onion before adding the tomatoes.
- Stir occasionally while the covered tomato sauce cooks.
- Wait for the sauce to thicken before adding the chickpeas.
- Add the coriander just before serving for a fresh finish.
Variations
- More heat: Increase the Kashmiri red chilli powder to suit your taste.
- Extra tomato: Add more chopped tomato for a more tomato-forward sauce.
- Fresh ginger: Use freshly grated ginger in place of the measured ginger.
- Serving swap: Serve with rotis instead of rice.
- Herb finish: Add a little extra chopped coriander at the table.
Common mistakes to avoid
- Adding chickpeas too early: Wait until the tomato sauce has thickened, as directed.
- Skipping the occasional stir: Stir during the covered simmer to keep the sauce cooking evenly.
- Adding all the water at once: Use the first 120 ml for the tomato sauce and the second 120 ml for the chickpea simmer.
- Cooking the garlic and ginger too long: Add them after the onion and cook for only 1 minute, until fragrant.
- Forgetting to season: Salt the curry to taste before serving.
How to store
Cool leftovers and refrigerate them in a covered container for up to 3 days. Reheat in a pan over a gentle heat, stirring until piping hot; add a splash of water if the sauce has thickened too much.
Frequently asked questions
Can I make this curry without coconut milk?
Yes. This recipe uses tomatoes and water to make the sauce and contains no coconut milk.
Should I drain the canned chickpeas?
The method does not specify whether to drain them. If you do, add the second 120 ml water as directed and check the sauce while it simmers.
How do I know when the tomato sauce is ready for the chickpeas?
Add the chickpeas when the sauce has thickened after its covered 5–8 minute simmer.
How long do the chickpeas need to cook?
After adding the second 120 ml water, simmer for 5–10 minutes, until the chickpeas are heated through.
What can I serve with this curry?
Serve it with rice or rotis, as suggested in the recipe.
Cook it from the original
This recipe comes from spoonbun.com. Their page has the author’s own photos, notes and tips — the best place to cook it from.
Open the recipe on spoonbun.com