
Thai Roti Dessert
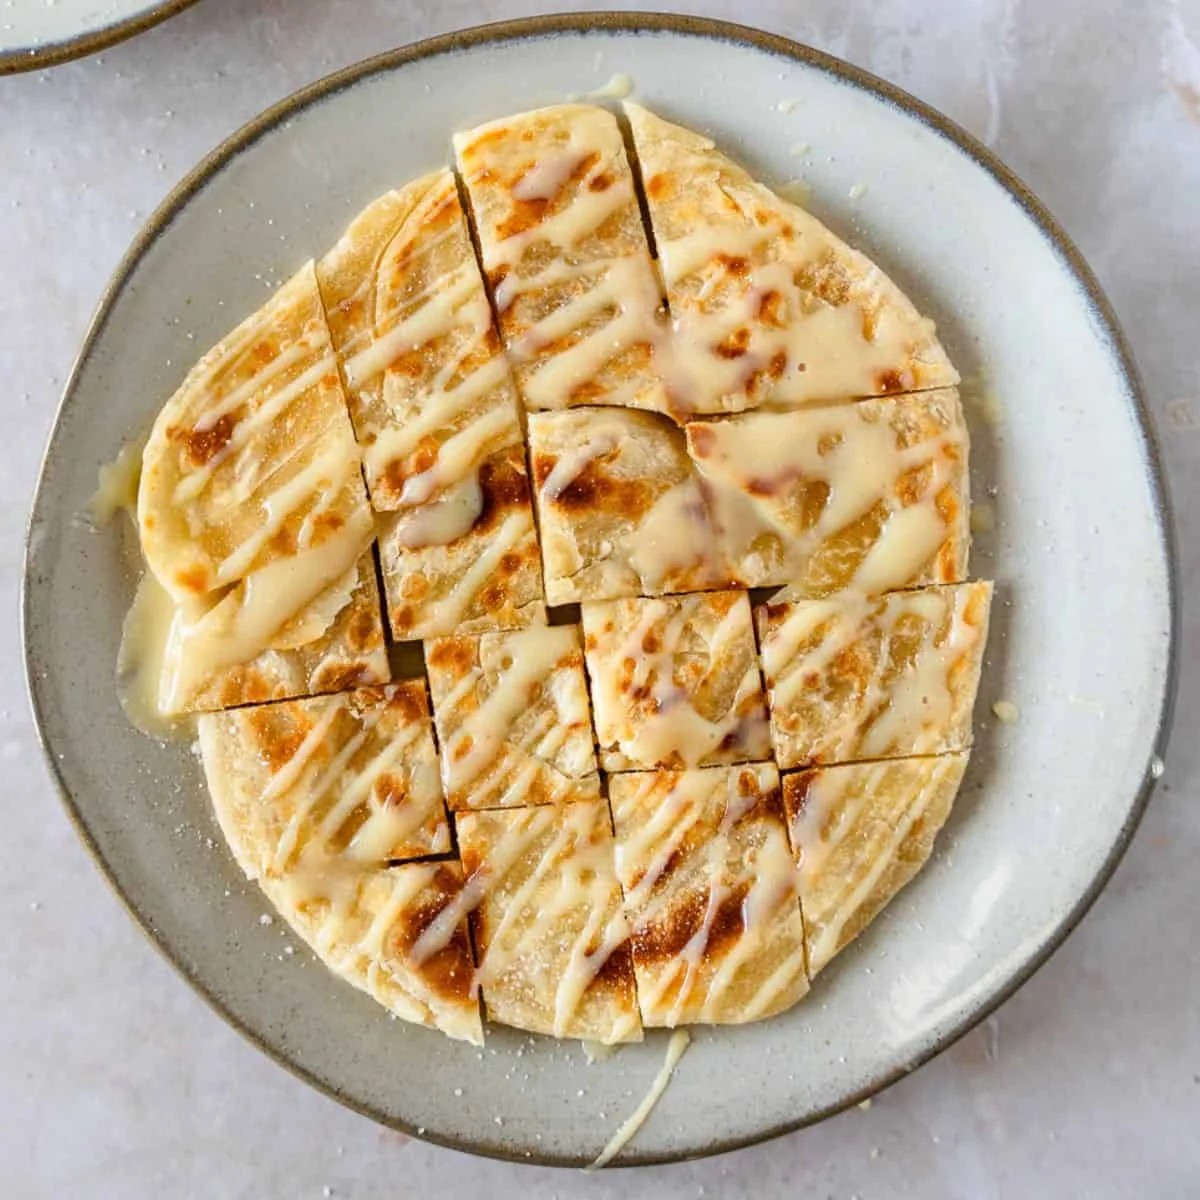
Thai roti is a pan-fried flatbread with crisp, flaky layers and a soft, chewy centre. This sweet version is finished with condensed milk and sugar for a street-food-inspired treat to make at home.
Ingredients
- 250 gplain flour
- 12 g, plus extra for sprinklingsugar
- 2.5 gsalt
- 113 g, warmedwhole milk
- 57 g, dividedunsalted butter
- as neededneutral oil
- 45 mlsweetened condensed milk or chocolate sauce
Instructions
- 1
Mix the dough
Whisk the flour, salt and sugar together in a bowl. Add the warm milk and 2 tablespoons of melted butter, then mix with a spatula until a ball forms. Alternatively, mix the ingredients in a stand mixer fitted with a dough hook.
- 2
Knead and rest
Knead the dough by hand for a few minutes, until smooth. Cover the bowl with a lid or towel and leave the dough to rest for 30 minutes to 1 hour.
- 3
Shape the portions
Transfer the dough to a cutting board. Butter the empty bowl and your hands, then roll the dough into an even log and divide it into 6 equal pieces. Roll each piece into a smooth ball and coat it with more butter. Put the balls in the buttered bowl, cover and rest for 30 minutes to 1 hour.
- 4
Stretch and coil
Take one dough ball and flatten it on a cutting board, stretching it as thin as possible. It is fine if it begins to tear. Peel it away from the surface, twist it into a log and shape it into a rose. Repeat with the remaining dough balls.
- 5
Heat the pan
Set a non-stick frying pan over medium heat and add just enough oil to coat the base lightly.
- 6
Cook the roti
Flatten each dough rose to about 15 cm in diameter. Cook it in the pan until golden on both sides.
- 7
Finish and serve
Set each cooked roti on baking parchment and fold it in half to squash it. Cut into pieces, then drizzle with condensed milk and sprinkle with sugar.
What is Thai roti?
Roti is a flatbread found in many parts of South and Southeast Asia, with versions shaped by local street-food traditions. Thai roti is often cooked to a crisp finish and served sweet, commonly with condensed milk.
This version builds flaky layers by stretching and twisting the rested dough before coiling it into portions. A quick pan-fry gives the outside colour while keeping the centre tender.
Nutrition and macros by portion
The nutrition label shows one serving as written: 270 calories, 6g protein, 40g carbs, 9g fat.
| Portion | Adjustment | kcal | Protein | Carbs | Fat |
|---|---|---|---|---|---|
| Lighter | Use less condensed milk | 189 kcal | 4g | 28g | 6g |
| This serving | As written | 270 kcal | 6g | 40g | 9g |
| Hungry | Serve a larger portion | 405 kcal | 9g | 60g | 14g |
The flour supplies most of the carbohydrates, while butter, cooking oil and condensed milk contribute much of the fat; the milk and flour provide some protein. Enjoy a roti with fresh fruit alongside to add a fresh contrast to the sweet topping.
Why the dough gets two rests
First rest: after kneading, the dough sits for 30 minutes to 1 hour. This gives it time to relax, making it easier to stretch thinly.
Second rest: the butter-coated balls rest for another 30 minutes to 1 hour. Keep them covered so their surfaces do not dry out before shaping.
Stretching and shaping
Thin dough: stretch each piece as far as you can without worrying about small tears. The method calls for twisting the sheet into a log and coiling it into a rose, which helps create layers.
Even portions: divide the log into 6 equal pieces so the roti cook at a similar pace. Flatten each coil to about 15 cm across just before frying.
Getting the pan-fry right
Light coating: use just enough neutral oil to lightly cover the pan rather than leaving the dough sitting in a pool of oil.
Golden finish: cook each roti over medium heat until golden on both sides. If it colours too quickly, lower the heat so the centre has time to cook.
How to serve it
The recipe finishes the roti by folding it on baking parchment and pressing it to squash the layers, then cutting it into pieces. Serve it warm with condensed milk and a sprinkle of sugar.
For a less traditional variation included in the ingredient list, use chocolate sauce instead of condensed milk. Add the topping just before serving so the crisp edges remain noticeable.
Planning the timing
The dough needs two resting periods, each lasting 30 minutes to 1 hour, in addition to mixing, shaping and cooking. The total time is listed as 140 minutes, so allow for the longer rests when planning.
You can shape the dough balls after the first rest, then use the second rest to prepare your pan and serving toppings.
Recipe notes & tips
- Warm the milk before adding it so it combines smoothly with the flour.
- Keep the dough covered during both rests to prevent it drying out.
- Butter your hands and the bowl when shaping the dough portions, as directed.
- Stretch the dough thinly, but do not discard it if it develops small tears.
- Flatten each coil to about 15 cm across for the final fry.
- Add the condensed milk and sugar after cooking, just before serving.
Variations
- Chocolate finish: use chocolate sauce in place of the sweetened condensed milk.
- Less sweet: drizzle on a smaller amount of condensed milk and omit the extra sugar.
- Extra crisp: cook the roti until both sides are well golden, keeping the pan at medium heat.
- Smaller pieces: divide the cooked roti into bite-sized pieces for sharing.
- Simple topping: serve with only a light sprinkle of sugar instead of a drizzle.
Common mistakes to avoid
- Skipping the first rest: the dough may resist stretching; leave it covered for 30 minutes to 1 hour.
- Leaving dough uncovered: the surface can dry out; cover the bowl during both rests.
- Using too much oil: the roti can become greasy; add only enough to coat the pan lightly.
- Cooking over high heat: the outside may brown before the centre cooks; use medium heat.
- Flattening unevenly: thick areas can cook differently; aim for an even round about 15 cm across.
- Topping too early: the roti can lose its crispness; drizzle and sprinkle just before serving.
How to store
For the best crisp texture, serve the roti freshly cooked. If you have leftovers, keep them covered in the fridge and reheat in a frying pan until warmed through; add the toppings after reheating.
Frequently asked questions
Can I make the dough without a stand mixer?
Yes. Mix the ingredients with a spatula until a ball forms, then knead by hand for a few minutes until smooth.
How long should the dough rest?
Rest it for 30 minutes to 1 hour after kneading, then rest the butter-coated dough balls for another 30 minutes to 1 hour.
What if the dough tears while stretching?
Small tears are not a problem for this method. Continue by peeling the dough from the work surface, twisting it into a log and shaping it into a rose.
How do I know when the roti is cooked?
Cook each one until it is golden on both sides. The pan should be over medium heat.
Can I use chocolate sauce instead of condensed milk?
Yes. The recipe lists chocolate sauce as an alternative topping to sweetened condensed milk.
Can I prepare the dough ahead?
The recipe gives resting times but does not specify longer storage for the uncooked dough. For the stated method, keep it covered and follow the two rests before cooking.
Cook it from the original
This recipe comes from thaicaliente.com. Their page has the author’s own photos, notes and tips — the best place to cook it from.
Open the recipe on thaicaliente.com