
White Bread
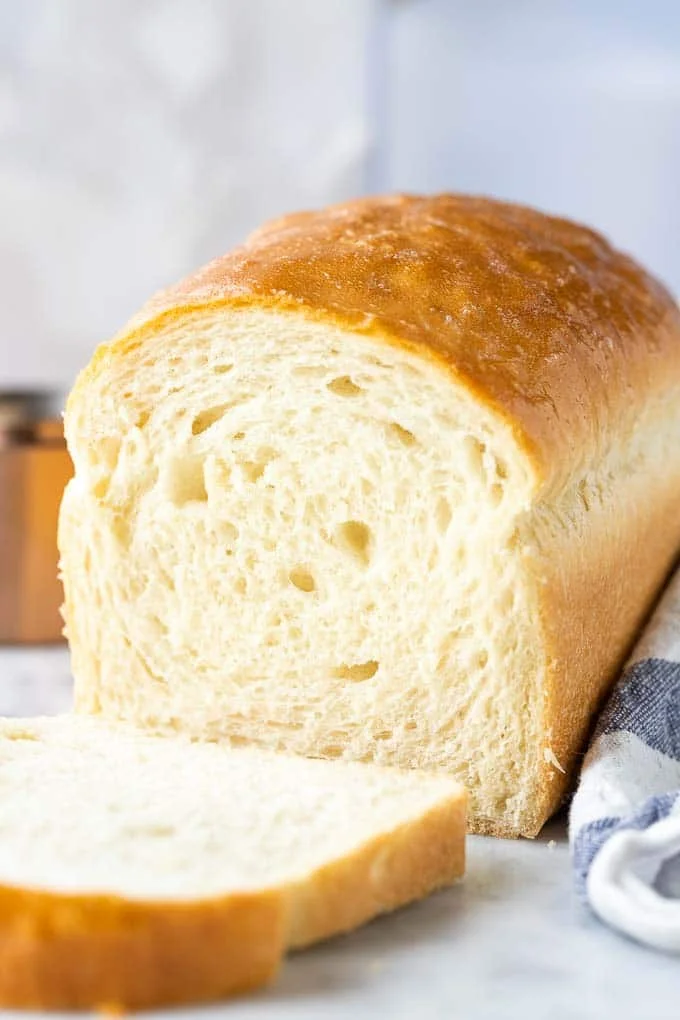
This American-style white bread makes two soft, fluffy loaves with a tender crumb and buttery tops. It is a useful everyday bake for toast, sandwiches or serving alongside a meal.
Ingredients
- 395 ml, divided (1⅔ cups)lukewarm water
- 7 g (2¼ teaspoons)instant yeast (or active dry yeast)
- 4 g (1 teaspoon)sugar
- 21 g (1 tablespoon)honey (or more sugar)
- 6 g (1 teaspoon)salt
- 21 g (1½ tablespoons), cubed at room temperatureunsalted butter
- 540 g, divided (4½ cups)all-purpose flour
- 21 g (1½ tablespoons), melted for brushingbutter
Instructions
- 1
Activate the yeast
In the bowl of a stand mixer fitted with a dough hook, combine the instant yeast, sugar and half the lukewarm water. Leave for 5–10 minutes until foamy; if using active dry yeast, leave it for 15 minutes.
- 2
Knead the dough
Add the remaining water, honey, salt, cubed butter and 480 g (4 cups) of the flour. Knead at low speed until the dough comes together and feels soft but not sticky. Add a few more tablespoons of the remaining flour if needed, then knead for 6–9 minutes, until the dough pulls away from the bowl and is smooth and soft.
- 3
Let it rise
Transfer the dough to a lightly greased bowl and turn it so it is coated all over. Cover with plastic wrap and leave in a warm, draught-free place for about 45 minutes, or until doubled in size.
- 4
Shape the loaves
Lightly flour your work surface and turn out the dough. Divide it into two equal portions. Gently pat each portion into a 20 × 30.5 cm (8 × 12 inch) rectangle, pressing out air pockets. Starting at a short end, roll each rectangle tightly and pinch the seam closed. Tuck the ends slightly under to create surface tension, then place each loaf seam-side down in a greased 20 × 10 cm (8 × 4 inch) loaf tin. Cover with greased plastic wrap and leave in a warm, draught-free place for about 45 minutes, until doubled in size.
- 5
Heat the oven
Preheat the oven to 199°C (390°F), with the rack in the lower-middle position.
- 6
Bake the bread
Bake the loaves for 25–30 minutes, until golden brown and the centre of a loaf registers 208–210°F.
- 7
Brush and cool
Turn the loaves out onto a cooling rack, then turn them upright again. Brush the tops and sides with melted butter and let the loaves cool completely before slicing.
What is white bread?
White bread is a loaf made with refined wheat flour, which gives it a pale crumb and a soft, even texture. This American-style version is shaped into two sandwich loaves and finished with melted butter.
A simple yeast dough and two rises help the loaves become light and fluffy. Rolling the dough firmly also helps create an even shape that slices neatly.
Nutrition and macros by portion
The nutrition label shows one serving as written: 1231 calories, 31g protein, 227g carbs, 20g fat.
| Portion | Adjustment | kcal | Protein | Carbs | Fat |
|---|---|---|---|---|---|
| Lighter | Thinner slices | 862 kcal | 22g | 159g | 14g |
| This serving | As written | 1231 kcal | 31g | 227g | 20g |
| Hungry | Larger slices | 1847 kcal | 47g | 341g | 30g |
The flour provides most of the carbohydrate, while butter contributes much of the fat and the flour supplies some protein. Pair a slice with an egg, beans or another protein-rich topping, and add fruit or vegetables for a more balanced plate.
The yeast and dough
Yeast: Instant yeast can be mixed with the water and sugar straight away; the brief rest checks that it becomes foamy. Active dry yeast needs the longer 15-minute rest stated in the method.
Flour: Start with the specified 480 g, then add a little of the reserved flour only if the dough is sticky. The finished dough should feel soft and pull away from the bowl after kneading.
How to knead it
Kneading: Give the dough the full 6–9 minutes so it becomes smooth and elastic. Add any extra flour gradually, since too much can make the loaves dense.
Butter: The room-temperature cubes are worked into the dough during kneading. Make sure they are incorporated rather than left in visible lumps.
Shaping and proofing
Rolling: Press out air pockets, then roll each rectangle tightly from a short end. Pinch the seam and tuck the ends underneath to help the loaf hold its shape.
Proofing: Both rises take place in a warm, draught-free spot. Use the dough’s doubled size as the main cue, rather than relying on the clock alone.
When the loaves are done
Colour: The crust should be golden brown after 25–30 minutes in the oven. The recipe also gives an internal temperature of 208–210°F as a doneness check.
Cooling: Brush the tops and sides with melted butter after turning the loaves out, then let them cool completely. Slicing while warm can compress the soft crumb.
Serving ideas
Toast: The mild flavour and soft crumb work well with butter, jam or savoury toppings. Let slices brown gently so the centre stays tender.
Sandwiches: Use fully cooled bread for cleaner slices and everyday sandwiches. It also makes a simple accompaniment to soup or a salad.
Recipe notes & tips
- Measure the flour carefully and add the reserved portion only as needed.
- Keep the water lukewarm rather than hot when mixing it with the yeast.
- Grease the bowl, loaf tins and plastic wrap so the dough is less likely to stick.
- Use a warm, draught-free place for both rises.
- Pinch the seam closed and place each loaf seam-side down in its tin.
- Wait until the loaves are completely cool before slicing.
Variations
- Sugar instead of honey: Use more sugar in place of the honey, as the ingredient list allows.
- Active dry yeast: Let the yeast mixture stand for 15 minutes before adding the remaining ingredients.
- Toast: Slice the cooled loaf and toast it for a crisp-edged breakfast or snack.
- Sandwich loaf: Use the cooled slices for sandwiches with your preferred fillings.
Common mistakes to avoid
- Adding too much flour: The dough can turn dense, so add the reserved flour a little at a time.
- Using water that is too hot: It can interfere with the yeast; use lukewarm water.
- Skipping the first rise: Let the dough double before dividing and shaping it.
- Rolling loosely: A loose roll can leave uneven gaps, so roll firmly and pinch the seam closed.
- Cutting while warm: The crumb may squash under the knife, so cool the loaves completely first.
How to store
Once completely cool, store the bread in an airtight bag or container at room temperature for a few days. Rewarm slices in a toaster, or freeze the loaves or slices in a well-sealed freezer bag for longer storage.
Frequently asked questions
Can I use active dry yeast?
Yes. Use the same amount and let it sit with the sugar and half the water for 15 minutes, rather than 5–10 minutes.
How do I know when the dough has risen enough?
It should be about doubled in size after each rise. The method gives roughly 45 minutes for each rise, but the size cue is more useful than the exact timing.
Why is my dough sticky?
Add a few tablespoons of the reserved flour gradually while kneading. Stop once the dough is soft and no longer sticky.
Can I make one large loaf instead of two?
The method is written for two portions and two 20 × 10 cm tins. A single larger loaf would need different shaping and baking timing, so use the stated tin sizes for the most reliable result.
Do I need to wait before slicing?
Yes. Let the loaves cool completely so the crumb can set and the slices are less likely to compress.
Can I freeze this bread?
Yes. Freeze it once cool, either whole or sliced, in a well-sealed freezer bag. Toast slices straight from frozen or thaw the loaf before serving.
Cook it from the original
This recipe comes from platedcravings.com. Their page has the author’s own photos, notes and tips — the best place to cook it from.
Open the recipe on platedcravings.com