
Picaditas Veracruzanas
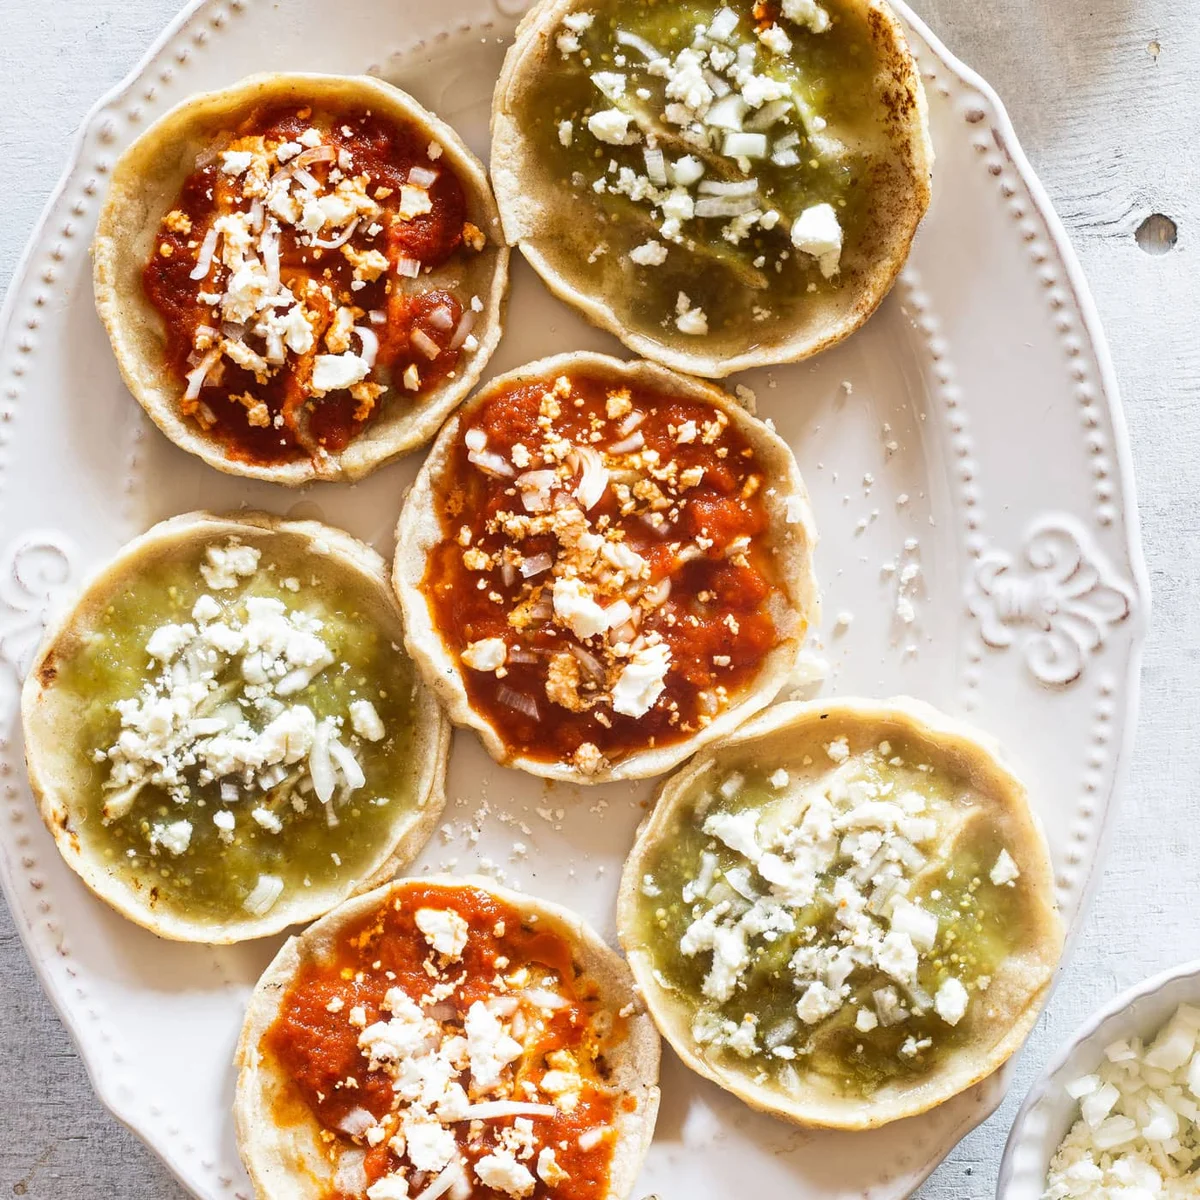
Picaditas Veracruzanas are thick masa cakes with raised edges, topped with salsa, onion, cheese and melted lard. They make a satisfying Mexican snack, and the little ridges help keep the toppings in place.
Ingredients
- 300 g (2½ cups)masa harina
- 360 ml (1½ cups), plus more if neededwater
- 5 g (1 tsp)salt
- 360 ml (1½ cups)guajillo salsa
- 360 ml (1½ cups)salsa verde
- About 170 g (1½ cups)queso fresco or your favourite cheese, crumbled
- About 100 g (⅔ cup)onions, chopped
- 120 ml (½ cup)melted pork lard or bacon fat
Instructions
- 1
Make the dough
Mix the masa harina, water and salt in a medium bowl until you have a smooth dough that does not stick to your hands. Add water as needed. Divide the dough into 20 portions and roll each into a ball. Cover the balls with a damp tea towel so they do not dry out.
- 2
Heat the pan
Set a skillet or griddle over medium-high heat and heat it until very hot and beginning to smoke.
- 3
Shape the cakes
Place a masa ball between two sheets of plastic and press it with a tortilla press or a heavy dish to make a thick disc. Carefully peel away the plastic and place the cake on the hot skillet.
- 4
Cook and shape
Cook for about 1 minute, then turn the cake and cook for 2 more minutes, flipping it once or twice more, until brown spots appear. Transfer it to a flat surface and use a paper kitchen towel to pinch up the edges into a small rim; pinch the middle to make a few small barriers as well. Repeat in batches of 3–4, shaping each cake after cooking, until all the dough is used. Keep the cakes warm wrapped in a tea towel.
- 5
Warm the fat
Heat the lard or olive oil in a small pan, then set it aside.
- 6
Top and serve
Working in batches, put the picaditas in a pan or the skillet used for the cakes and drizzle over a little melted lard. Top each with one type of salsa, then add onion and cheese and finish with another drizzle of lard. Cook for a couple of minutes, just until the toppings are warm, then remove from the pan and serve.
What are picaditas?
Picaditas are Mexican masa cakes with a thicker centre and pinched-up edges that form a shallow rim. Their shape holds salsa and other toppings, making them easy to eat as a snack or light meal.
This Veracruz-style version pairs guajillo salsa and salsa verde with onion, cheese and melted lard. The combination of two sauces gives each cake a mix of savoury, fresh and chilli-led flavours.
Nutrition and macros by portion
The nutrition label shows one serving as written: 150 calories, 3g protein, 13g carbs, 10g fat.
| Portion | Adjustment | kcal | Protein | Carbs | Fat |
|---|---|---|---|---|---|
| Lighter | Use less finishing lard | 105 kcal | 2g | 9g | 7g |
| This serving | As written | 150 kcal | 3g | 13g | 10g |
| Hungry | Serve extra picaditas | 225 kcal | 5g | 20g | 15g |
The masa harina supplies most of the carbohydrates, while the lard carries much of the fat; the cheese contributes protein and additional fat. Balance the plate with a simple salad or vegetables, especially if serving the picaditas as a meal.
Getting the masa right
Dough texture: Mix the masa harina and water until the dough is smooth and pliable rather than sticky. If it feels dry or cracks when pressed, add water a little at a time.
Keep it covered: Masa dough can dry out while you work. A damp tea towel over the portioned balls helps keep them soft enough to press and shape.
Pressing and shaping
Even discs: Press each ball between plastic sheets so it releases cleanly and does not stick to the press. Aim for a thick disc rather than a thin tortilla.
Raised rim: Shape the edge while the cake is still warm, using a paper kitchen towel to protect your fingers. Pinch the middle too, as directed, to create small barriers for the toppings.
Watch the cooking cues
Hot surface: The skillet or griddle should be very hot before the first cake goes on. Brown spots are the visual cue to look for as the cakes cook.
Short batches: The recipe suggests cooking 3–4 cakes at a time, then shaping them before they cool. Keep finished cakes wrapped in a tea towel while you work through the rest.
Salsa, cheese and lard
Sauce choice: Use either guajillo salsa or salsa verde on each cake, as the method suggests, rather than mixing the two together. The raised rim helps contain the salsa.
Finishing fat: A little melted lard goes on before and after the toppings. Add it sparingly at first, since you can always drizzle on more while finishing the batch.
Serving ideas
Serve the picaditas warm, soon after the final brief heating in the pan. Their salsa, onion and cheese toppings make them a snack on their own.
For a more substantial plate, pair them with a simple salad or vegetables. Keep any extra salsa on the side so diners can add more to taste.
Recipe notes & tips
- Keep the dough balls under a damp tea towel until you are ready to press them.
- Use plastic sheets when pressing so the masa discs are easier to lift.
- Press the cakes thick enough to pinch into a rim after cooking.
- Work in batches of 3–4 so the cakes can be shaped while warm.
- Keep cooked cakes wrapped in a tea towel to help them stay warm.
- Add the toppings shortly before serving so the cakes can be warmed and eaten promptly.
Variations
- Choose one salsa: Top each picadita with guajillo salsa or salsa verde.
- Change the cheese: Use your favourite crumbled cheese in place of queso fresco.
- Use bacon fat: Swap the pork lard for bacon fat as suggested in the ingredients.
- Make them with olive oil: The method offers olive oil as an alternative for heating the fat.
- Adjust the toppings: Add more or less chopped onion to suit your preference.
Common mistakes to avoid
- Dry dough: Add water a little at a time until the masa is smooth and pliable.
- Uncovered dough: Keep the balls under a damp tea towel to stop them drying out.
- Thin cakes: Press thick discs so they can hold their shape and toppings.
- Cold cakes: Pinch the edges soon after cooking, while the cakes are still warm.
- Overheating the toppings: Cook the topped cakes only for a couple of minutes, just to warm everything through.
How to store
Store leftover picaditas in an airtight container in the fridge and use within 2 days. Reheat them in a skillet until warmed through; the salsa and cheese may soften the cakes during storage.
Frequently asked questions
How many picaditas does this recipe make?
The method divides the dough into 20 portions, while the recipe lists 18 servings. The number you serve will depend on how large you make each cake.
Can I make the dough ahead?
The method is designed for making and cooking the cakes in one session. If preparing ahead, keep the dough covered so it does not dry out.
How do I know when the cakes are cooked?
Follow the stated timing: about 1 minute on the first side, then 2 more minutes with one or two additional flips. Brown spots should form on the surface.
Can I use only one salsa?
Yes. The method uses one type of salsa on each picadita, so you can make the whole batch with guajillo salsa or salsa verde.
Can I use another cheese?
Yes. The ingredients allow for queso fresco or your favourite cheese, crumbled.
Why pinch a rim around each cake?
The rim creates a shallow edge to help hold the salsa and toppings on the masa cake.
Cook it from the original
This recipe comes from maricruzavalos.com. Their page has the author’s own photos, notes and tips — the best place to cook it from.
Open the recipe on maricruzavalos.com