
White Braided Bread
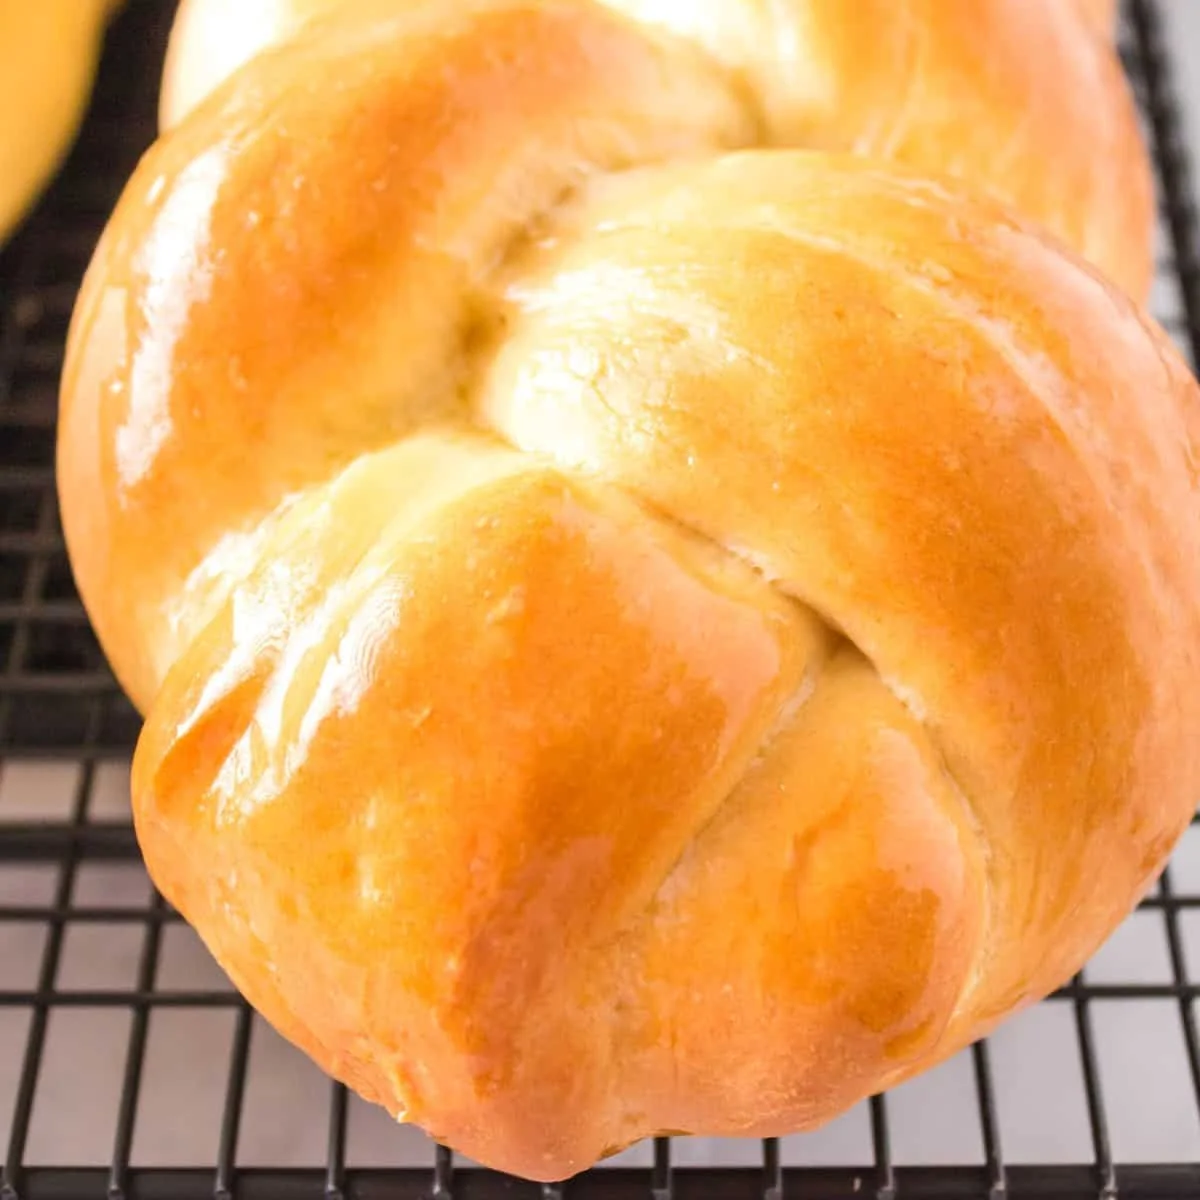
White braided bread is a soft yeast loaf shaped into two decorative braids. Make it for an Easter table or serve it alongside soup, stew, pasta or salad.
Ingredients
- 7 g (2 1/2 teaspoons)active dry yeast
- 240 ml (1 cup), approximately 35°C (95°F), dividedwarm water
- 25 g (2 tablespoons)granulated sugar or raw sugar
- 57 g (1/4 cup), at room temperatureunsalted butter (or salted butter)
- 2 largeeggs
- 1 teaspoonsalt
- 500 g (4 cups)unbleached plain flour
Instructions
- 1
Activate the yeast
In the bowl of a stand mixer fitted with a dough hook, combine the yeast, 120 ml of the water and the sugar. Leave for 4–5 minutes, until the mixture foams. If it does not foam, start again with fresh yeast; water that is too hot can kill the yeast, while cold water can slow its activity.
- 2
Mix the wet ingredients
Add the remaining water, butter, eggs and salt to the yeast mixture. Mix for 30 seconds. If softening chilled butter in the microwave, take care not to melt it, and make sure it is not hot before adding it.
- 3
Add the flour
With the mixer on low speed, add the flour one cup at a time so it is gradually incorporated.
- 4
Knead the dough
Once all the flour is added, mix at medium speed for 5 minutes. The dough should form a ball and pull away from the sides of the bowl; when pressed with a finger, it should leave an indent without sticking to your finger.
- 5
Let the dough rise
Transfer the dough to a lightly greased bowl and cover with plastic wrap. Leave it in a warm, draught-free place for about 1 hour, or until doubled in size.
- 6
Divide the dough
Punch the dough down, then knead it 3 or 4 times on a lightly floured surface. Divide it into 6 equal pieces.
- 7
Prepare the tray
Line a baking sheet with a silicone mat or parchment paper and set it aside.
- 8
Shape the strands
Roll each piece of dough into a log about 50 cm (20 inches) long. Set three strands aside for the second braid, then arrange the other three close together in front of you without letting them touch.
- 9
Braid the dough
Starting in the middle of the strands, cross the middle strand over the left strand, then cross the new middle strand over the right. Repeat these movements towards the end and pinch the ends together; finish the other half of the braid in the same way and pinch its end.
- 10
Shape the second loaf
Transfer the first braid to the prepared baking sheet. Braid the remaining three strands in the same way and place the second braid on the sheet, leaving space between them.
- 11
Proof the braids
Cover the braids with plastic wrap and leave them to rise for 45 minutes. Towards the end of this time, preheat the oven to 175°C (350°F).
- 12
Bake until golden
Remove the plastic wrap and bake the braids for 25 minutes, or until golden brown.
- 13
Brush and cool
Brush the baked braids with butter and leave them to cool for 15 minutes before serving.
What is white braided bread?
Braided bread is made by weaving strands of dough together before baking. This American-style white loaf makes a decorative centrepiece for an Easter table, but also works as a bread to serve with everyday meals.
The dough is enriched with eggs and butter, giving it a tender crumb. Dividing it into two braids makes the shape manageable while still creating an impressive presentation.
Nutrition and macros by portion
The nutrition label shows one serving as written: 125 calories, 3g protein, 21g carbs, 3g fat.
| Portion | Adjustment | kcal | Protein | Carbs | Fat |
|---|---|---|---|---|---|
| Lighter | Smaller bread portion | 88 kcal | 2g | 15g | 2g |
| This serving | As written | 125 kcal | 3g | 21g | 3g |
| Hungry | Larger bread portion | 188 kcal | 5g | 32g | 5g |
The flour supplies most of the carbohydrates, while butter contributes much of the fat and the eggs provide some protein. Pair a serving with soup, salad or another meal component for a more rounded plate.
Choosing the ingredients
Yeast: The recipe uses active dry yeast, which is first mixed with warm water and sugar. Seeing foam before adding the other ingredients is a helpful sign that it is working.
Butter and eggs: Room-temperature butter is easier to mix into the dough. If you soften it in the microwave, avoid melting it or adding it while hot.
Getting the dough right
Flour: Add it gradually on low speed so it is less likely to scatter from the bowl. After mixing, the dough should gather into a ball and pull away from the bowl’s sides.
Kneading: The recipe relies on 5 minutes of mixing at medium speed rather than extended hand-kneading. Use the finger-press cue: the dough should hold an indent without sticking to your finger.
Proofing the dough
First rise: Leave the covered dough in a warm, draught-free place for about 1 hour. Judge this rise by its size—it should double—rather than relying only on the clock.
Second rise: Once shaped, the braids need another 45 minutes under plastic wrap. Keep them apart on the tray so they have room as they rise and bake.
Shaping an even braid
Strands: Roll the six pieces into logs about 50 cm long, then use three for each loaf. Keeping the strands similar in length helps the two braids look balanced.
Weave: Begin at the middle and alternate crossing the middle strand over the left, then the new middle strand over the right. Pinch each end together to hold the braid in shape.
Knowing when it is baked
Colour: Bake at 175°C (350°F) for 25 minutes, checking for a golden-brown finish. If the braids are not golden yet, follow the recipe’s visual cue rather than taking them out early.
Cooling: Brush the braids with butter after baking and let them cool for 15 minutes. This gives them time to settle before serving.
What to serve alongside
Meals: The bread suits soup, stew, pasta or salad, as well as a festive table. Its braided shape also makes it easy to bring whole to the table and slice as needed.
Serving: Let the bread cool for the stated 15 minutes before cutting. Serve it with the meal rather than adding extra ingredients to the dough.
Recipe notes & tips
- Check that the yeast foams before you continue with the dough.
- Keep the butter soft but not melted or hot when adding it.
- Add flour gradually on low speed to keep it in the mixer bowl.
- Use the dough’s doubled size as the cue to end the first rise.
- Leave space between the braids on the baking sheet.
- Brush with butter after baking, then cool for 15 minutes.
Variations
- Raw sugar: Use raw sugar in place of granulated sugar, as the recipe allows.
- Salted butter: Use salted butter instead of unsalted butter, as suggested in the ingredient notes.
- Parchment lining: Line the baking sheet with parchment paper instead of a silicone mat.
- Festive centrepiece: Arrange the two braids together on a serving board after cooling.
- Soup companion: Serve slices alongside soup or stew as a simple meal pairing.
Common mistakes to avoid
- Inactive yeast: If the mixture does not foam after 4–5 minutes, restart with fresh yeast.
- Water too hot: Use warm rather than hot water, since excessive heat can kill the yeast.
- Butter too hot: Let softened butter cool before adding it to the yeast mixture.
- Adding flour too quickly: Mix it in one cup at a time on low speed to prevent it flying out.
- Rushing the rise: Wait until the first rise has doubled the dough, and give the shaped braids their full 45 minutes.
- Braids touching: Leave a gap between them on the baking sheet so they have room.
How to store
Once cool, store the bread in an airtight container at room temperature and use within 2–3 days. Reheat slices briefly in a warm oven, or toast them.
Frequently asked questions
How can I tell whether the yeast is active?
After 4–5 minutes in the warm water and sugar, the mixture should foam. If it does not, the recipe advises starting again with fresh yeast.
Can I use salted butter?
Yes. The recipe notes that salted butter works as well as unsalted butter.
Can I make the braids without a stand mixer?
The method is written for a stand mixer with a dough hook. If mixing by hand, use the same dough cues to judge when it has come together and is ready.
Why does the recipe start braiding in the middle?
Starting in the middle is intended to make the braid more uniform. Work towards one end, pinch it, then finish the other half.
How do I know the bread is done?
The recipe gives 25 minutes at 175°C (350°F) and a golden-brown colour as the doneness cue.
Can I prepare the dough ahead?
The recipe does not include an overnight method. For the stated method, follow the two rises and bake the braids the same day.
Cook it from the original
This recipe comes from noshingwiththenolands.com. Their page has the author’s own photos, notes and tips — the best place to cook it from.
Open the recipe on noshingwiththenolands.com