
The best pierogi dough recipe + how to make perfect pierogi
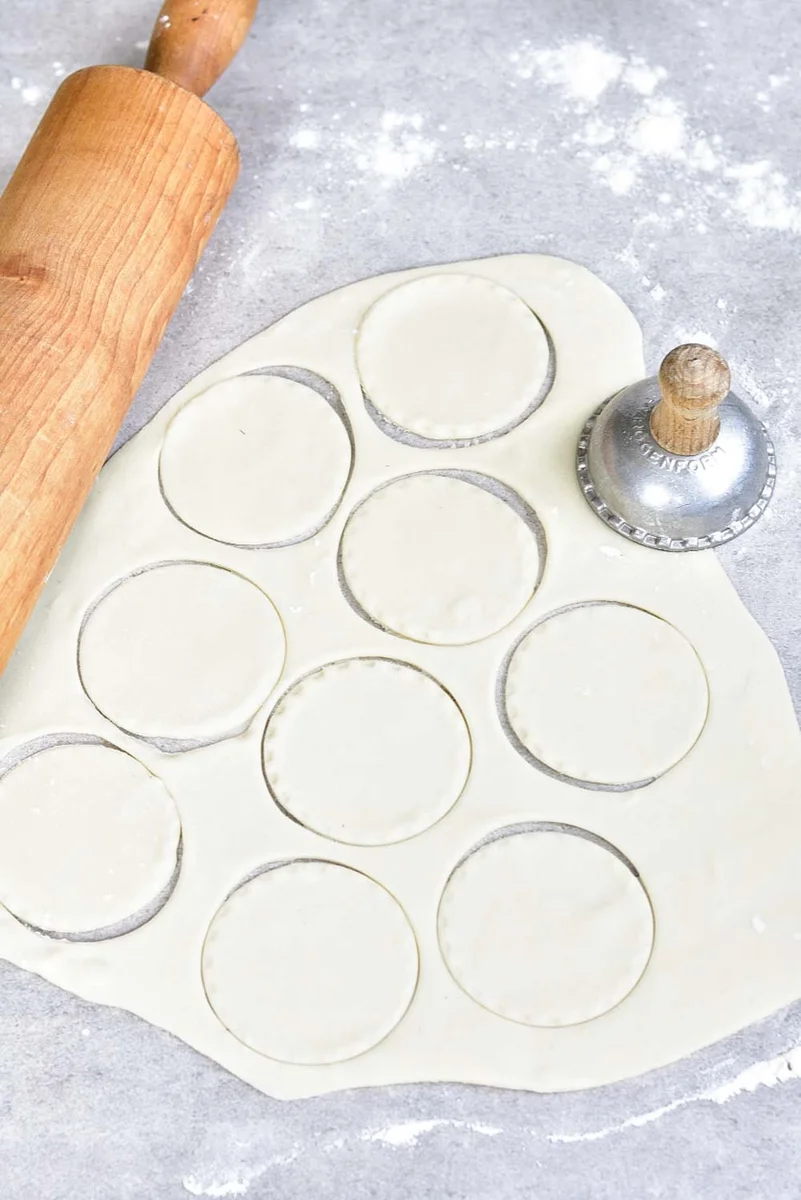
This Polish-style pierogi dough is made with flour, hot water and butter for a soft, elastic texture that is easy to roll and shape. It makes a generous batch of wrappers for filling, sealing and cooking as needed.
Ingredients
- 500 g (4 cups; 17.5 oz)plain flour
- 280 ml (1 cup + 2½ tablespoons; 280 g; 10 oz)water
- 40 g (3 tablespoons; 1.4 oz)butter, or vegetable oil
- 1 teaspoonsalt
Instructions
- 1
Combine flour and salt
Put the flour and salt in a large bowl and mix them together.
- 2
Warm water and butter
Heat the water and butter in a small saucepan until very hot but not boiling, about 80–85°C (176–185°F). The water should begin to move and steam.
- 3
Mix the dough
Pour the hot water and butter into the flour mixture. Stir with a wooden spoon until roughly combined.
- 4
Knead until elastic
Knead by hand or with a stand mixer fitted with a dough hook for about 5 minutes. You can also use a food processor with a dough blade. The dough should become smooth, soft and elastic, and should not stick to your hands. If it is too dry, add a little water; if too wet, add a little flour. If it has formed a ball but still feels tough, keep kneading until it softens and becomes elastic.
- 5
Rest the dough
Wrap the dough in plastic wrap so it does not dry out, then leave it to rest for about 30 minutes.
- 6
Divide the dough
Cut the dough into 4 portions.
- 7
Roll and cut
On a lightly floured surface, roll one portion to about 2 mm (1/16 inch) thick. If it is difficult to roll, leave it to rest for 5–10 minutes. Cut out rounds with a cup or a pierogi or pastry cutter.
- 8
Add the filling
Put one ball of filling, or 1 teaspoon of filling, on each round. Gather the scraps, cover them with plastic wrap and set them aside.
- 9
Seal each pierogi
Fold each round over the filling to make a half-moon. Press the edges together and crimp them with your fingers, making sure there are no gaps that could let the pierogi open during cooking.
- 10
Cover the shaped pierogi
Set the pierogi apart on a towel lightly sprinkled with flour so they do not stick to the board. Cover them loosely with a kitchen cloth to prevent them drying out, then repeat with the remaining dough.
- 11
Boil salted water
Bring a large pot of salted water to the boil.
- 12
Cook in batches
Cook the pierogi in batches; in a 21 cm (8-inch) pot, cook about 10–12 at a time. Once they float to the surface, cook them for a further 1–2 minutes, adjusting for the thickness of the dough, then lift them out with a slotted spoon.
- 13
Drain and serve
Drain the pierogi well and transfer them to a plate. Serve warm with melted butter poured over.
What is pierogi dough?
Pierogi are Polish dumplings made by wrapping a filling in dough, sealing the edges and cooking the parcels in water. This version uses a simple flour-and-water base enriched with butter, making a pliable wrapper for shaping.
Hot water helps bring the flour together, while kneading and resting give the dough time to become smoother and easier to roll.
Nutrition and macros by portion
The nutrition label shows one serving as written: 2107 calories, 0g protein, 0g carbs, 0g fat.
| Portion | Adjustment | kcal | Protein | Carbs | Fat |
|---|---|---|---|---|---|
| Lighter | Use less butter | 1475 kcal | 0g | 0g | 0g |
| This serving | As written | 2107 kcal | 0g | 0g | 0g |
| Hungry | Larger pierogi portion | 3161 kcal | 0g | 0g | 0g |
In the dough, flour supplies most of the carbohydrate and some protein, while butter contributes most of the fat; the filling and serving butter will change the finished pierogi's macros. Pair a portion with vegetables or a salad, and account for the filling when tracking the whole dish.
Choosing the ingredients
Flour: Plain flour is the all-purpose choice here. Weighing the 500 g gives a more dependable starting point than measuring by volume.
Butter: Butter adds richness and a gentle flavour; vegetable oil is offered as an alternative. Salt seasons the dough, while the water hydrates the flour.
Why the water is hot
Hot water: Warm the water with the butter to about 80–85°C, stopping before it boils. Pour it into the flour while hot and stir until the mixture is roughly combined.
Texture check: The dough should come together without sticking to your hands. If it is dry or wet, adjust with a little water or flour respectively, rather than making a large change at once.
Kneading and resting
Kneading: Work the dough for about 5 minutes, until it feels smooth, soft and elastic. A dough that has formed a ball can still be tough, so keep kneading if it has not softened yet.
Resting: Cover the dough for about 30 minutes. This gives it time to relax, making it easier to roll thinly without fighting back.
Rolling and shaping
Thin rounds: Roll each portion to about 2 mm thick on a lightly floured surface. If the dough resists, let it rest for 5–10 minutes before trying again.
Sealed edges: Add a small amount of filling, fold the round into a half-moon and press the edges firmly closed. Keep the shaped pierogi covered and on a lightly floured towel so they do not dry out or stick.
Cooking and serving
Batch size: Cook the pierogi in batches rather than crowding the pot; the method suggests about 10–12 for a 21 cm pot. Once they float, give them another 1–2 minutes, with the exact time depending on dough thickness.
To serve: Drain them well and serve warm with melted butter. The dough itself does not include a filling, so choose and prepare a filling separately.
Recipe notes & tips
- Weigh the flour and water for a consistent dough.
- Keep the unused dough covered while you roll and shape each portion.
- Use only a light dusting of flour when rolling so the dough does not dry out.
- If a portion keeps springing back, let it rest for 5–10 minutes before rolling again.
- Seal each pierogi carefully, pressing out gaps around the filling.
- Cook in batches and lift the pierogi with a slotted spoon.
Variations
- Use oil: Replace the butter with vegetable oil as the recipe allows.
- Choose a filling: Use your preferred pierogi filling, adding a small ball or 1 teaspoon to each round.
- Change the shape: Cut the dough into rounds with a cup or a pierogi cutter.
- Serve with butter: Pour melted butter over the cooked pierogi while they are warm.
- Save the scraps: Gather the dough trimmings and reroll them for more rounds.
Common mistakes to avoid
- Boiling the water: Heat it until very hot and steaming, about 80–85°C, but do not let it boil.
- Stopping kneading too soon: A formed ball can still be tough; continue until the dough feels soft and elastic.
- Rolling resistant dough: Cover it and let it rest for 5–10 minutes before trying again.
- Leaving gaps in the seal: Press and crimp the edges firmly so the pierogi do not open in the water.
- Letting the dough dry out: Keep unused dough and shaped pierogi covered while you work.
- Crowding the pot: Cook in batches, about 10–12 pierogi in a 21 cm pot.
How to store
Keep uncooked shaped pierogi covered and lightly floured until cooking so they do not dry out or stick. Refrigerate cooked leftovers in an airtight container and use within 3 days; reheat gently in a pan or in boiling water until hot throughout.
Frequently asked questions
Can I make the dough without a stand mixer?
Yes. Knead it by hand for about 5 minutes, or use a food processor fitted with a dough blade.
How thin should I roll the dough?
Aim for about 2 mm (1/16 inch). If it is difficult to roll, let it rest for 5–10 minutes and try again.
How much filling goes in each pierogi?
The method suggests one ball of filling or 1 teaspoon per round. Avoid overfilling so you can seal the edges securely.
How can I tell when the pierogi are cooked?
They should float to the surface; cook them for a further 1–2 minutes. Thicker dough may need longer.
Can I prepare the dough ahead?
You can make it ahead and keep it wrapped so it does not dry out. Let it rest for about 30 minutes before rolling.
Does this recipe include a pierogi filling?
No, it gives instructions for the dough and shaping only. Choose and prepare a filling separately.
Cook it from the original
This recipe comes from everyday-delicious.com. Their page has the author’s own photos, notes and tips — the best place to cook it from.
Open the recipe on everyday-delicious.com