
Salsa macha with peanuts and sesame seeds
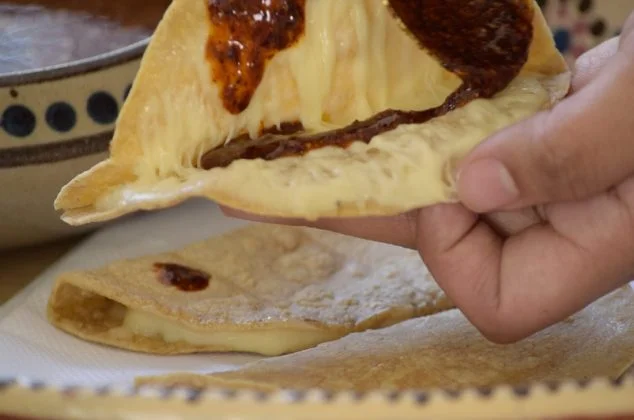
Salsa macha is a Mexican chilli oil blended with toasted garlic, dried chillies, peanuts and sesame seeds. This version brings heat, crunch and savoury depth to tacos, eggs, grilled food and more.
Ingredients
- 50 gchile de árbol
- 1ancho chilli
- 1guajillo chilli
- 10 clovesgarlic
- 300 ml (1¼ cups)olive oil
- 60 ml (¼ cup)sesame seeds
- 60 ml (¼ cup)peanuts
- to tastesalt and pepper
Instructions
- 1
Slice the garlic
Cut the garlic cloves into thin slices.
- 2
Brown the garlic
Heat 120 ml (½ cup) of the oil in a saucepan and gently brown the garlic, taking care not to burn it. Remove it from the pan and set it aside.
- 3
Toast the larger chillies
In the same oil, brown the ancho and guajillo chillies without letting them burn. Remove them and set them aside.
- 4
Fry the árbol chillies
Add a little more oil to the pan and fry the chile de árbol until the chillies puff up and turn golden, without burning. Remove them and set them aside.
- 5
Cool the ingredients
Leave the oil in the saucepan, the garlic and the chillies to cool.
- 6
Blend the salsa
Put all the ingredients in a blender and add the remaining oil. Season with salt and blend.
- 7
Serve the salsa
Serve with the dishes of your choice.
What is salsa macha?
Salsa macha is a Mexican chilli oil, commonly associated with Veracruz, made by frying dried chillies and other flavourings in oil. It can be smooth or chunky, depending on how it is blended.
Here, chile de árbol provides heat, while ancho and guajillo bring a deeper chilli flavour. Peanuts, sesame and garlic make this version savoury and rich.
Nutrition and macros by portion
The nutrition label shows one serving as written: 200 calories, 0g protein, 0g carbs, 0g fat.
| Portion | Adjustment | kcal | Protein | Carbs | Fat |
|---|---|---|---|---|---|
| Lighter | Use less salsa | 140 kcal | 0g | 0g | 0g |
| This serving | As written | 200 kcal | 0g | 0g | 0g |
| Hungry | Serve a larger spoonful | 300 kcal | 0g | 0g | 0g |
Most of the energy and fat come from the olive oil, with additional fat and some protein from the peanuts and sesame; the dried chillies and garlic contribute relatively little carbohydrate. Use a small spoonful to season a meal, and pair it with beans or another protein-rich dish plus vegetables.
Choosing the chillies
Chile de árbol: these small dried chillies give the salsa its heat. Leave them whole for frying as directed.
Ancho and guajillo: these larger dried chillies add depth alongside the hotter árbol chillies. Brown them briefly, watching closely so they do not scorch.
Frying without burning
Garlic first: thin slices brown quickly, so keep them moving and take them out as soon as they are golden. Burnt garlic can make the oil taste bitter.
Chillies next: use the same oil for the ancho and guajillo, then add a little more oil for the chile de árbol. Keep a close eye on the pan throughout.
Getting the texture right
Cool before blending: let the oil, garlic and chillies cool as the method specifies before adding them to the blender. This helps avoid blending hot oil.
Blend to taste: stop when the salsa reaches the consistency you prefer. A shorter blend leaves more texture from the peanuts and sesame.
How to serve it
At the table: spoon a little over tacos, eggs, beans or grilled vegetables, or offer it alongside grilled meat and fish. Its concentrated chilli flavour means a small amount can season a whole plate.
For dipping: serve it with warm tortillas or crusty bread so the chilli oil can be scooped up.
Timing and preparation
The recipe takes about 20 minutes in total, with the frying done in stages. Measure out the ingredients and have a heatproof plate ready for the garlic and chillies before you start.
The cooling stage is part of the method, so allow enough time for the ingredients and oil to cool before blending.
Recipe notes & tips
- Keep the garlic slices similar in thickness so they brown evenly.
- Remove each ingredient from the pan as soon as it is golden or puffed.
- Use a little more oil for the árbol chillies if the pan looks dry.
- Let the ingredients cool before putting them in the blender.
- Taste the blended salsa before adding more salt or pepper.
- Start with a small spoonful when serving, then add more to taste.
Variations
- Coarser texture: blend briefly so more pieces of peanut and sesame remain.
- Milder heat: use less chile de árbol while keeping the other ingredients.
- Extra sesame: add more sesame seeds for a stronger toasted flavour.
- Nut-free option: leave out the peanuts and use extra sesame seeds.
- More garlic: add extra garlic only if you are happy to adjust the recipe's balance.
Common mistakes to avoid
- Burnt garlic: brown the thin slices gently and remove them promptly.
- Scorched chillies: watch the pan closely and take each chilli out once browned.
- Blending while hot: let the oil and fried ingredients cool first.
- Over-blending: stop when the salsa reaches your preferred texture.
- Adding too much at once: taste as you season with salt and pepper.
How to store
Transfer the salsa to a clean, airtight container and refrigerate promptly. Because it contains cooked garlic in oil, keep it chilled and use within 4 days; do not store it at room temperature.
Frequently asked questions
How hot is this salsa macha?
The chile de árbol gives it a noticeable kick, balanced by the milder ancho and guajillo. Add a small amount to your food first and adjust to taste.
Can I make it less spicy?
Yes. Reduce the amount of chile de árbol while keeping the ancho and guajillo for flavour.
Should the salsa be smooth or chunky?
Either works. Blend briefly for a more textured salsa or for longer if you prefer it smoother.
What can I serve salsa macha with?
Try it with tacos, eggs, beans, grilled vegetables, meat or fish. It also works as a dipping sauce with warm tortillas.
Can I use a different oil?
Olive oil is specified here. If substituting, choose an oil suitable for the gentle frying used in this recipe, and expect the flavour to change.
Cook it from the original
This recipe comes from cocinavital.mx. Their page has the author’s own photos, notes and tips — the best place to cook it from.
Open the recipe on cocinavital.mx