
Garlic Butter Parmesan Rolls
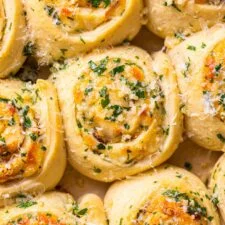
These soft, savoury rolls are layered with roasted garlic, parsley, butter and mozzarella, then finished with a garlicky Parmesan topping. They take time to rise, but make a generous centrepiece for dinner or a special side for soup.
Ingredients
- 120 mlwhole milk, lightly warmed
- 25 ggranulated sugar
- 7 g (1 envelope; 2¼ teaspoons)active dry yeast or instant yeast
- 57 g (4 tablespoons)unsalted butter, melted and lightly cooled
- 1 largeegg, at room temperature
- 1 largeegg yolk, at room temperature
- 250 g (2 cups)plain flour
- 1 teaspoonkosher salt
- 4 headsgarlic, tops cut off to expose the cloves
- 15 ml (1 tablespoon)olive oil
- 57 g (4 tablespoons)unsalted butter, softened to room temperature
- 15 g (¼ cup)chopped parsley
- ½ teaspoonkosher salt and freshly ground black pepper
- 200 g (2 cups)shredded mozzarella, preferably thick-cut
- 28 g (2 tablespoons)butter, melted
- 4 g (1 tablespoon)chopped parsley
- 5 g (1 tablespoon)freshly grated Parmesan, plus more for garnish
- 1–2 teaspoonsminced garlic
Instructions
- 1
Activate the yeast
Warm the milk to about 43°C (110°F). Put it in the bowl of a stand mixer, stir in the sugar and sprinkle the yeast over the top. If using active dry yeast, leave it undisturbed for 7–10 minutes until bubbly and fragrant; with instant yeast, continue straight to the next step.
- 2
Mix the dough
Add the melted butter, egg, egg yolk, flour and salt. Fit the mixer with a dough hook and knead at medium speed for 6–8 minutes, until smooth and coming together. If it sticks to the bowl, add another tablespoon of flour only if needed. To knead by hand instead, work the dough for 10 minutes on a lightly floured surface.
- 3
Let dough rise
Shape the dough into a ball and place it in a lightly greased large bowl. Cover tightly with plastic wrap and a clean tea towel, then leave it somewhere warm for 1–2 hours, or longer, until doubled in size.
- 4
Roast the garlic
While the dough rises, heat the oven to 200°C (400°F). Remove the papery outer layers from the garlic heads and place them, cut-side up, in a small foil-lined baking dish. Drizzle with the olive oil, then cover loosely with foil. Roast for 30–40 minutes, until golden and tender when pressed. Cool until safe to handle, then squeeze or ease the cloves from their skins and set aside.
- 5
Roll the dough
Once risen, punch down the dough and turn it onto a lightly floured work surface. Roll it into a rectangle about 33 × 20 cm (13 × 8 inches).
- 6
Add the filling
Blend the roasted garlic cloves in a food processor or blender until they form a paste. Spread the softened butter over the dough, leaving a small border, then spread on the garlic paste. Scatter over the parsley, salt and pepper, followed by the mozzarella, patting the cheese gently into place.
- 7
Form the log
Starting from a long side, roll the dough into a tight log and place it seam-side down. Carefully stretch the log a little if needed, then pinch the seam closed. Trim the ends if you like.
- 8
Cut the rolls
Use a large sharp knife or unscented floss to cut the log crosswise into 9 pieces.
- 9
Proof the rolls
Line a 23 × 23 cm (9 × 9-inch) baking dish, or a similarly sized dish, with parchment paper. Arrange the rolls inside, cover with plastic wrap and a clean tea towel, and leave in a warm place for another 1–2 hours, until puffy.
- 10
Bake the rolls
Heat the oven to 180°C (350°F). Remove the coverings and bake the rolls for 30–35 minutes, until lightly golden. Prepare the topping while they bake.
- 11
Mix the topping
In a small bowl, stir together the melted butter, parsley, Parmesan and minced garlic until combined. Set aside.
- 12
Brush and serve
As soon as the rolls come out of the oven, brush them with the topping. Add more grated Parmesan if desired and serve warm.
What are garlic butter Parmesan rolls?
These are soft, enriched yeast rolls arranged and sliced much like cinnamon rolls, but filled with savoury ingredients instead of a sweet spiced filling. The cinnamon-roll shape gives each piece layers of dough, cheese and garlic.
This American-style version combines roasted garlic, herbs and mozzarella, with a buttery Parmesan and garlic finish. The slow rise gives the dough time to become light and puffy, while the filling brings richness to every spiral.
Nutrition and macros by portion
The nutrition label shows one serving as written: 340 calories, 13g protein, 37g carbs, 17g fat.
| Portion | Adjustment | kcal | Protein | Carbs | Fat |
|---|---|---|---|---|---|
| Lighter | Smaller roll portion | 238 kcal | 9g | 26g | 12g |
| This serving | As written | 340 kcal | 13g | 37g | 17g |
| Hungry | Add another roll | 510 kcal | 20g | 56g | 26g |
Flour and milk provide most of the carbohydrates, while the mozzarella, egg and flour contribute protein. Butter, mozzarella and olive oil supply much of the fat; serve one roll with a salad or vegetable soup for a more balanced plate.
Why roast the garlic?
Roasted garlic: baking the cut heads with olive oil softens the cloves so they can be squeezed into a spreadable paste. The recipe roasts them for 30–40 minutes, until golden and tender.
Cool first: let the garlic heads cool enough to handle before removing the cloves. A food processor or blender makes a smooth paste that is easy to spread across the dough.
Getting a supple dough
Warm milk: aim for about 43°C (110°F) before adding the yeast. If it feels too hot, let it cool before mixing; active dry yeast should become bubbly after 7–10 minutes.
Kneading: the dough should look smooth after 6–8 minutes in the mixer, or 10 minutes by hand. Add the extra tablespoon of flour only if the dough is sticking to the bowl, so it does not become unnecessarily firm.
Filling and shaping
Spread evenly: leave a small border around the dough when spreading the butter and garlic paste. Distribute the parsley, seasoning and mozzarella evenly so the rolls have filling throughout.
Seal the log: roll from a long side, keep the roll snug and pinch the seam closed. Cutting with unscented floss can help keep the spirals from being squashed.
Proofing and baking cues
First rise: leave the covered dough in a warm place until it has doubled; the stated 1–2 hours is a guide, since room temperature affects the timing. The second rise is ready when the cut rolls look puffy.
In the oven: bake at 180°C (350°F) for 30–35 minutes, until the tops are lightly golden. Brush on the topping straight away so it can coat the warm rolls.
How to serve them
These rich rolls work well alongside tomato soup, a green salad or a roast dinner. Serve them warm, when the cheese is soft and the garlic-herb topping is fragrant.
For a shared table, set the baking dish out while the rolls are still warm and let everyone pull one apart. They can also stand in for bread alongside a pasta meal.
Recipe notes & tips
- Check the milk temperature before adding the yeast so it is warm rather than hot.
- Let active dry yeast stand until bubbly before adding the remaining dough ingredients.
- Use a small border of bare dough around the filling to make the log easier to seal.
- Line the baking dish with parchment to catch any filling that escapes.
- If cutting with a knife, use a large sharp blade and press straight down rather than sawing.
- Brush on the topping as soon as the rolls are baked for the best coverage.
Variations
- Extra herbs: add a little chopped thyme to the filling alongside the parsley.
- Cheese swap: replace some of the mozzarella with another good-melting cheese.
- More Parmesan: mix a little extra grated Parmesan into the filling for a sharper flavour.
- Milder garlic: use fewer cloves in the topping if you prefer a gentler finish.
- Peppery finish: add extra freshly ground black pepper to the filling.
Common mistakes to avoid
- Milk too hot: let it cool to about 43°C (110°F) before adding the yeast.
- Rushing the rise: wait until the dough has doubled and the shaped rolls look puffy.
- Over-flouring: add extra flour only if the dough sticks to the bowl, or it may turn firm.
- Loose seam: pinch the edge closed so the log holds its shape as you cut it.
- Squashed spirals: use a sharp knife or unscented floss and cut cleanly through the log.
- Late topping: brush the mixture on immediately after baking so it coats the warm rolls.
How to store
Once cool, keep the rolls in an airtight container at room temperature for up to 2 days, or refrigerate for up to 4 days. Reheat gently in a 160°C oven until warmed through, or microwave individual rolls briefly; the topping is best when freshly applied.
Frequently asked questions
Can I use instant yeast?
Yes. The recipe allows either active dry or instant yeast. With instant yeast, skip the 7–10 minute blooming wait and proceed to add the other dough ingredients.
Can I knead the dough without a stand mixer?
Yes. Knead it by hand on a lightly floured surface for about 10 minutes, until smooth.
How do I know when the dough has risen enough?
After the first rise, it should have doubled in size. After shaping, leave the rolls until they look puffy; the time varies with the warmth of the room.
Can I prepare the rolls ahead?
The recipe does not specify an overnight method. For best results, follow the stated rises and bake them before serving.
How should I cut the dough without flattening it?
Use a large sharp knife and cut straight down, or use unscented floss looped around the log. Either way, aim for 9 pieces.
Can I freeze the baked rolls?
Yes. Cool them completely, wrap them well and freeze. Thaw before reheating, then add fresh Parmesan if you would like to refresh the finish.
Cook it from the original
This recipe comes from butterbeready.com. Their page has the author’s own photos, notes and tips — the best place to cook it from.
Open the recipe on butterbeready.com