
Pamonha cake: an easy, creamy corn cake
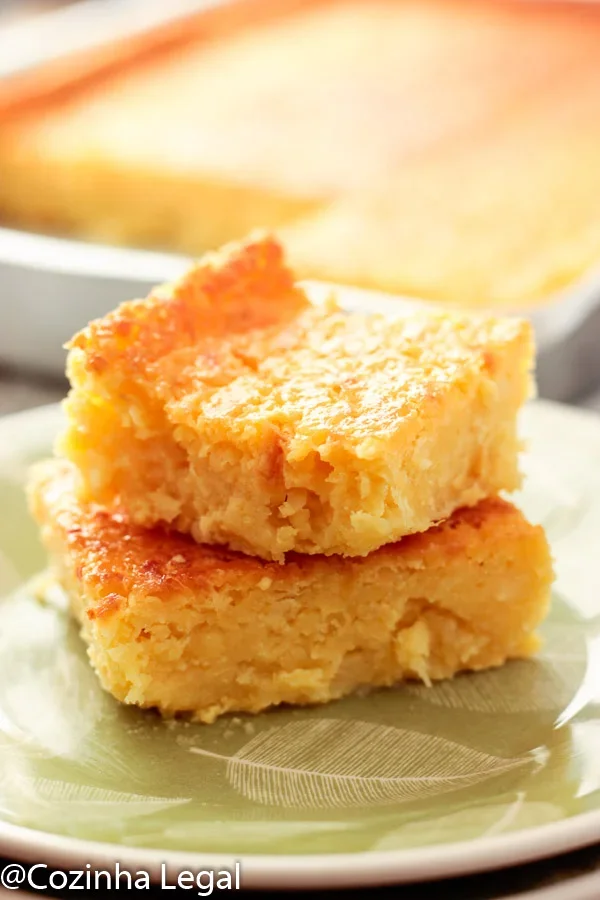
This Brazilian-inspired pamonha cake turns fresh corn, milk and cheese into a soft, creamy bake with a golden top. It is mixed in a blender and makes 15 generous slices, so it suits a family gathering or a make-ahead dessert.
Ingredients
- 6fresh corn cobs
- 720 ml (3 tea cups)milk
- 600 g (3 tea cups)sugar
- 200 ggrated meia cura cheese
- 75 ml (5 tablespoons)plain flour
- 200 gmelted butter
- 15 ml (1 tablespoon)baking powder
- 1 pinchsalt
Instructions
- 1
Prepare the tin
Heat the oven to 180°C. Grease a 25 × 35 cm rectangular baking tin with a little butter and dust it with flour, then set it aside.
- 2
Blend the corn
Strip the kernels from the cobs. Blend the kernels with the milk in two batches.
- 3
Mix the batter
Pour the blended mixture into a large bowl and stir in the remaining ingredients, mixing well after each addition. Add the baking powder last.
- 4
Bake the cake
Pour the batter into the prepared tin and bake for about 1 hour, until the top is well browned. Take it out of the oven and wait until it is cool before serving.
What is pamonha cake?
Pamonha is a traditional Brazilian preparation made with corn, often wrapped in corn husks and cooked. This cake takes the flavours of pamonha and bakes them in a tin instead.
Fresh corn gives the cake its defining flavour, while milk and melted butter make the mixture rich. Meia cura cheese adds a savoury note to balance the sweetness.
Nutrition and macros by portion
The nutrition label shows one serving as written: 120 calories, 0g protein, 0g carbs, 0g fat.
| Portion | Adjustment | kcal | Protein | Carbs | Fat |
|---|---|---|---|---|---|
| Lighter | Smaller slice with fruit | 84 kcal | 0g | 0g | 0g |
| This serving | As written | 120 kcal | 0g | 0g | 0g |
| Hungry | Larger slice | 180 kcal | 0g | 0g | 0g |
The corn and sugar provide most of the carbohydrates, while the butter and cheese contribute much of the fat; the cheese also supplies protein. Balance a slice with fresh fruit or plain yoghurt for a plate with more variety.
Choosing the corn and cheese
Fresh corn: use ripe cobs and cut the kernels off carefully, keeping as close to the cob as you can. The recipe blends the kernels with milk, so there is no need to cook them first.
Meia cura cheese: this semi-cured Brazilian cheese brings saltiness and a distinctive dairy flavour. Grate it finely so it disperses through the batter.
Getting a smooth batter
Two batches: blending the corn and milk in two portions helps the mixture move freely in the blender. Transfer each batch to the same bowl before adding the other ingredients.
Additions: stir well after each ingredient goes in, then add the baking powder last. This keeps the raising agent from sitting in the mixture for too long before baking.
Checking when it is done
Colour: look for a well-browned top after about 1 hour in the oven at 180°C. The top is the visual cue given in the recipe; the centre may remain creamy rather than becoming dry like a sponge cake.
Cooling: let the cake cool completely before serving. This gives the soft interior time to settle and makes it easier to cut into slices.
The tin and the timing
Tin size: a 25 × 35 cm rectangular tin spreads the batter across a broad surface, helping it bake evenly. Grease and flour the tin before pouring in the mixture.
Oven time: the recipe allows approximately 1 hour, but start checking the colour as the end of that time approaches. Avoid opening the oven repeatedly while the cake is baking.
Serving the cake
For a simple dessert, serve the cooled slices as they are or alongside coffee. Their sweet corn and cheese flavours also work well with fresh fruit.
For a fuller plate, add plain yoghurt or a little unsweetened fruit compote. Keep accompaniments modest so they do not overwhelm the cake.
Recipe notes & tips
- Cut the kernels from the cobs over a bowl to catch any loose kernels.
- Blend the corn and milk in two batches as directed, rather than filling the blender all at once.
- Grate the cheese finely so it mixes evenly into the batter.
- Add the baking powder only after the other ingredients have been mixed in.
- Allow the cake to cool fully before cutting to help the creamy slices hold together.
- Use a 25 × 35 cm tin so the batter bakes at the intended depth.
Variations
- Use frozen corn: thaw it fully before blending with the milk.
- Try another cheese: use a firm, savoury cheese if meia cura is unavailable.
- Add cinnamon: dust the cooled cake lightly for a warm-spiced finish.
- Serve with fruit: pair slices with fresh berries or sliced mango.
- Make smaller pieces: cut the cooled cake into bite-sized squares for sharing.
Common mistakes to avoid
- Blending too much at once: work in two batches so the corn and milk can blend properly.
- Leaving large kernels: blend until the corn is broken down and the mixture is evenly combined.
- Adding baking powder early: stir it in last, just before transferring the batter to the tin.
- Baking by the clock alone: use the well-browned top as the recipe's doneness cue, with about 1 hour as a guide.
- Serving it hot: wait until the cake is completely cool so the creamy centre can settle.
- Skipping the tin preparation: grease and flour the rectangular tin before adding the batter.
How to store
Once cool, cover the cake or transfer slices to an airtight container and refrigerate for up to 3 days. Bring a slice to room temperature or warm it gently before serving.
Frequently asked questions
Can I use tinned or frozen corn?
Yes. Drain tinned corn well, or thaw frozen corn before blending it with the milk. Fresh corn is the version specified in the recipe.
What can I use instead of meia cura cheese?
Choose a firm, savoury cheese that can be grated, such as a mild aged cheese. The flavour will differ from the Brazilian meia cura.
How do I know when the cake is ready?
Bake for about 1 hour at 180°C and look for a well-browned top. The recipe does not call for a dry, sponge-like centre.
Does the cake need to cool before serving?
Yes. The method says to serve it only once it is cool, which helps the soft texture settle and makes slicing easier.
Can I make the cake ahead?
Yes. Bake it in advance, let it cool, then cover and refrigerate it. Serve chilled or let slices come closer to room temperature.
Why blend the corn and milk in two batches?
The recipe divides the mixture so it is easier to blend in a standard blender. Combine both batches in the bowl before mixing in the remaining ingredients.
Cook it from the original
This recipe comes from cozinhalegal.com.br. Their page has the author’s own photos, notes and tips — the best place to cook it from.
Open the recipe on cozinhalegal.com.br