
Banoffee Pie with Colombian Arequipe
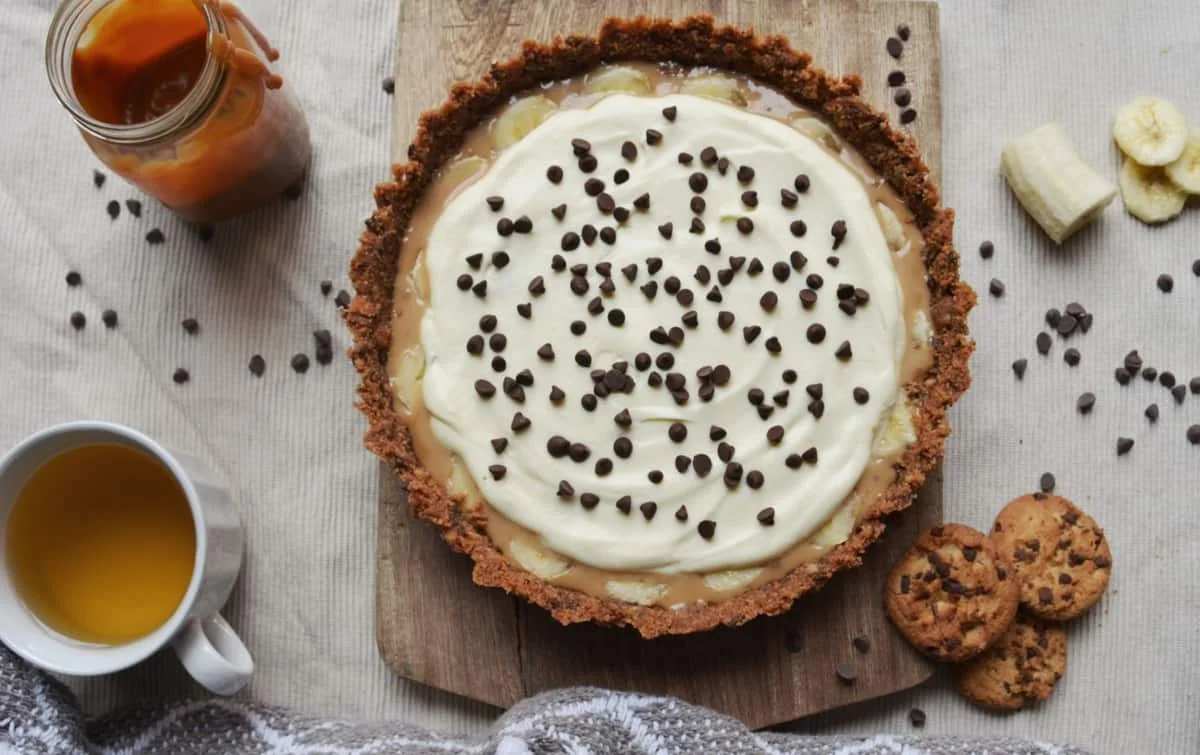
This no-bake banoffee pie layers a chocolate biscuit crust with Colombian arequipe, ripe banana and whipped cream. It is a straightforward make-ahead dessert, with a little chilling time needed to set the base.
Ingredients
- 300 gchocolate chip biscuits
- 100 g, plus extra for greasing the tinunsalted butter
- 200 mldouble cream
- 2 tbspwhite sugar
- 240 g (about 4 large tbsp)arequipe (dulce de leche), shop-bought
- 1 tbsp, if necessarywater
- 2ripe bananas, sliced
- To decoratechocolate chips
Instructions
- 1
Grease the tin
Grease the tin with butter and set it aside.
- 2
Make the crust
Crush the biscuits in a food processor and melt the butter. Mix them together, then press the mixture over the bottom and sides of the tin to form a thick crust. Refrigerate for at least 3 hours or overnight.
- 3
Whip the cream
Whip the cream with the sugar, then keep it in the refrigerator until you are ready to use it.
- 4
Loosen the arequipe
Warm the arequipe in a saucepan for just a few seconds, until it is easier to spread. If necessary, add 1 tablespoon of water. Homemade arequipe may already be runnier, so warming it or adding water might not be needed.
- 5
Assemble the pie
Spread the arequipe over the biscuit base, then add the sliced bananas and whipped cream. Sprinkle with chocolate chips or another topping of your choice. Serve straight away or refrigerate until ready to eat.
What is banoffee pie?
Banoffee pie is a British dessert combining banana and toffee, commonly served with cream on a biscuit or pastry base. This version uses Colombian arequipe, a thick milk caramel also known as dulce de leche, for its toffee layer.
Chocolate chip biscuits bring extra sweetness and a hint of chocolate to the crust. The pie needs no baking, though the base must chill for at least 3 hours to firm up.
Nutrition and macros by portion
The nutrition label shows one serving as written: 500 calories, 6g protein, 63g carbs, 26g fat.
| Portion | Adjustment | kcal | Protein | Carbs | Fat |
|---|---|---|---|---|---|
| Lighter | Smaller slice, less cream | 350 kcal | 4g | 44g | 18g |
| This serving | As written | 500 kcal | 6g | 63g | 26g |
| Hungry | Larger slice | 750 kcal | 9g | 95g | 39g |
The biscuit crust and sugar provide most of the carbohydrates, while butter, cream and arequipe contribute much of the fat; the cream and dairy-based caramel also provide some protein. Serve a slice with fresh berries or another unsweetened fruit for a fresher contrast.
Choosing the base
Biscuit crumbs: Crush the biscuits finely so they press into a compact crust. The recipe uses chocolate chip biscuits, which give the base a sweeter, chocolate-studded finish.
Butter: Mix the melted butter through the crumbs before pressing them into the tin. Press the mixture up the sides as well as across the base to make a sturdy shell.
Getting the arequipe ready
Shop-bought arequipe: A brief warming makes it easier to spread without pulling up the chilled crust. Add the tablespoon of water only if the caramel needs loosening.
Homemade arequipe: It may be more fluid than the shop-bought kind, so check its consistency before warming or adding water. Aim for a texture that can be spread over the base.
Chilling and assembly
Set the crust: Refrigerate it for at least 3 hours, or leave it overnight, before adding the filling. This is the main wait in an otherwise quick recipe.
Layer gently: Spread the arequipe over the firm base, add the banana slices, then spoon or spread the whipped cream on top. Assemble close to serving time if you want the bananas to look their freshest.
Cream and texture
Whip the cream with the sugar until it holds its shape, then keep it chilled until needed. Avoid whipping it so far that it becomes grainy or starts to turn buttery.
The finished pie combines a crisp, buttery base with soft banana, smooth caramel and airy cream. Chocolate chips add a little crunch on top.
Serving ideas
Cut the pie with a sharp knife, wiping the blade between slices for tidier portions. Serve it cold so the crust and layers are easier to handle.
The dessert is rich, so small slices can work well after a meal. Fresh berries alongside are a simple way to add a tart, fresh contrast.
Recipe notes & tips
- Chill the crust for the full 3 hours so it has time to firm up.
- Press the biscuit mixture firmly into the corners and up the sides of the tin.
- Warm shop-bought arequipe only briefly; it should loosen, not become hot.
- Add water to the arequipe only if it is too thick to spread.
- Keep the whipped cream refrigerated until you are ready to assemble the pie.
- Decorate with chocolate chips just before serving for a crisp topping.
Variations
- Use plain biscuits: Swap in plain biscuits if you prefer a less chocolatey crust.
- Add a cocoa finish: Dust the cream with cocoa powder instead of using chocolate chips.
- Try another topping: Finish with grated chocolate or a topping of your choice.
- Use homemade arequipe: Choose homemade caramel and check whether it needs any loosening.
- Add berries: Serve with fresh berries for a tart contrast to the sweet layers.
Common mistakes to avoid
- Crumbly crust: Crush the biscuits finely and mix thoroughly with the melted butter before pressing.
- Soft base: Give the crust at least 3 hours in the refrigerator, or chill it overnight.
- Runny arequipe: Add the water only if needed, since homemade arequipe may already be loose enough.
- Bananas browning: Slice and layer them shortly before serving.
- Overwhipped cream: Stop whipping once the cream holds its shape, before it turns grainy.
How to store
Keep the assembled pie covered in the refrigerator and eat it within 1–2 days; the banana may soften and darken over time. Serve chilled rather than reheating.
Frequently asked questions
Can I make the crust the day before?
Yes. The crust can chill overnight before you add the filling.
Does the pie need to be baked?
No. This recipe is assembled without baking; the biscuit base sets in the refrigerator.
Do I need to add water to the arequipe?
Only if it is too thick to spread. Warm it for a few seconds first and check its consistency.
Can I use homemade arequipe?
Yes. It may be runnier than shop-bought arequipe, so warming it or adding water may not be necessary.
When should I add the bananas?
Add them during assembly, after spreading the arequipe. For the freshest appearance, assemble the pie close to serving time.
Can I use a different topping?
Yes. The recipe allows for chocolate chips or another topping of your choice.
Cook it from the original
This recipe comes from vecinavegetariana.com. Their page has the author’s own photos, notes and tips — the best place to cook it from.
Open the recipe on vecinavegetariana.com