
Easy No Knead Artisan Bread
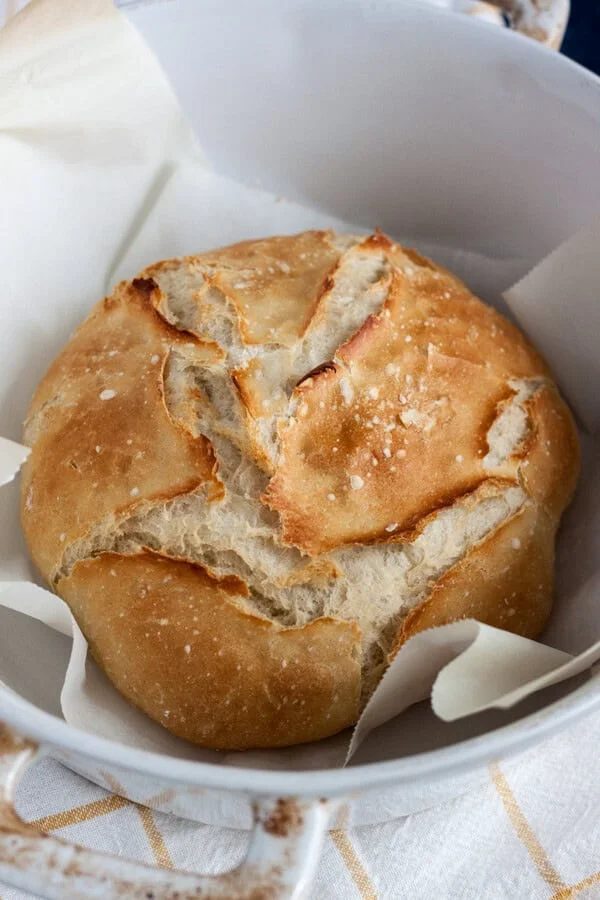
This no-knead loaf uses a soft, sticky dough and a covered casserole to develop a crisp crust with very little hands-on work. It is a straightforward choice when you want a rustic loaf without kneading.
Ingredients
- 275 g (2 cups + 2 tablespoons)plain flour
- 236 ml (1 cup; 38–43°C / 100–110°F)lukewarm water
- 1 teaspoonactive dried yeast
- 1 teaspoonsugar
- 1 teaspoonsalt
- For dustingextra flour
Instructions
- 1
Bloom the yeast
Dissolve the sugar in the lukewarm water, then sprinkle the yeast over the surface. Leave it for 10–15 minutes to bloom.
- 2
Mix the dough
Meanwhile, combine the flour and salt in a mixing bowl. Pour in the yeast mixture and stir with a wooden spoon until combined; the dough should be soft and sticky.
- 3
Shape the dough
Oil a large glass bowl and scrape the dough onto a well-floured board. Oil your hand and shape the dough into a ball.
- 4
Let it rise
Put the dough in the oiled bowl, cover with cling film and leave for about 2 hours, until doubled in size. You can refrigerate it at this stage for further fermentation or continue with baking.
- 5
Bring to room temperature
If the dough has been refrigerated, let it come to room temperature before baking.
- 6
Shape it again
Turn the dough out onto a well-floured board and shape it into a ball. Set it on a large piece of baking parchment and leave to rise for about 1 hour.
- 7
Heat the oven
Preheat the oven and your baking dish to 230°C (450°F). The recipe uses a 5-quart lidded ceramic casserole.
- 8
Transfer the dough
When the oven is ready, carefully remove the casserole and open the lid. Lift the dough, still on the parchment, into the casserole, replace the lid and return it to the oven.
- 9
Bake the loaf
Bake for 25–30 minutes, removing the lid for the final 5–10 minutes to brown the crust.
- 10
Cool before serving
Take the casserole out of the oven and let it cool on a wire rack before removing the bread.
What is no-knead artisan bread?
This is a rustic, American-style home loaf made from a simple flour-and-water dough that is stirred rather than kneaded. The long rise gives the yeast time to work while the cook does very little hands-on shaping.
Covered baking in a hot casserole helps the loaf bake in a humid environment, then the lid comes off to brown the crust. That combination is what makes this method practical for an oven-baked loaf with a bakery-style finish.
Nutrition and macros by portion
The nutrition label shows one serving as written: 235 calories, 0g protein, 0g carbs, 0g fat.
| Portion | Adjustment | kcal | Protein | Carbs | Fat |
|---|---|---|---|---|---|
| Lighter | Serve a smaller slice | 165 kcal | 0g | 0g | 0g |
| This serving | As written | 235 kcal | 0g | 0g | 0g |
| Hungry | Serve a larger slice | 353 kcal | 0g | 0g | 0g |
Most of the carbohydrates in a serving come from the flour, while the small amount of fat comes from the flour and any oil used to coat the bowl. The recipe lists protein as 0 g per serving, though flour naturally contributes some protein. Pair a slice with eggs, beans or cheese and vegetables for a more balanced plate.
Choosing the ingredients
Flour: Plain flour keeps the ingredient list simple and gives the dough its structure. Measure the stated 275 g for a consistent dough.
Water and yeast: Lukewarm water helps the active dried yeast bloom; it should be warm, not hot. The short bloom also gives you a chance to check that the yeast is foaming.
Salt and sugar: Salt seasons the loaf, while the small amount of sugar is dissolved in the water before the yeast is added.
Handling sticky dough
First shape: The dough is meant to be soft and sticky, so flour the board and oil your hand rather than trying to make it dry. Use a scraper or spoon to transfer it from the bowl.
Second shape: After the first rise, flour the board again and form a ball for the parchment-lined second rise. Keep the dough handling brief and gentle.
Reading the rises
First rise: Allow about 2 hours and look for the dough to double in size. The recipe also allows refrigeration at this point for further fermentation.
Second rise: After shaping, leave the loaf on parchment for about 1 hour. If it was chilled, bring it to room temperature before proceeding with baking.
Using a covered casserole
Preheat the oven and the lidded baking dish to 230°C (450°F), as directed. The recipe specifies a 5-quart ceramic casserole with a lid.
Transfer the dough on its parchment and handle the hot dish and lid carefully. Keep the casserole covered for most of the bake, then uncover it for the final 5–10 minutes so the crust can brown.
When the loaf is done
Crust: The recipe uses the final uncovered minutes to develop colour; check that the loaf has browned before taking it out. If it needs more colour, use the longer end of the stated 5–10-minute window.
Cooling: Let the casserole and loaf cool on a wire rack before removing the bread. Cooling first makes the loaf easier to handle and serve.
Serving the bread
This loaf works alongside soup, salad or a meal with a sauce to mop up. It is also easy to slice and serve with butter, cheese or a savoury spread.
For a more balanced plate, pair a slice with a protein-rich topping and vegetables rather than serving bread on its own.
Recipe notes & tips
- Use the metric flour amount for reliable measuring.
- Keep the water lukewarm rather than hot when blooming the yeast.
- Dust the board well and oil your hand to manage the sticky dough.
- Check that the dough has doubled before shaping it for the second rise.
- Use oven gloves when handling the preheated casserole and its lid.
- Let the loaf cool on a wire rack before taking it out of the casserole.
Variations
- Herb loaf: Mix dried herbs into the flour and salt before adding the yeast mixture.
- Seeded crust: Sprinkle seeds over the shaped dough before its second rise.
- Garlic bread: Serve slices with garlic butter after the loaf has cooled.
- Cheese topping: Add sliced cheese when serving for a savoury snack.
- Wholemeal blend: Replace part of the plain flour with wholemeal flour, keeping in mind that the dough texture may change.
Common mistakes to avoid
- Water too hot: It can hinder the yeast; use lukewarm water within the stated range.
- Skipping the yeast bloom: Give it the full 10–15 minutes before mixing.
- Adding too much flour: The dough should remain soft and sticky, so use extra flour mainly for dusting and shaping.
- Short first rise: Wait until the dough has doubled rather than relying only on the clock.
- Handling the hot casserole carelessly: Use oven gloves and open the lid with care.
- Removing the loaf too soon: Cool the bread on a wire rack before taking it from the casserole.
How to store
Once completely cool, store the loaf in a bread bag or wrapped at room temperature and use within a few days. Reheat slices briefly in a toaster or warm oven; the crust is best soon after baking.
Frequently asked questions
Can I make the dough ahead?
Yes. After the first rise, the method allows you to refrigerate the dough for further fermentation. Bring it to room temperature before continuing.
How warm should the water be?
Use lukewarm water at 38–43°C (100–110°F), as stated in the recipe.
Why is the dough sticky?
A soft, sticky dough is expected for this recipe. Flour the board and oil your hand to make shaping easier.
Do I need a ceramic casserole?
The method uses a 5-quart ceramic casserole with a lid. If using different bakeware, make sure it is suitable for the stated oven temperature and can be safely preheated.
When should I remove the lid?
Bake covered for most of the 25–30 minutes, then remove the lid for the final 5–10 minutes to brown the crust.
How long does the dough rise?
The first rise takes about 2 hours, until doubled, followed by a second rise of about 1 hour after shaping.
Cook it from the original
This recipe comes from wildwildwhisk.com. Their page has the author’s own photos, notes and tips — the best place to cook it from.
Open the recipe on wildwildwhisk.com