
No-knead Dutch Oven Bread
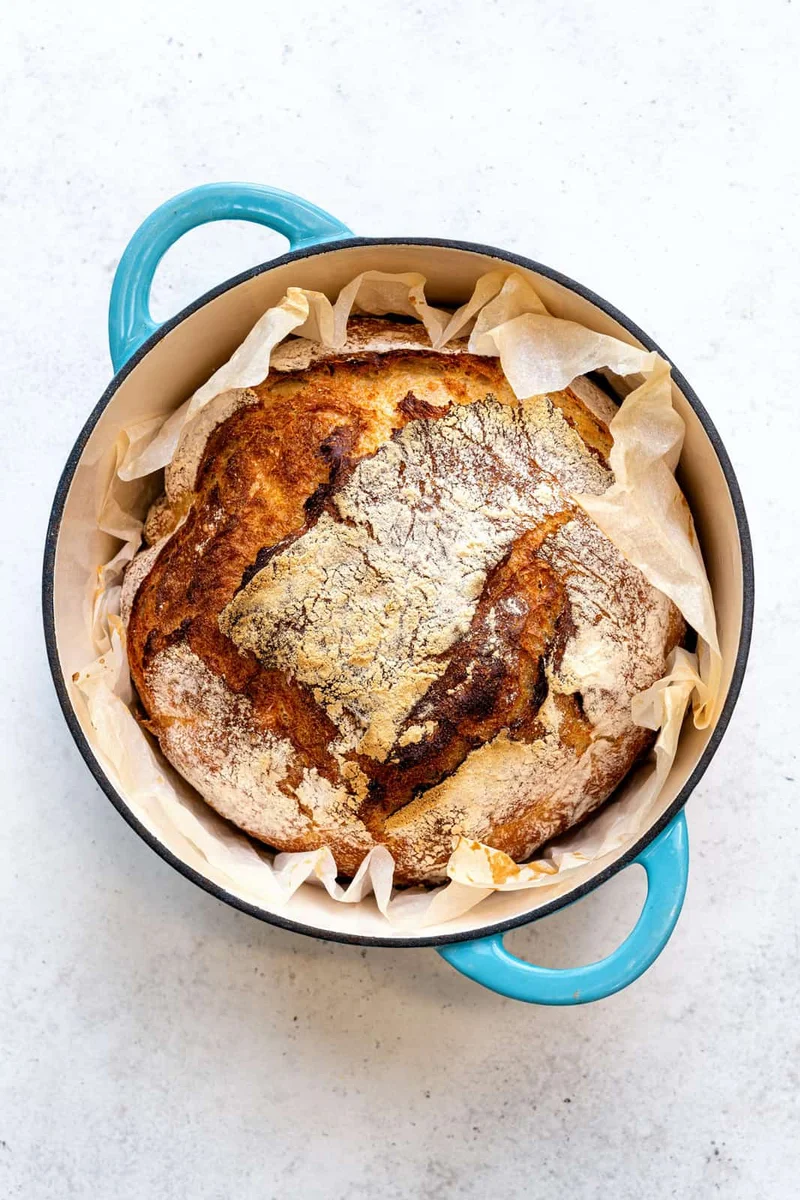
This no-knead loaf uses a sticky yeast dough and a preheated Dutch oven to make a crisp-crusted, chewy homemade bread. It is a good choice when you want an impressive-looking loaf without kneading by hand.
Ingredients
- 570 g (4 1/2 cups), plus extra for dusting and the worktopwhite bread flour or plain flour
- 2 tspinstant yeast (rapid-rise yeast)
- 500 ml (2 cups)lukewarm water
- 1 tbsprunny honey or sugar
- 1/2 tbspsea salt or kosher salt
- as neededolive oil, for greasing
Instructions
- 1
Mix flour and yeast
Combine the flour and instant yeast in a large bowl.
- 2
Make the dough
Add the water and honey, then stir with a wooden spoon or dough whisk until you have a shaggy, very sticky dough. Add the salt and mix until distributed.
- 3
Leave to rise
Transfer the dough to a bowl or Pyrex dish greased with a little olive oil. Cover with a damp tea towel and leave for 1 1/2–2 hours, or until almost doubled in size.
- 4
Prepare the loaf
Dust the worktop with flour and turn out the dough. Sprinkle it with a little flour; it will be sticky, as it should be. Line a bowl or banneton basket with baking paper and dust with flour.
- 5
Shape the dough
Use a pastry scraper to fold the edges of the dough towards the centre, forming a round loaf.
- 6
Start the second rise
Cup the loaf carefully in your hands and transfer it to the prepared bowl, seam side down. Loosely cover with a plastic bag.
- 7
Heat the Dutch oven
Preheat the oven to 220°C (420°F), with a Dutch oven on a low shelf, for 30 minutes while the bread has its second rise.
- 8
Score the loaf
Score the top with a sharp knife or lame. Carefully remove the very hot pot from the oven, using oven mitts or pot holders.
- 9
Bake covered
Lift the bread from the bowl by its baking paper and lower it into the pot. Cover and bake for 30 minutes.
- 10
Finish and cool
Remove the lid and bake for 10 more minutes. Take the bread out of the Dutch oven and bake it directly on the oven shelf for 5 minutes for an extra-crisp crust. Cool on a wire rack for 30 minutes before slicing.
What is Dutch oven bread?
Dutch oven bread is a loaf baked in a heavy, lidded pot that is preheated in the oven. The pot traps moisture around the dough during the first part of baking, helping the crust form while the loaf expands.
This version uses a simple no-knead dough and a round shape. Its appeal is the contrast between a crisp crust and a soft, chewy centre, without the usual hands-on kneading.
Nutrition and macros by portion
The nutrition label shows one serving as written: 2260 calories, 68g protein, 475g carbs, 8g fat.
| Portion | Adjustment | kcal | Protein | Carbs | Fat |
|---|---|---|---|---|---|
| Lighter | Serve a smaller slice | 1582 kcal | 48g | 333g | 6g |
| This serving | As written | 2260 kcal | 68g | 475g | 8g |
| Hungry | Larger bread portion | 3390 kcal | 102g | 713g | 12g |
Most of the carbohydrate comes from the flour, while the flour also supplies much of the protein. The small amount of olive oil contributes fat; pair a slice with a protein-rich topping and vegetables to balance the plate.
Choosing the flour and yeast
Flour: Bread flour gives the loaf a chewier structure, while plain flour is also offered as an option. Either way, keep some extra flour nearby for dusting the worktop and shaping.
Yeast: Instant yeast is mixed directly with the flour here. The recipe specifies instant or rapid-rise yeast, so follow the note from the original source if substituting active dry yeast.
Why the dough is sticky
Hydration: The dough is deliberately very sticky after the water is added. Resist the urge to keep adding flour to make it easy to handle; the recipe relies on folding and a light dusting during shaping.
Handling: A pastry scraper helps lift and fold the dough with less sticking. Work gently so you can form a round loaf without trying to knead it smooth.
Shaping and the second rise
Folding: Bring the edges towards the centre to create the loaf's round shape. Set it seam side down in the prepared bowl so it is ready to be turned out into the pot.
Timing: The first rise takes 1 1/2–2 hours, until the dough is almost doubled. The recipe pairs the second rise with the Dutch oven's 30-minute preheat.
The hot-pot bake
Preheating: Put the Dutch oven in the oven for the full 30 minutes specified. Use oven mitts or pot holders when handling it, as the pot will be very hot.
Lid and finish: Bake covered for 30 minutes, then uncovered for 10 minutes. The final 5 minutes directly on the oven shelf are intended to make the crust extra crisp.
How to tell when it is ready
Crust: Look for a deeply browned, crisp-looking exterior after the uncovered baking and final time on the oven shelf. The loaf should be handled carefully when removing it from the pot.
Cooling: Let the bread rest on a wire rack for 30 minutes before slicing. This gives the loaf time to settle and makes it easier to cut cleanly.
Serving the loaf
For a simple snack, serve slices with butter or olive oil. The bread also works alongside soup, salads or a meal with a sauce to mop up.
If serving it with a meal, pair the bread with a source of protein and vegetables for a more balanced plate.
Recipe notes & tips
- Measure the water and flour carefully so the dough has the intended sticky consistency.
- Dust the worktop and baking paper lightly rather than working lots of extra flour into the dough.
- Use a pastry scraper to fold and lift the sticky dough more easily.
- Preheat the Dutch oven for the full 30 minutes before baking.
- Handle the pot with oven mitts or pot holders at every stage.
- Wait for the full 30-minute cooling period before slicing.
Variations
- Use bread flour: Choose it instead of plain flour for a chewier loaf.
- Use sugar: Swap the honey for sugar as the recipe allows.
- Add seeds: Sprinkle seeds over the loaf before baking for a seeded crust.
- Serve with soup: Pair slices with soup for a simple meal.
- Make toast: Use cooled slices for toast the next day.
Common mistakes to avoid
- Adding too much flour: The dough is meant to be very sticky, so use only a light dusting for handling.
- Skipping the pot preheat: Heat the Dutch oven for the specified 30 minutes before adding the loaf.
- Handling the pot bare-handed: It will be very hot; use oven mitts or pot holders.
- Cutting too soon: Let the loaf cool on a wire rack for 30 minutes before slicing.
- Forgetting the uncovered bake: Remove the lid after 30 minutes and bake for 10 more minutes before the final shelf bake.
How to store
Once fully cool, store the loaf in a bread bag or wrapped at room temperature and use within a few days. Refresh slices by toasting them; the original method does not specify a reheating time for the whole loaf.
Frequently asked questions
Can I use plain flour instead of bread flour?
Yes. The ingredient list gives white bread flour or plain flour as options; bread flour is likely to give a chewier texture.
Can I use active dry yeast?
The recipe calls for instant yeast and refers to notes for using active dry yeast. Check the original recipe's notes for that substitution.
How sticky should the dough be?
It should be shaggy and very sticky after mixing. Use a little flour on the worktop and dough for shaping rather than trying to make the dough dry.
Do I need a banneton basket?
No. The method allows a bowl lined with baking paper as an alternative.
Why is the Dutch oven preheated?
The method heats the pot for 30 minutes before baking and uses it covered for the first 30 minutes of the bake. Take care when handling the hot pot.
When can I slice the bread?
Cool it on a wire rack for 30 minutes before slicing, as directed in the method.
Cook it from the original
This recipe comes from supergoldenbakes.com. Their page has the author’s own photos, notes and tips — the best place to cook it from.
Open the recipe on supergoldenbakes.com