
Life-Changing Gluten-Free Quinoa Flour Roti (Chapati) – Flatbread/Wraps/Tortillas
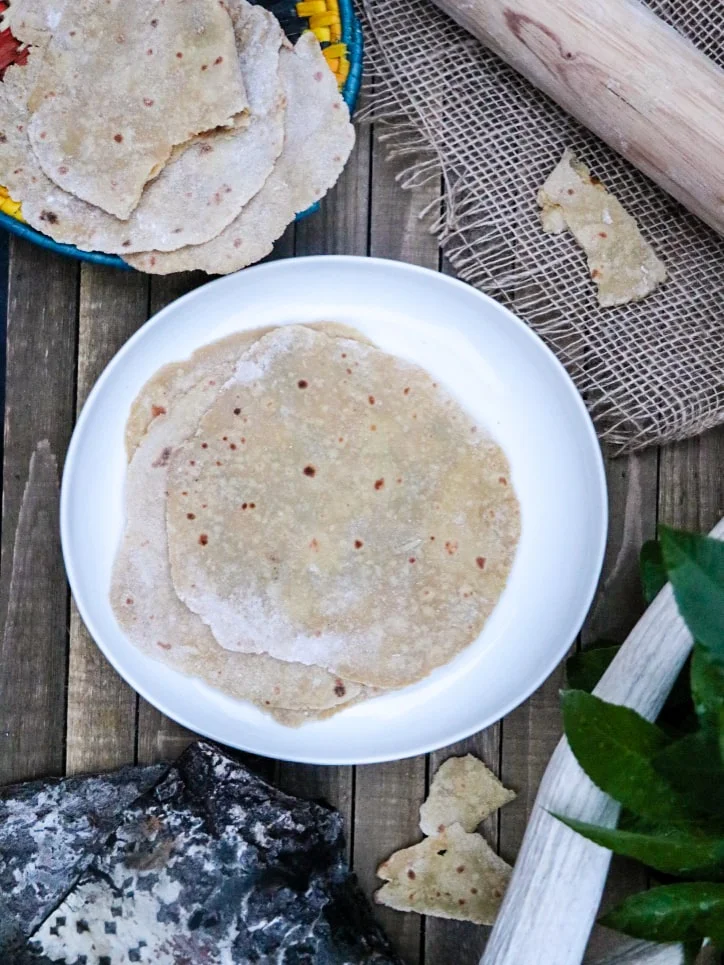
These soft, gluten-free quinoa flour rotis can stand in for chapatis, tortillas or wraps. The dough needs little kneading, and the rotis cook quickly on a hot pan once the flour has been prepared.
Ingredients
- 120 g (1 cup)good-quality quinoa flour
- 120 ml (1/2 cup) or morewarm water
- 7.5 ml (1/2 tbsp)olive oil
- 0.6 g (1/8 tsp), optionalsalt
- to tasteghee or butter, for brushing
- to tasterice flour or another gluten-free flour, for dusting the work surface
Instructions
- 1
Prepare the flour
In advance, spread about 227 g (1/2 lb) quinoa flour evenly on parchment paper on a large baking sheet. Bake at 102°C (215°F) for 3–4 hours to remove bitterness from the flour.
- 2
Mix the dough
In a medium bowl, combine the cup of flour, oil and salt, if using. Add the warm water a little at a time, mixing with your hands and allowing each addition to absorb before adding more. Mix and knead until a soft, elastic dough forms; it does not need extensive kneading. Cover and rest for 20–30 minutes, or up to an hour.
- 3
Heat the pan
Heat a tava, griddle or non-stick skillet, preferably cast iron, over medium to medium-high heat, adjusting for your stove. You may need to lower the heat once you begin cooking the rotis.
- 4
Shape the rotis
Dust the work surface with your chosen gluten-free flour. Form the dough into small balls, a little larger than golf balls, and dust both sides. Roll each into a round about 15 cm (6 inches) in diameter, taking care not to press too hard. Turn the dough with a spatula and add flour as needed.
- 5
Cook and serve
Carefully lift a rolled roti with a large spatula and place it on the skillet. Cook for about 30 seconds, or until the underside sets, then flip and spread with a little oil or butter. Cook for 15–20 seconds, flip again and add more oil or butter if desired. With practice, the third flip may make the roti puff; flip a couple more times, pressing gently, until fully cooked. Wipe excess flour from the pan with a slightly damp tissue. On a gas stove, you can try placing the roti over direct heat to puff it. Serve immediately.
What are quinoa flour rotis?
Roti, also called chapati, is a flatbread associated with Indian cooking. This version replaces the usual wheat flour with quinoa flour, making it a gluten-free option for serving alongside a meal or using as a wrap.
The method begins by baking the flour at a low temperature for several hours to address its bitterness. A simple, soft dough and careful pan cooking help make the flatbreads pliable.
Nutrition and macros by portion
The nutrition label shows one serving as written: 166 calories, 5g protein, 24g carbs, 4g fat.
| Portion | Adjustment | kcal | Protein | Carbs | Fat |
|---|---|---|---|---|---|
| Lighter | Use less brushing fat | 116 kcal | 4g | 17g | 3g |
| This serving | As written | 166 kcal | 5g | 24g | 4g |
| Hungry | Serve an extra roti | 249 kcal | 8g | 36g | 6g |
Quinoa flour provides most of the carbohydrates and some of the protein, while the olive oil and any ghee or butter used for brushing contribute fat. Pair a roti with vegetables and a protein-rich accompaniment to make a more rounded plate.
Preparing the quinoa flour
Low, slow baking: spread the flour in an even layer on parchment, as the recipe directs, and give it the full 3–4 hours. The flour needs to be prepared in advance, so account for that long stage when planning the 260-minute total time.
Getting the dough right
Water: add it gradually rather than pouring it in all at once, since the amount needed varies with the flour. Let each addition absorb before deciding whether the dough needs more.
Texture: aim for a soft, elastic dough. The method calls for only a short knead, so stop once the dough comes together and give it the covered rest.
Rolling without tearing
Gentle pressure: roll each ball into a circle about 15 cm (6 inches) across without pressing too firmly. Dust both sides and the work surface as needed to help the dough release.
Even rounds: turning the dough with a spatula while rolling helps distribute the flour and makes it easier to keep the circles round.
Cooking and checking doneness
First side: cook for about 30 seconds, until the bottom has set enough to turn. If the pan is browning the roti too quickly, lower the heat as the recipe suggests.
Final flips: brush with oil or butter after turning, then flip again after 15–20 seconds. A roti may puff on the third flip, but the recipe also allows for a few more gentle flips until it is cooked through.
Serving ideas
Fresh from the pan: serve the rotis immediately, while they are warm and flexible. They work as a side for an Indian-style meal or as a base for fillings.
For a balanced plate: pair a roti with a protein-rich dish and vegetables. If using it as a wrap, choose a filling that is not overly wet so the bread is easier to handle.
Recipe notes & tips
- Prepare the quinoa flour well in advance, since its baking stage takes several hours.
- Add warm water in small amounts because different flour may absorb different quantities.
- Cover the dough during its 20–30-minute rest, or rest it for up to an hour.
- Use only light pressure when rolling to reduce the chance of tearing the dough.
- Adjust the heat if the rotis begin cooking too quickly.
- Wipe excess flour from the pan with a slightly damp tissue between rotis.
Variations
- Brush with ghee: use ghee instead of butter or oil for brushing.
- Use another dusting flour: dust the surface with a different gluten-free flour instead of rice flour.
- Skip the salt: leave it out as the recipe allows.
- Make wraps: fill the cooked rotis with your preferred wrap fillings.
- Serve as chapati: offer the rotis warm alongside an Indian-style meal.
Common mistakes to avoid
- Adding water all at once: the dough may become too wet; add it gradually and let each addition absorb.
- Overworking the dough: extensive kneading is unnecessary; stop when it is soft and elastic.
- Pressing too firmly: this can make shaping difficult; use a light touch as you roll.
- Cooking over excessive heat: the roti may brown too fast; lower the heat if needed.
- Leaving loose flour on the pan: it can build up while cooking; wipe it away with a slightly damp tissue.
How to store
These rotis are best served immediately. If you have leftovers, cool them, store them in an airtight container in the fridge and reheat briefly in a skillet until warm.
Frequently asked questions
Why does the quinoa flour need to be baked first?
The recipe uses a low oven temperature for 3–4 hours to remove bitterness from the flour. This is an advance preparation step.
How much water should I use?
Start with 120 ml (1/2 cup) and add more gradually if needed. The recipe notes that the amount varies depending on the flour.
Can I skip the salt?
Yes. Salt is optional in this recipe.
What can I use to dust the work surface?
Rice flour or another gluten-free flour is suggested. Use enough to help prevent sticking while rolling.
Why aren't my rotis puffing up?
Puffing can take practice and is not guaranteed on every roti. Follow the flipping and gentle pressing method; if you have a gas stove, the recipe suggests trying direct heat to encourage puffing.
Can I make the dough ahead?
The method says to cover and rest the dough for 20–30 minutes, or up to an hour. It does not give instructions for storing the dough longer.
Cook it from the original
This recipe comes from teaforturmeric.com. Their page has the author’s own photos, notes and tips — the best place to cook it from.
Open the recipe on teaforturmeric.com